Installation and initial start-up, Product description – Ivoclar Vivadent S1 User Manual
Page 13
13
4. Installation and Initial Start-Up
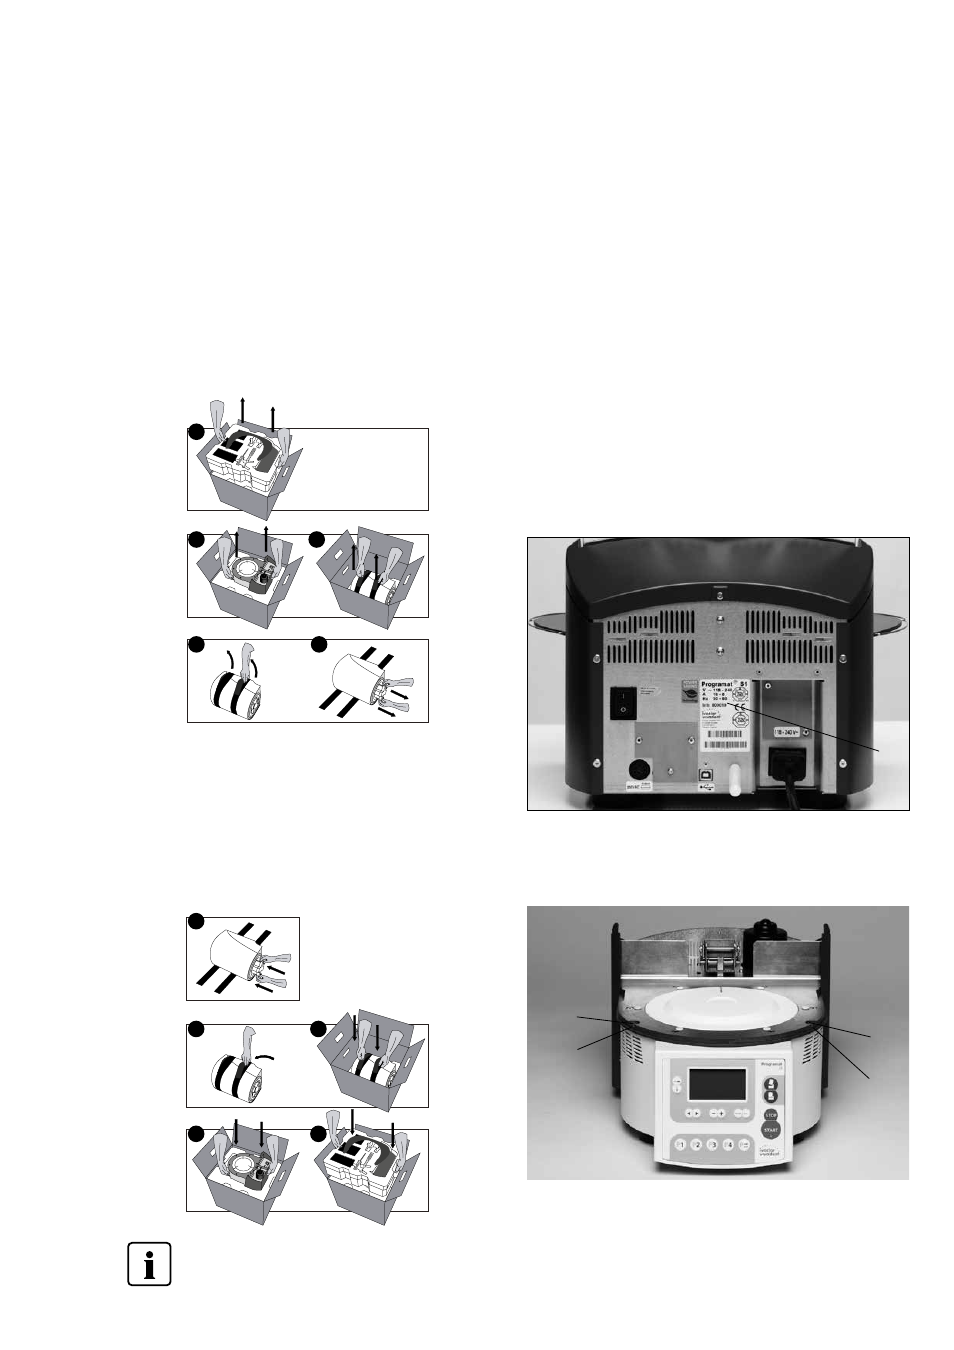
4.1 Unpacking and checking the contents
The packaging provides the following advantages:
– Reusable packaging
– Closing mechanism with integrated transportation grips
– Ideal protection by Styrofoam inserts
– Easy handling / optimum unpacking
– The packaging may be used in several ways (modules)
Remove the furnace components from their packaging and place it
on a suitable table. Please observe the instructions on the outer
packaging.
There are no special transportation grips on the furnace. Support the
bottom of the furnace to carry it.
Check the delivery for completeness (see delivery form in Chapter 9)
and transportation damage. If parts are damaged or missing, contact
your local Ivoclar Vivadent Service Center.
Packing and shipping of individual components
The packaging of the S1 permits simple and safe shipping of individual
components. Simply use the two corresponding inserts. Fold the side
flaps (2) and combine the two packaging parts by means of the
transportation flaps. The packaging may be disposed of with the
regular household refuse.
3. Product Description
4.2 Selecting the location
Place the furnace on a flat table using the rubber feet. Make sure
that the furnace is not placed in the immediate vicinity of heaters or
other sources of heat. Make sure that air may properly circulate
between the wall and the furnace and that there is enough space
for the swivel movement of the furnace head (at least 110 mm).
Therefore, mounting the spacer (45) is absolutely mandatory.
Also ensure that there is enough space between the furnace and the
user, as the furnace releases heat during the opening of the furnace
head.
The furnace should neither be placed nor operated in areas
where there is an explosion hazard.
4.3 Assembly
Make sure the voltage indicated on the rating plate (14) complies
with the local power supply. If this is not the case, the furnace must
not be connected.
We recommend keeping the original packaging for future
service and transportation purposes.
Step 1:
Assembling the cooling tray (26)
Remove both screws (27) including the silicone washer (28).
28
27
28
27
14
1
1
2
4
5
2
3
4
5
3
1
1
2
4
5
2
3
4
5
3