Using your router table fence – Kreg PRS1015 Precision Router Table Fence User Manual
Page 10
Using Your Router Table Fence
Indexing the fence
The 8" tape rule and clamp block lens cursor provide an easy way to
index the fence to a router bit, allowing you to accurately rout a groove in
two passes, rout a large profi le in progressive passes, or perform a two-
step routing task and return the fence to the initial position.
Disconnect the router
from the power source before
making any adjustments or changing
accessories. Read, understand, and
follow your router manufacturer’s
safety warnings and instructions.
Micro-Adjustment
The micro-adjuster will move the fence up to .025" in .005" increments.
Start with the fence locked in position. Slide the adjuster against the
end of the clamp block, turning the dial so the zero mark aligns with the
bottom edge of the clamp block. Tighten the knob. When adjusting the
fence away from the micro-adjuster, release the fence and turn the dial
to the desired increment. The dial pushes the fence to the new position.
Lock the fence. When adjusting the fence toward the micro-adjuster, turn
the dial to the desired increment and tighten the knob. Unlock the fence,
push it against the micro-adjuster, and re-lock the fence.
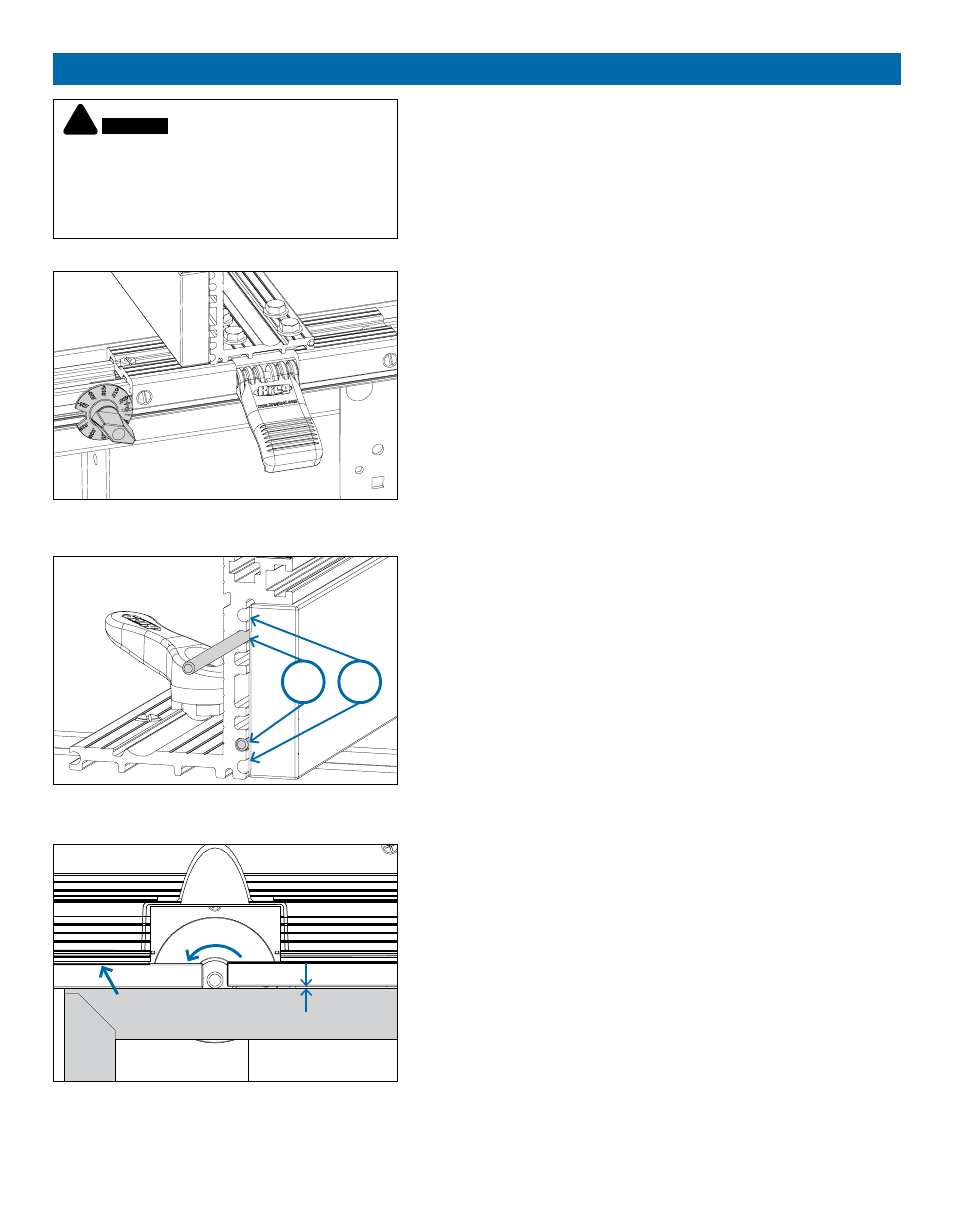
Jointing
Remove the jointing rods (33) stored in the fence extrusion. Loosen the
outfeed fence face knobs. There are two shallow and two deep round
channels in the fence extrusion behind the fence faces. For a
1
⁄
16
" offset,
slide the rods into the shallow recesses. For a
1
⁄
32
" offset, slide the rods
into the deep recesses. With the rods in place, tighten the outfeed fence-
face knobs.
Install a straight bit in the router. Place a steel ruler against the outfeed
fence face and position the fence so the bit just grazes the ruler.
!
WARNING
Bit rotation
Infeed
Outfeed
Jointing
rods inserted
on outfeed side
Jointing
offset
1
⁄
32
"
1
⁄
16
"