Assembly – Kreg PRS1015 Precision Router Table Fence User Manual
Page 6
Assembly
1
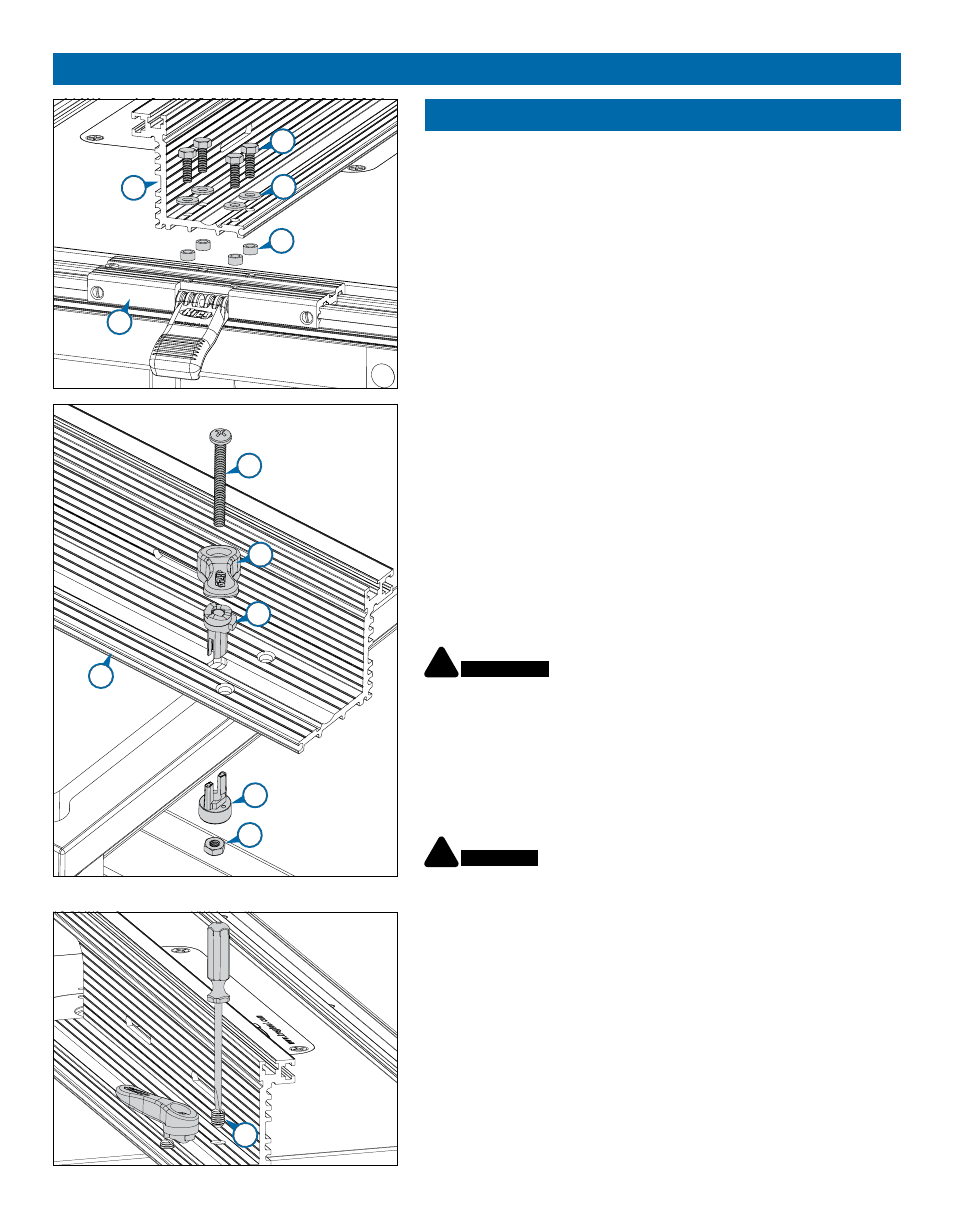
Hardware for this section is in HARDWARE PACK #2.
Place four spacers (13) over the mounting holes in the clamp block
(3). Fasten the extrusion (12) to the clamp block with washers (14) and
machine screws (15). Finger-tighten the screws.
Add the fence extrusion
2
Hardware for this section is in HARDWARE PACK #3.
Slip the machine screw (16) through the fence-lock handle (17) and
fence-lock base (18). Drop the handle/base/machine screw assembly
through the hole in the base fl ange of the fence extrusion (12) and
the keyhole slot in the router table top. The fl at edge of the base stem
faces the back of the fence and the handle points away from the back
of the fence. Slide the fence-lock anchor (19) onto the machine screw
from underneath the table with the anchor “fi ngers” in the table-top slot.
Thread the lock nut (20) onto the machine screw. Make sure the nylon
insert in the lock nut faces down. Lower the fence-lock anchor onto the
lock nut, housing the nut in the tapered hexagonal recess in the anchor.
Use a screw driver to draw the lock nut into the fence-lock anchor. Once
the nut is fully seated in the anchor, it will not drop out.
3
Position the fence-lock handle (17) pointing away from the fence
and angled 45 degrees to the left [viewed from the back of the
fence]. This is the locked position for the handle. To adjust fence-lock
tension, tighten the machine screw with a screw driver until the clamp
is tight enough to hold the fence in place. Rotate the handle ¼-turn
counterclockwise to release the fence.
4
Thread two set screws (21) into the holes fl anking the ¼-turn
handle. You’ll use these screws to square the fence. (See the
section Align and square the fence.)
15
12
14
21
13
3
12
19
18
17
16
!
ATTENTION
When using the fence with a table top thinner than
1
1
⁄
16
", carefully trim the ends of the anchor fi ngers so they don’t bottom
out in the fence-lock base.
20
!
WARNING
Periodically check the fence lock to make sure it has
not loosened with use. Tighten the machine screw (16) as needed.