Assembly – Kreg PRS1015 Precision Router Table Fence User Manual
Page 5
1
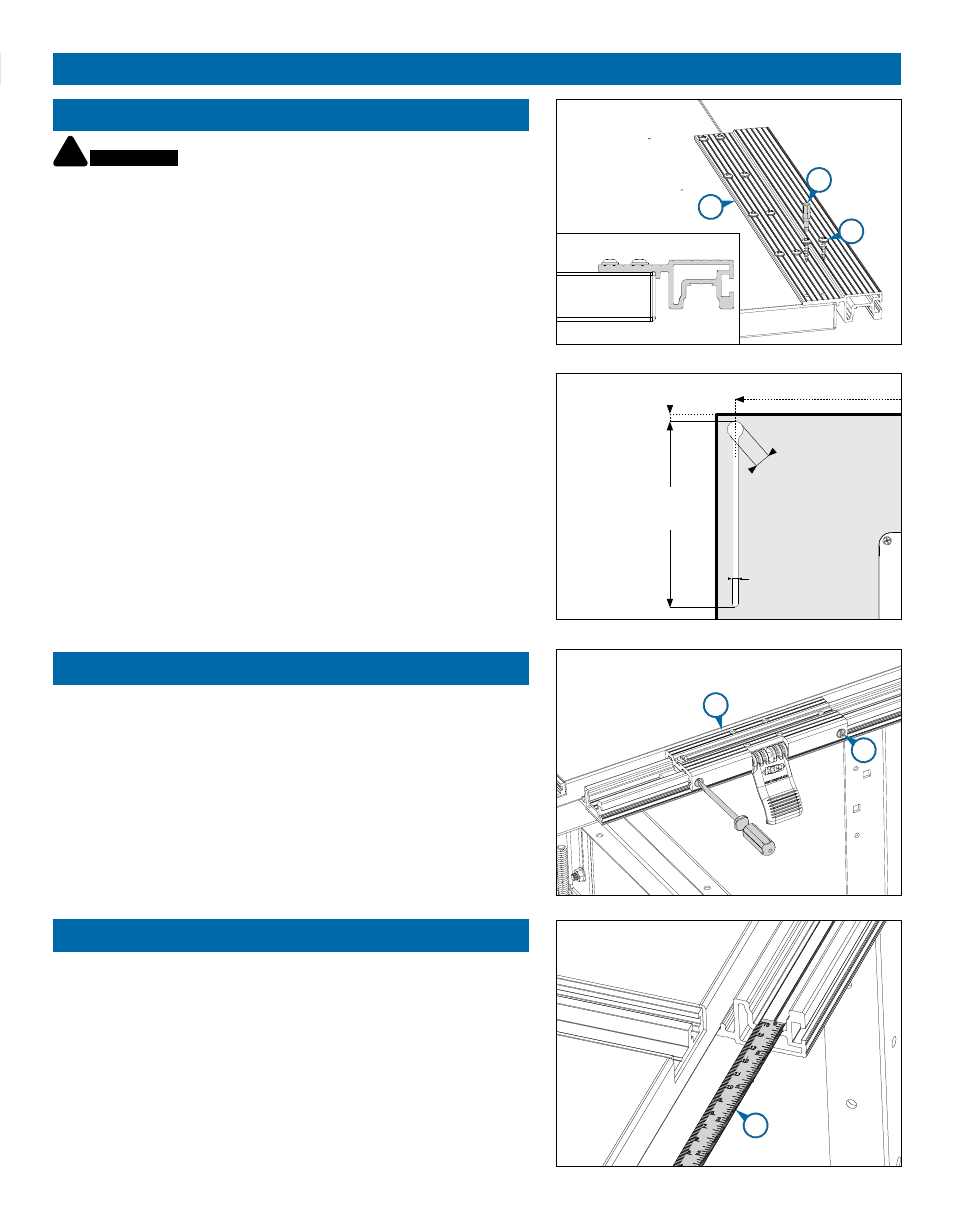
Hardware for this section is in HARDWARE PACK #1.
To mount the fence to the Kreg Precision Router Table PRS1025,
raise the handle (1) to release the clamp-block assembly (Parts 1-7)
from the mounting rail (8). Position the rail on the bottom of the table top
at the right rear corner, aligning the holes in the rail with the holes in the
table top. Fasten the rail with the screws (9).
Attach the mounting rail
2
This router-table fence is designed to be mounted on the Kreg
Precision Router Table Top PRS1025, which is 1
1
⁄
16
" thick. For
thinner tops, insert a 1¼"-wide, 17"-long shim of the appropriate
thickness between the mounting rail (8) and the router table top to
make up the difference. For thicker table tops, create a 1¼"-wide,
17"-long recess to reduce the rail-mounting area to 1
1
⁄
16
" thick. Apply
the shim or rout the recess on the bottom of the router table top at
the rear right corner. Raise the handle (1) to release the clamp-block
assembly (Parts 1-7) from the mounting rail (8). Position the rail on the
bottom of the table top with the rear end of the rail and the rear edge of
the table top fl ush. Using the holes in the rail as guides, drill pilot holes
and fasten the rail to the top with the screws (9).
1
Position the clamp block assembly on the mounting rail. Adjust the
nylon set screws (2) in the front of the clamp block (3) so they just
graze the mounting rail. The clamp block should move easily but not
wobble.
Install the clamp block
2
Slide the 8" scale (11) into the clamp block slot. The rib centered
in the slot bows the scale, providing a friction fi t that keeps it in
position. (See Indexing the fence under the section Using Your Router
Table Fence.)
Assembly
3
For table tops other than the Kreg Precision Router Table Top
PRS1025, drill and rout the keyhole slot for the ¼-turn fence lock.
The length of the slot should allow the face of the fence to be positioned
2½" in front of the center of the router-table insert plate.
3
2
11
See
Step 3
at left
13
⁄
32
"
1
⁄
2
"
1" Diameter
30
3
⁄
4
" To right hand edge
10
8
9
bottom
rear-edge
Installing the clamp block tape
!
ATTENTION
To mount this fence to the Kreg Precision Router
Table PRS1025, see Step 1. To mount the fence to other router tables,
see Steps 2 and 3.