Kreg PRS1015 Precision Router Table Fence User Manual
Page 9
Assembly
2
Industry standards allow a slight amount of end-to-end twist in
aluminum extrusions. To eliminate any twist, secure the fence with
the clamp block and ¼-turn fence lock. Place a square against the fence
face at the left end of the fence. Use the set screws (21) fl anking the
¼-turn handle to align the fence face with the square.
2
Slide the head of the T-slot bolt into the mounting rail slot from
the front end and tighten the knob. The micro-adjuster can be
stored at the front of the mounting rail without interfering with router-
table operation. (See Micro-Adjustment under the section Using Your
Router Table Fence.)
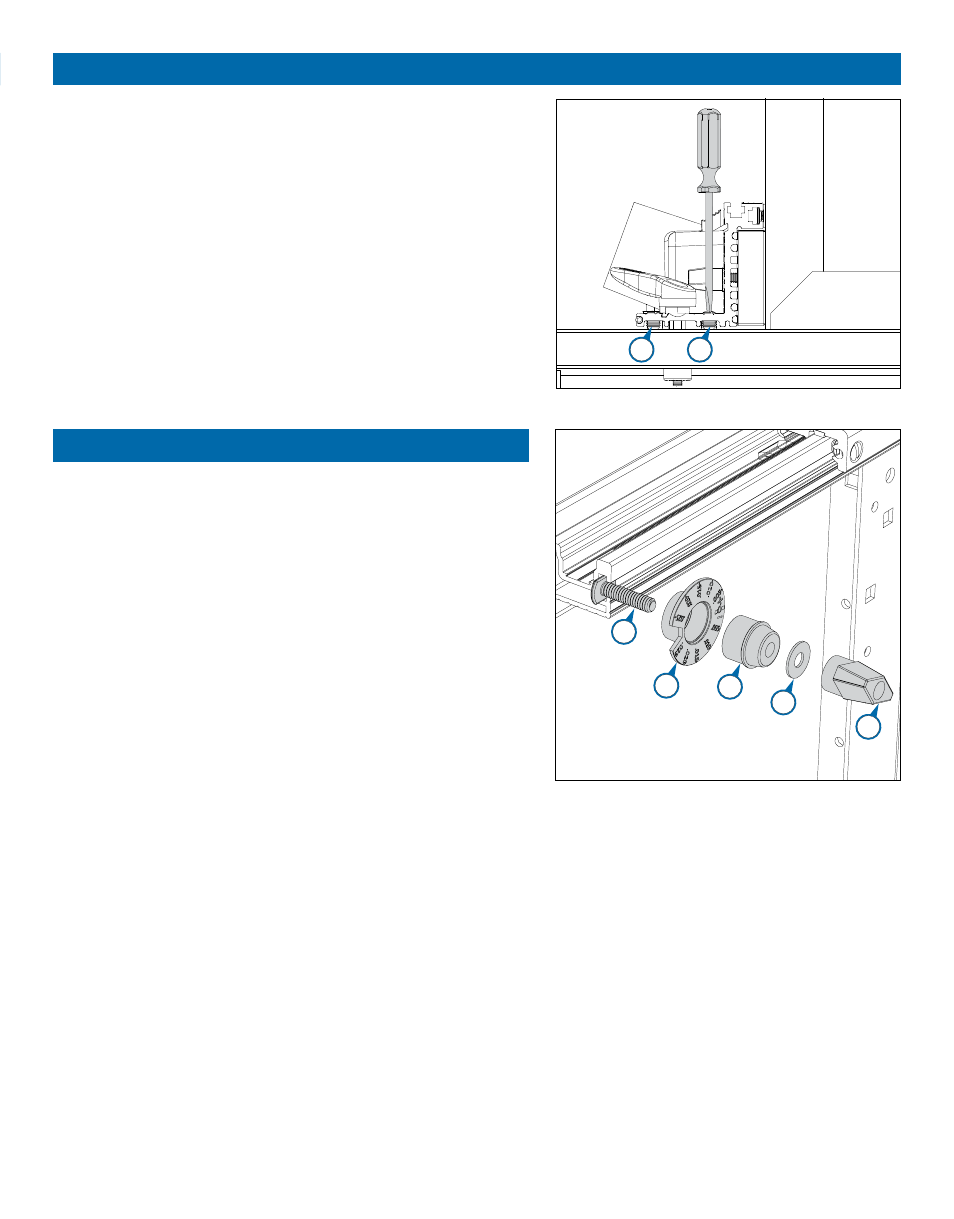
1
Hardware for this section is in HARDWARE PACK #6.
Slide the T-slot bolt (34) through the base (35) and the washer (36).
Thread on the T-knob (37). Insert this assembly into the dial (38).
Install the micro-adjuster
21
21
34
38
35
37
36