Smart check, User management, Server – OpenEye OE2-E120 User Manual
Page 27
27717AP
27
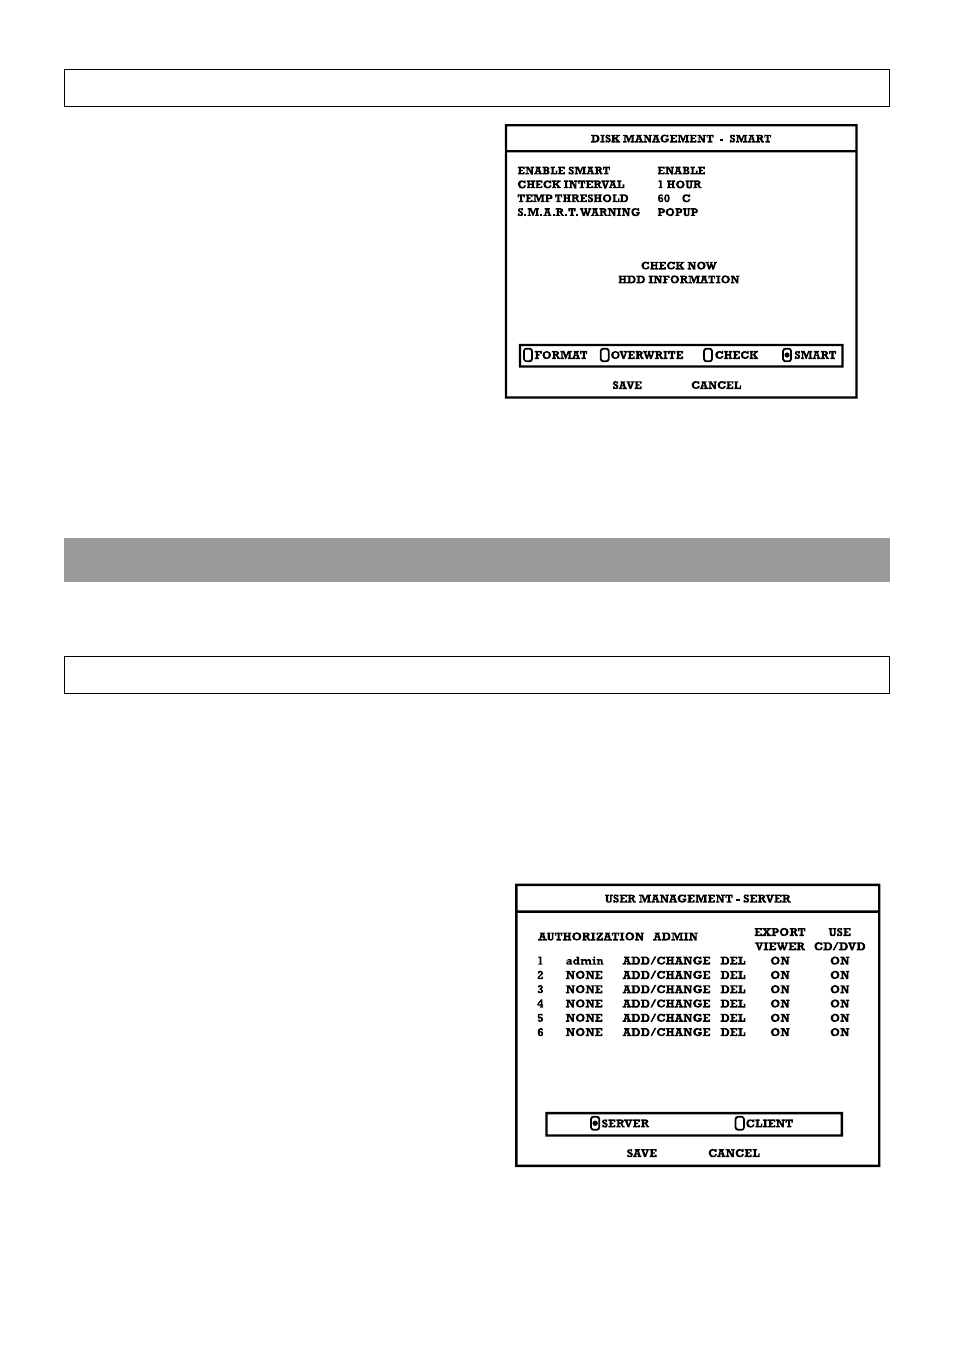
SMART Check
SMART CHECK – (Self Monitoring Analysis & Reporting
Technology) Enable SMART Check to detect signs of HDD
failure.
1. Select SMART ENABLE and press ENT to
ENABLE or DISABLE.
2. Set a check interval between 1 and 24 HOURS.
3. Define a temperature threshold and select Celsius
or Fahrenheit.
Note
The recommended upper optimum operating
temperature for the HDD is between 40C and
50C (or 104F to 122F).
4. Select a warning to be activated when the HDD
reaches the defined threshold.
5. Select SAVE and press ENT to save settings.
Tip
Select HDD INFORMATION and press the ENT button to view the current HDD, DVD, and USB drive information.
USER MANAGEMENT
Use the User Management Setup to Add or Delete user accounts on the DVR and accounts for remote access.
Server
Use the SERVER menu to manage users that access the E120 locally. There are three user levels available (Admin,
SuperUser, User).
Export Viewer – Allow the user to include a copy of the Backup Viewer application when a local backup is made. This is a
Server side feature only.
Use CD/DVD - Allow the user to use the DVD Drive. This is a Server side feature only.
To add a new user:
1. Select the authorization level to display the names of
the users in that level (ADMIN, SUPERUSER, USER)
by selecting the user type at the top of the screen and
pressing ENT to cycle to the next level.
2. Select ADD/CHANGE on an unused row and press
ENT.
3. Use the on-screen keyboard to input the user name.
4. Select OK.
5. Set the user password using the onscreen keypad or
the key buttons on the front panel or remote control.
Repeat the password to confirm.
6. Repeat the above steps to set up more users at
appropriate authorization levels.
7. Select SAVE and press ENT to save settings.