OWON SDS Series User Manual
Page 96
7.Demonstration
(6) Press the Trigger Menu button to display the Trigger menu.
(7) Press the H1 button to display the Trigger Type menu.
(8) Press the F1 to choose Single as the type.
(9) Turn the M knob to choose Edge as the mode.
(10) Press the H2 button to display the Source menu.
(11) Press the F1 button to choose CH1 as the source.
(12) Press the H3 button to display the Coupling menu; press the F2 button to choose
DC as the Coupling.
(13) Press the H4 button to choose
(rising) as the Slope.
(14) Rotate the TRIG LEVEL knob and adjust the trigger level to the roughly 50% of
the signal to be measured.
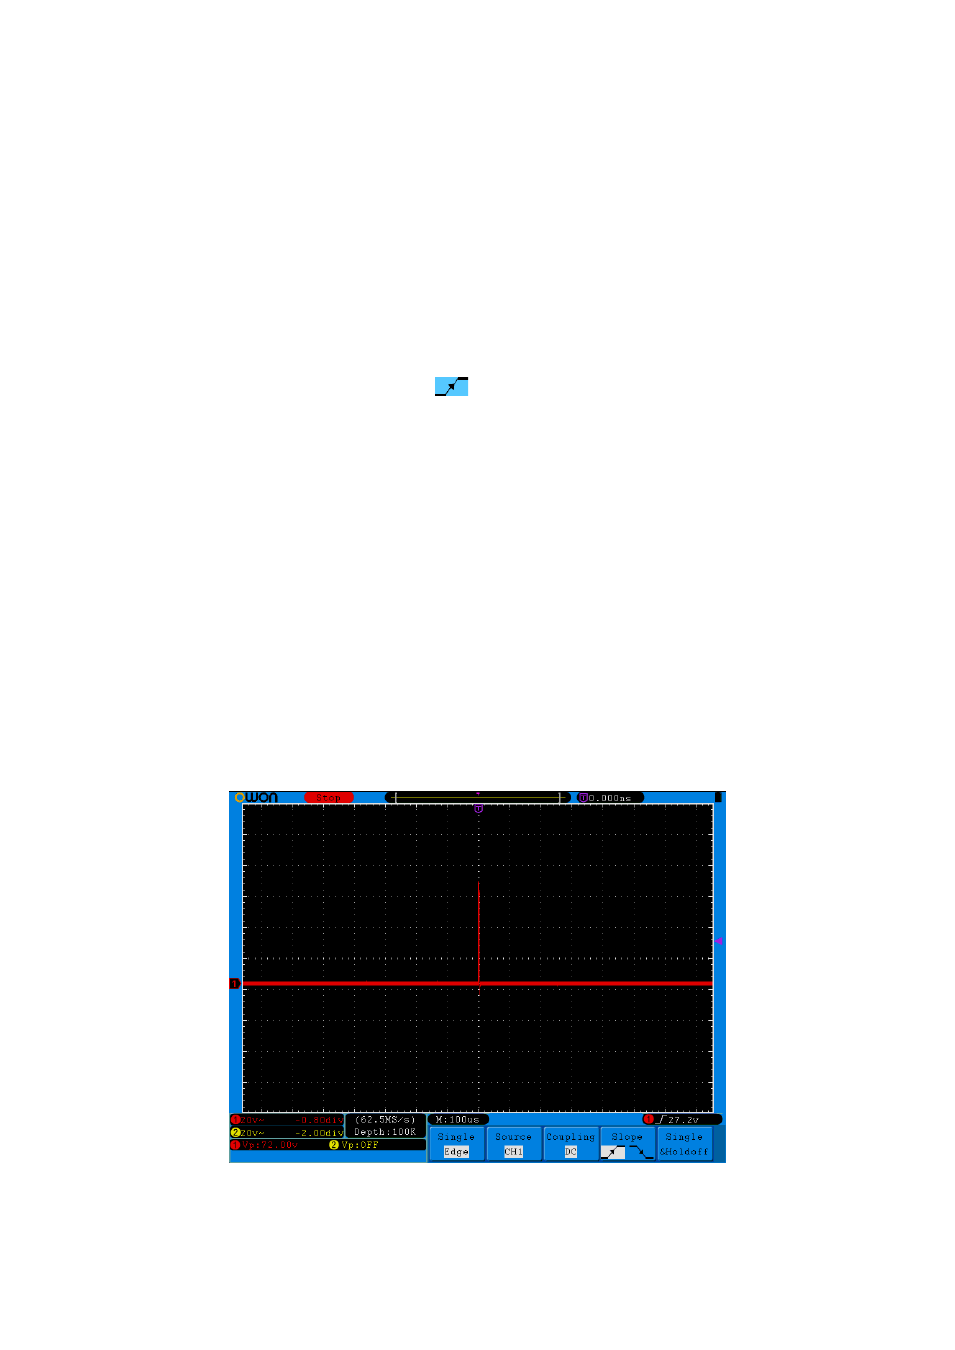
(15) Check the Trigger State Indicator on the top of the screen, if it is not Ready, push
down the Run/Stop button and start acquiring, wait for trigger to happen. If a
signal reaches to the set trigger level, one sampling will be made and then
displayed in the screen. By using this approach, a random pulse can be captured
easily. For instance, if we want to find a burst burr of high amplitude, set the
trigger level to a slightly higher value of the average signal level, press the
Run/Stop button and wait a trigger. Once there is a burr occurring, the instrument
will trigger automatically and record the waveform during the period around the
trigger time. By turning the HORIZONTAL POSITION knob in the horizontal
control area in the panel, you can change the horizontal triggering position to
obtain the negative delay, making an easy observation of the waveform before the
burr occurs (see Figure 7-3).
Figure 7-3 Capturing a Single Signal
91