More about chord progressions, Chord change points, The effect of changing and inserting sections – Teac PocketStudio 5 Reference Manual User Manual
Page 20: Available chords, Sections, 4 – patterns on the pocketstudio 5
4 – Patterns on the Pocketstudio 5
20
TASCAM Pocketstudio 5
Reference Manual
More about chord progressions
In the sample song, we only used a few chords. The
Pocketstudio 5 is capable of producing almost any
chord progression written (using Western-style nota-
tion, anyway).
Chord change points
First, the way in which the bars are divided for the
chord change points can be set to match the follow-
ing musical divisions:
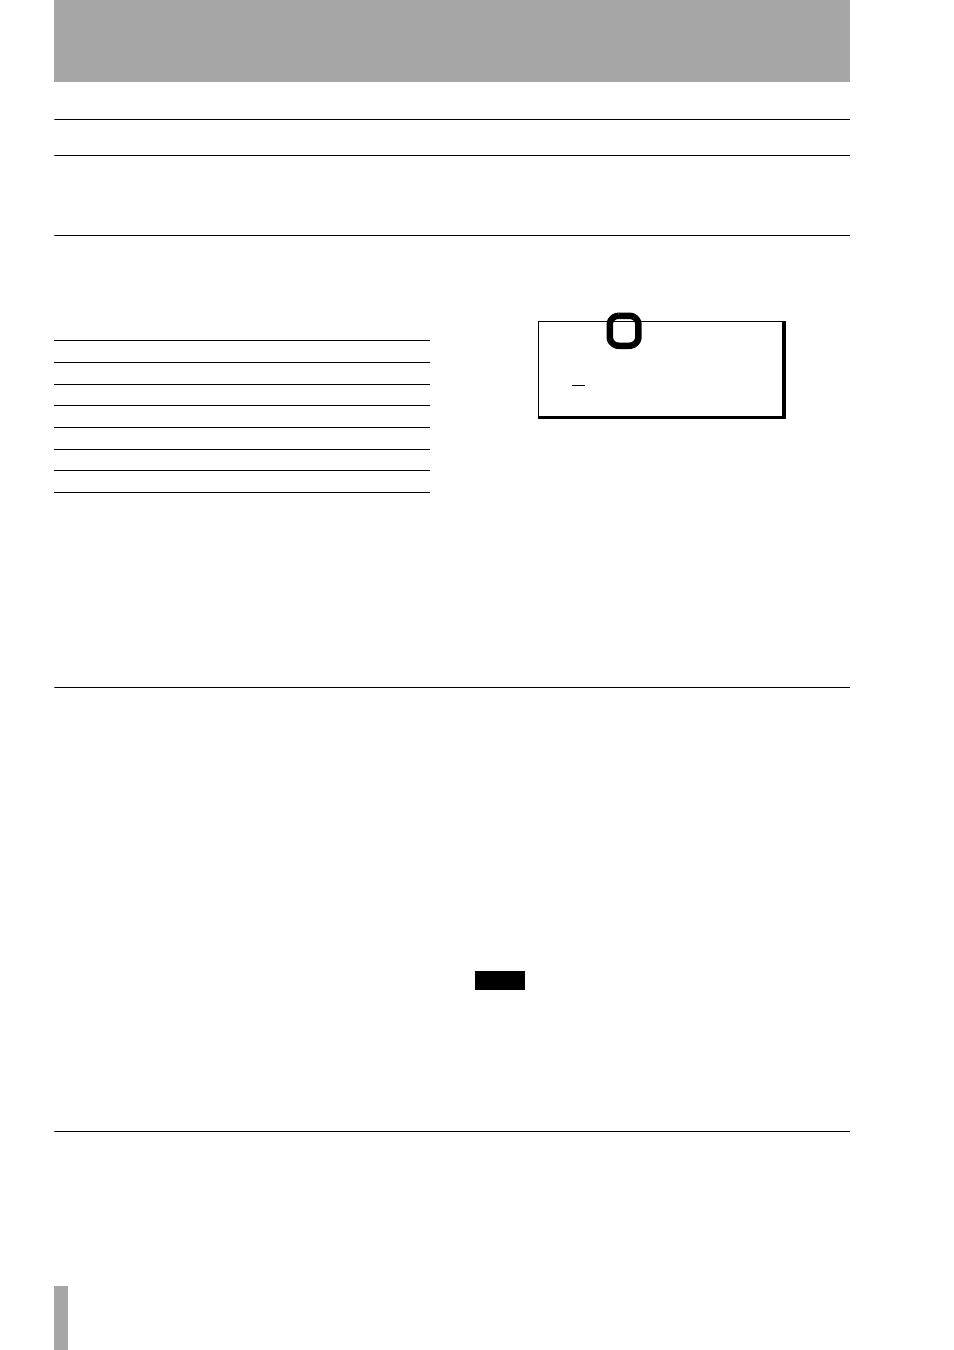
When this setting is made on the first line of the
screen, the second line of the screen divides the cur-
rent bar into the number of parts determined by the
change point setting. Here we see a 4/4 bar divided
into eighth-notes (quavers), meaning that there are
eight divisions in the bar (the chord could change a
maximum of eight times in this bar)
.
When you move to the second line of the screen, use
Ó and Á to move between the possible chord
change points, and the wheel to set (clockwise) and
unset (counterclockwise) these points as actual
change points.
When a valid (set) change point is highlighted, use 
to move to the third line to set the chord at that point.
A set change point is represented by:
k
.
An unset change point is represented by
8
if it marks
a beat boundary, or
•
in other cases.
The effect of changing and inserting sections
As explained earlier (“Setting up the song arrange-
ment” on page 12) it is possible to change the struc-
ture of a song by changing the type of section and by
adding and copying sections within the arrangement.
The way that the chords are set up in these new sec-
tions depends on whether you are using the User or
the Preset area (see “Select the user area” on
page 12).
In the Preset area whenever you add a new section or
you change the type of an existing section, the chord
progression within that section will be the default for
that particular pattern.
In the User area whenever you add a new section,
there will be one chord all the way through that sec-
tion. That chord will be the last chord of the previous
section. Since it is a “continuation” chord, it is shown
in parentheses (e.g.
(•Dbm7/-)
).
In the User area, when you change the type of an
existing section, the chord progression remains the
same as previously, but the actual notes played will
vary.
This means that it is very easy to create “instant
songs” in the Preset area by simply using the default
chord progressions and working from there. Further
adjustment (deletion of unwanted chord changes,
etc.) is then possible by copying the Preset area to the
User area (using the
Write
function in the
PATTERN
menu) and editing it there.
TIP
If you have made a song in the preset area which
sounds right, except that it is in the wrong key for you
to sing or play, you can change the key of the three
parts (bass and two other instruments—you can’t
change the key of the drums!) using the
KeyTr
parameter (“Arranging the parts” on page 16).
Available chords
There are four parameters that you can set for each
chord change:
a
whole note (semibreve)
s
half-note (minim)
dn
triplet quarter-note (triplet)
d
quarter-note (crochet)
xn
triplet eighth-note (triplet quaver)
x
Eighth-note (quaver)
c
Sixteenth-note (semiquaver)
B 0 0 1
x
k
•
8
•
8
•
8
•
• D - / -
(
4 /
4
I n t r o
)