Vir2 Instruments Studio Kit Builder User Manual
Page 19
14
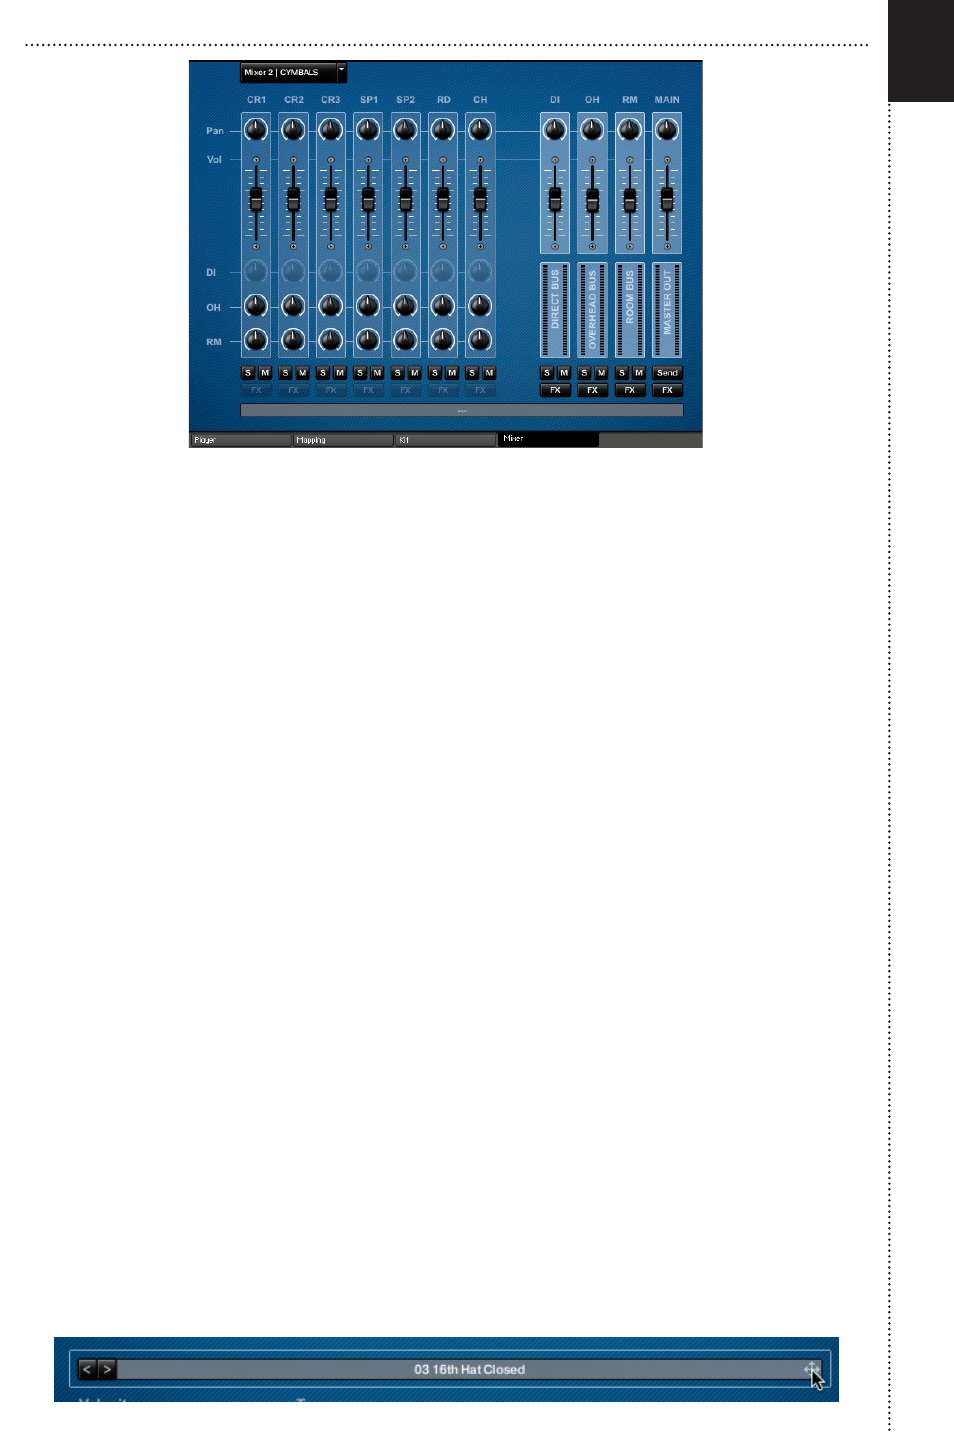
MIXER 2 BELOW
Mixer 1 shows all of the controls for each of the individual drums and the hi-
hats. Mixer 2 shows all of the controls each of the cymbals. The DI, Overhead
(OH), Room (RM) and MAIN buss controls are the same in both mixer views.
While the controls of each mixer view are similar, you will notice two things
that are different about Mixer 2: the DI knobs for each cymbal are greyed
out, and so are the FX buttons. This is because all of the cymbals were
recorded from overhead and room mic positions. In most cases, direct mics
are typically only used on hi-hats and ride cymbals. FX processing of the
cymbals will be applied on the overhead and/or room busses.
Here is a description of each of the controls:
Pan Knob – controls the kit piece’s placement in the stereo field.
Volume Fader – controls the overall volume level for each kit piece or buss.
DI Knob – controls the amount of direct mic signal that is present
OH Knob – controls the amount of overhead mic signal that is present
RM Knob – controls the amount of room mic signal that is present
Solo (S) Button – Temporarily isolates a kit piece or buss while listening
Mute (M) Button – Temporarily silences a kit piece or buss while listening
FX Button – Opens the Studio Kit Builder FX window
Send Button – Opens the send FX controls window
The long gray strip at the bottom of the Mixer displays the changes you
make to any of the Knobs or faders.