Attachment arm, Removing and installing (models hd and hd – Polaris 2013 BRUTUS Owner's Manual User Manual
Page 71
70
ATTACHMENT ARM
Removing And Installing (Models HD and
HD
PTO
)
Description
When the PRO-TACH attachment system is not being used, it
can be removed from the vehicle.
Tip: Remove the bucket or attachment before removing the attach-
ment arm from the vehicle.
Removing:
Tip: Before removing the attachment arm, it is recommended to install
the Tilt Cylinder Stow Kit. The stow kit will secure the tilt cylinder
in the storage position when the attachment arm is removed. See
your Polaris dealer for parts.
1. Park the vehicle on a
flat level surface.
2. Lower the attachment
arm fully and tilt the
PRO-TACH fully for-
ward.
Tip: In muddy conditions or to
prevent the attachment
arm from freezing to the
ground, put the attach-
ment arm on planks or
blocks before removing
the attachment arm from the vehicle.
3. Move the gear selector lever to PARK and stop the engine.
See page 41.
WARNING! Avoid Injury. Keep fingers and hands out of pinch points
when removing and installing the attachment arm.
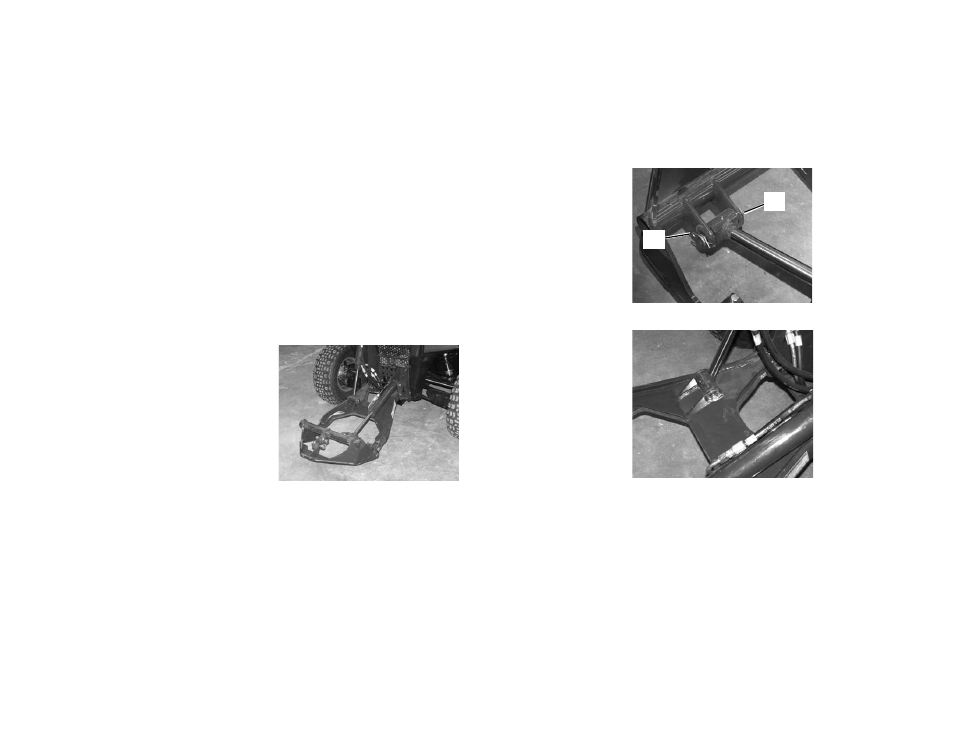
Tip: When the pin (Item 2) is
removed from the tilt cyl-
inder, the interface will be
free to tilt down to the
ground. Support the
interface while the pin is
being removed.
4. Remove the retainer
pin (Item 1) and the
pin (Item 2) from the
rod end of the tilt cyl-
inder and position the
interface flat on the ground.
5. Remove the retainer
pin (Item 3) and pin
(Item 4) from the rod
end of the lift cylinder.
6. Start the engine. (See
page 41. Press the bot-
tom of the joystick
lockout switch to
enable the joystick.
7. Retract both the lift
and tilt cylinders fully.
8. Press the top of the
joystick lockout switch to disable the joystick.
9. Turn the key to the off position and exit the vehicle. See
page 41.
2
1