2 connecting the control and sensor cables, 3 connecting the communication cable, Connecting the control and sensor cables – SMA AUTOMATIC SWITCH BOX XL User Manual
Page 42: Connecting the communication cable
Electrical Connection
SMA Solar Technology AG
42
AS-BOX-XL-IEN094410
Installation Guide
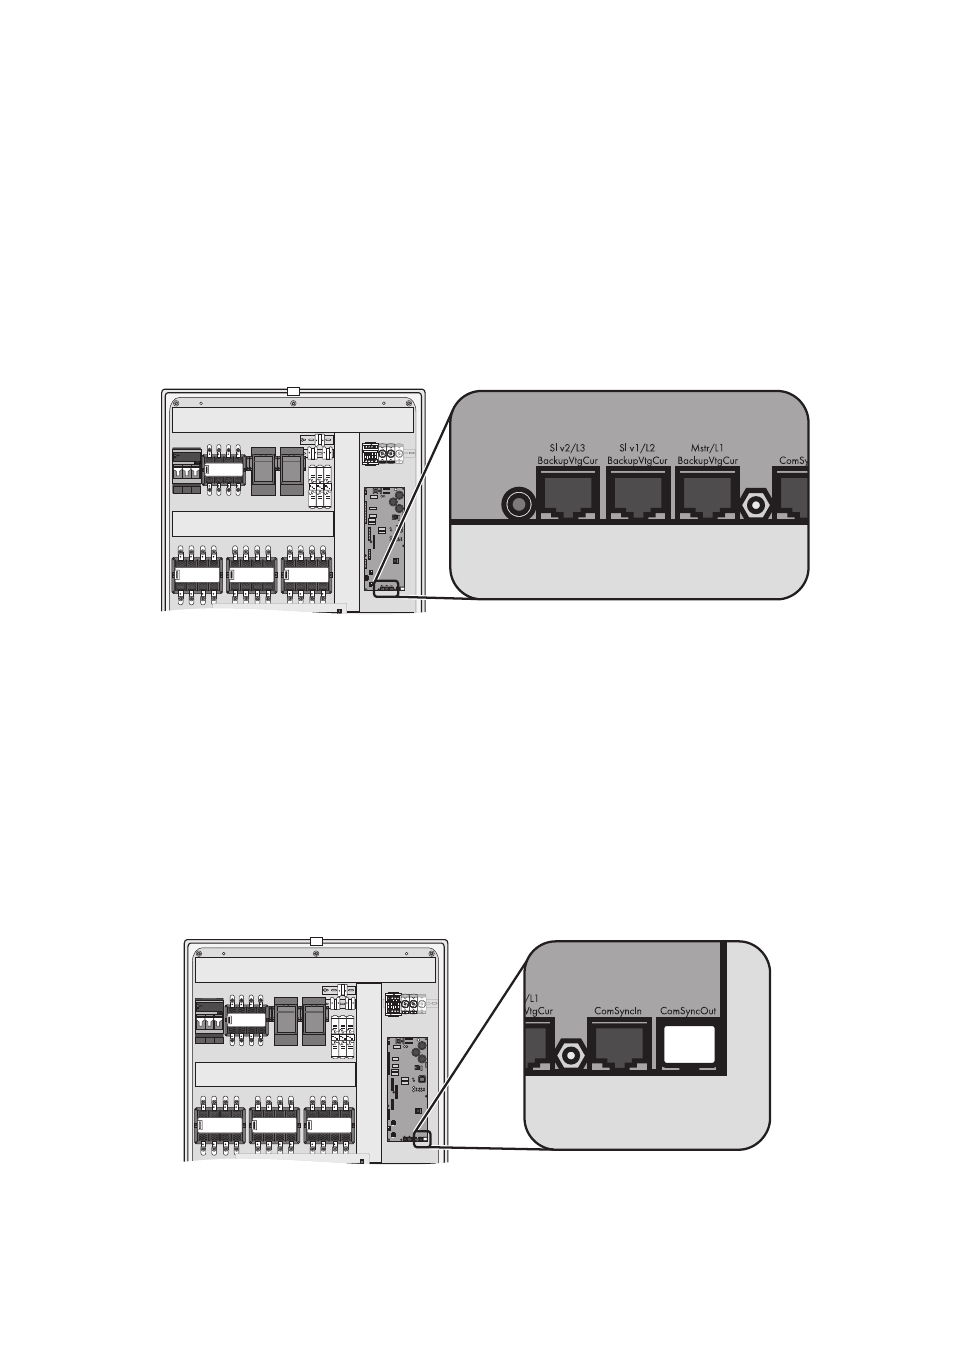
5.5.2 Connecting the control and sensor cables
1. Insert the control and measurement cable (red) for the Sunny Backup-Master of the Main Cluster
into the "Mstr/L1 BackupVtgCur" socket.
2. Plug the control and sensor cable for the Sunny Backup-Slave 1 of the Main Cluster into the
"Slv1/L2 BackupVtgCur" socket.
3. Plug the control and sensor cable for the Sunny Backup-Slave 2 of the Main Cluster into the
"Slv2/L3 BackupVtgCur" socket.
☑ The control and sensor cables are now connected.
5.5.3 Connecting the communication cable
1. Plug the communication cable (black) for the communication between Sunny Backup and the
Automatic Switch Box into the "ComSyncIn" socket. Leave the termination resistor plugged into
the "ComSyncOut" socket.
2. Connect the end of the communication cable to the "ComSyncIn" socket to a Sunny Backup in
the Main Cluster. Since all Sunny Backup units (master and slaves) of the Main Cluster are
interconnected via a communication bus, the Automatic Switch Box can be connected to either
a slave or the master of the Main Cluster.
☑ The communication cable is now connected.