iSys iTerra Elite II Color LED Plotter User Manual
Page 32
June 2011: Revision 002
32
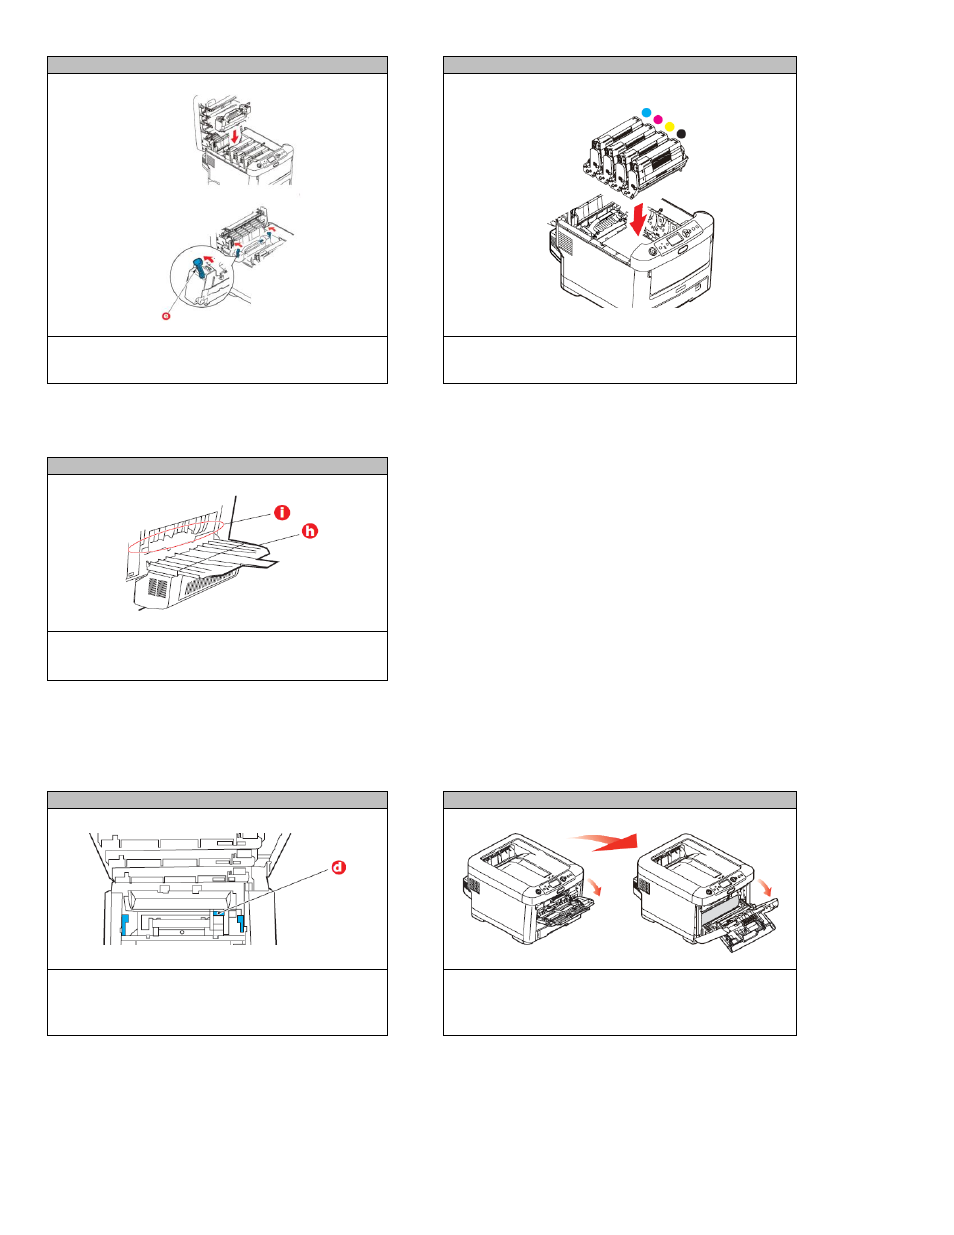
STEP 10
STEP 11
Replace fuser unit into the machine and move
locking levers (e) toward the rear of the machine.
Starting with the cyan image drum unit nearest the fuser,
replace the four image drums into the drum cavity,
making sure to locate them in the correct order.
STEP 12
Open the rear exit tray (h) and check for sheets of
paper in the rear path area (i), pull out any sheets
found in this area.
STEP 13
STEP 14
If the sheet is low down in this area and difficult to
remove, it is probably still gripped by the fuser. In
this case raise the top cover, reach around and
press down on the fuser pressure release lever (d).
Pull down the MP tray using the depressions. Lift the
front cover release lever and lower the front cover.