Pegasus settings for pocket pcs, Pegasus card configuration for pocket pcs, Status tab – Casio DT-10 User Manual
Page 4: Information fields, Egasus, Onfiguration for, Ocket, 1 pegasus settings for pocket pcs
1
1 Pegasus Settings for Pocket PCs
1.1 Pegasus Card Configuration for Pocket PCs
You need to configure the Pegasus card before you can be connected to the network. The Pegasus Configuration
Icon
under
Start->Settings->Connections can lead you to the configuration window. Tap on the icon
will take you to the Status (or Configuration) window of the Pegasus wireless settings. Here you will see four
tabs: Status, Configuration, Advanced, and About tabs. The Configuration tab may not display in Pocket PC
2003 operating system because the system has its own radio scan capability (Connection Manager), and some
OEMs prefer to use the Connection Manager. The functionalities of the Status Icon will be introduced in greater
detail at the end of the chapter. The Pocket PC 2003 connection manager will be described in Chapter 1.2 .
Note: “Click” in this d cument actually means “tap” with a stylus on the screen of the P cket PC. Howeve , we
will keep the conventional usage of Click instead of Tap.
o
o
r
1.1.1 Status Tab
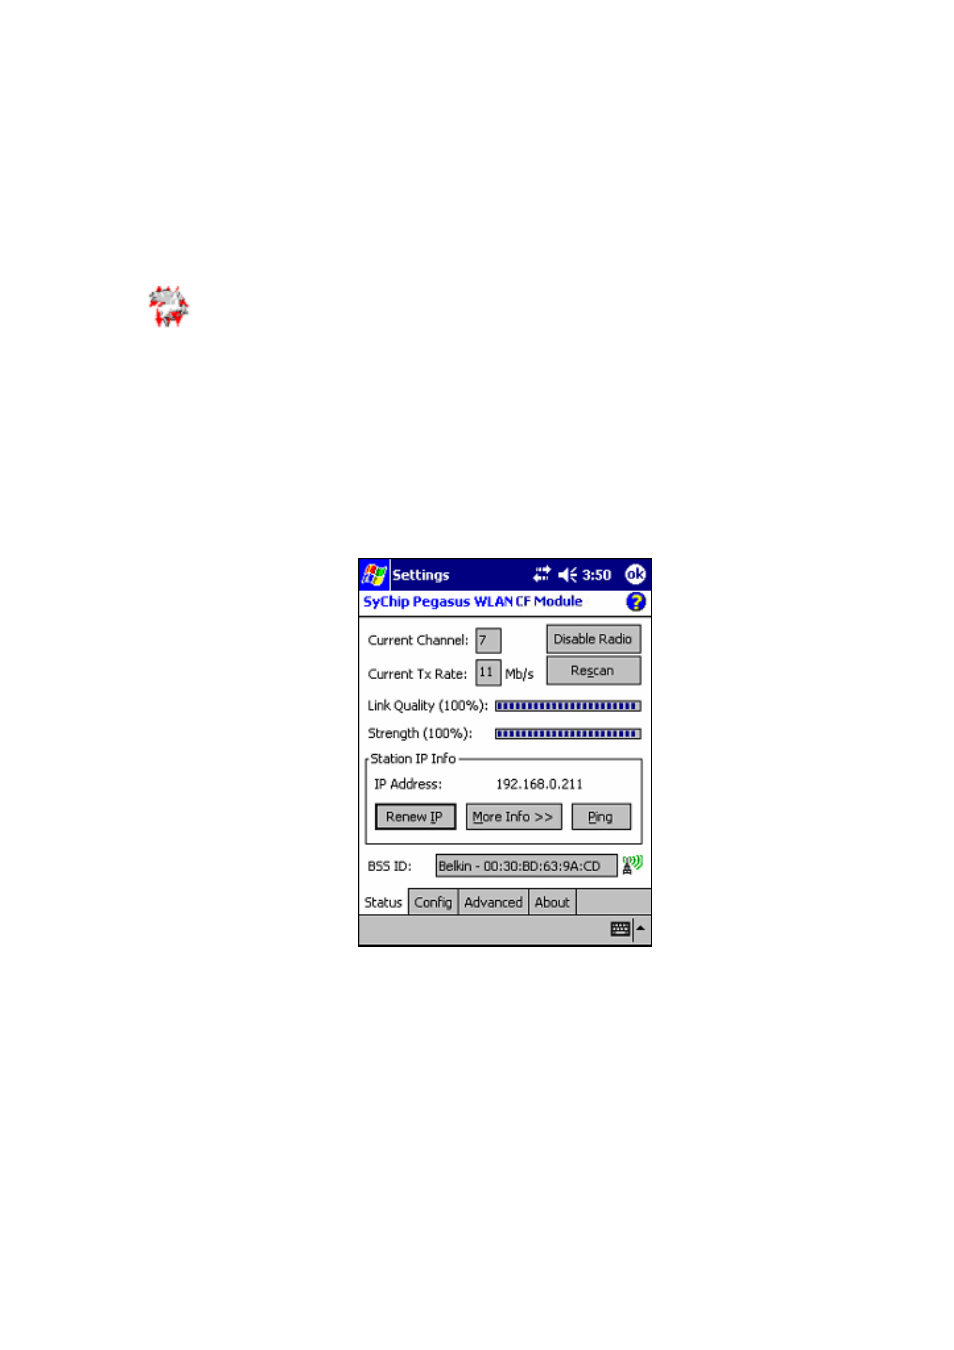
The status screen shows important parameters about the WLAN module as shown in Figure 1.
Figure 1 Status window
1.1.1.1 Information
Fields
• Current Channel
Shows the RF channel currently being used by the card.
• Current TX Rate
Shows the current transmit rate. This can be 1Mb/s, 2Mb/s, 5.5Mb/s, or 11 Mb/s.
• Link Quality
Gives signal to noise ratio in both percentage and graphical display.
• Strength
Gives signal strength of the receiver in both percentage and graphical display.
Copyright© 2005 CASIO COMPUTER CO., LTD.
All rights reserved.