Built-in effects operation section, 2 – names and functions of parts – Tascam Model 24 - Digital Mixer, Recorder, and USB Audio Interface User Manual
Page 23
TASCAM Model 24
23
2 – Names and Functions of Parts
!
MULTI JOG dial
This dial functions as a dial when turned and as a button
when pressed.
Dial functions
i
Turn when the Home Screen is open to move the file play-
back position. (See “Locate function” on page 40.)
i
When a MENU Screen is open, turn to select items and
change setting values. (See “Basic MENU screen operations”
Button function
i
Press when the Home Screen is open to designate a locate
point. (See “Locate function” on page 40.)
i
When a Menu Screen is open, press to confirm selections
and settings (ENTER button function).
@
Output level indicators
These are output level indicators for the MAIN OUTPUT jacks.
#
m
/
,
buttons
i
When stopped and during playback, press and hold these
buttons to search backward/forward.
i
When the Home Screen is open, press the
m
button to
locate to the beginning of the current song (
00:00:00
,
which is the zero point).
i
When the Home Screen is open, press the
,
button to
locate to the end of the current song.
i
If the current song has auto punch in or out points set, you
can also locate to those points.
i
If the current song has marks set, these can also be used to
locate to them.
i
While pressing the
8
button, press the
m
button to
locate to the point where recording last started.
i
While pressing the
8
button, press the
,
button to
locate to the point where recording last stopped.
i
When the
SD PLAY
Screen is in playback state, press to skip
a file. (See “Playing WAV files on SD cards (SD PLAY mode)”
$
MENU button
i
When the Meter Screen is open, press to open the Home
Screen.
i
When the
MENU
Screen or a menu item settings screen is
open, press to return to the Home Screen.
i
When the Home Screen is open, press to open the MENU
Screen. (See “Menu structure” on page 27.) and (See
“Basic MENU screen operations” on page 27.)
%
8
button/indicator
Press to stop playback or recording.
This button lights when stopped.
Press this button when paused to return to the beginning of
the song or file.
^
7
/
9
button/indicator
Press this button to start playback.
This button lights during playback and recording.
This button blinks when paused.
&
0
button/indicator
Press this button to start recording.
This button lights during recording.
Press this button during playback to start recording (Manual
punch in).
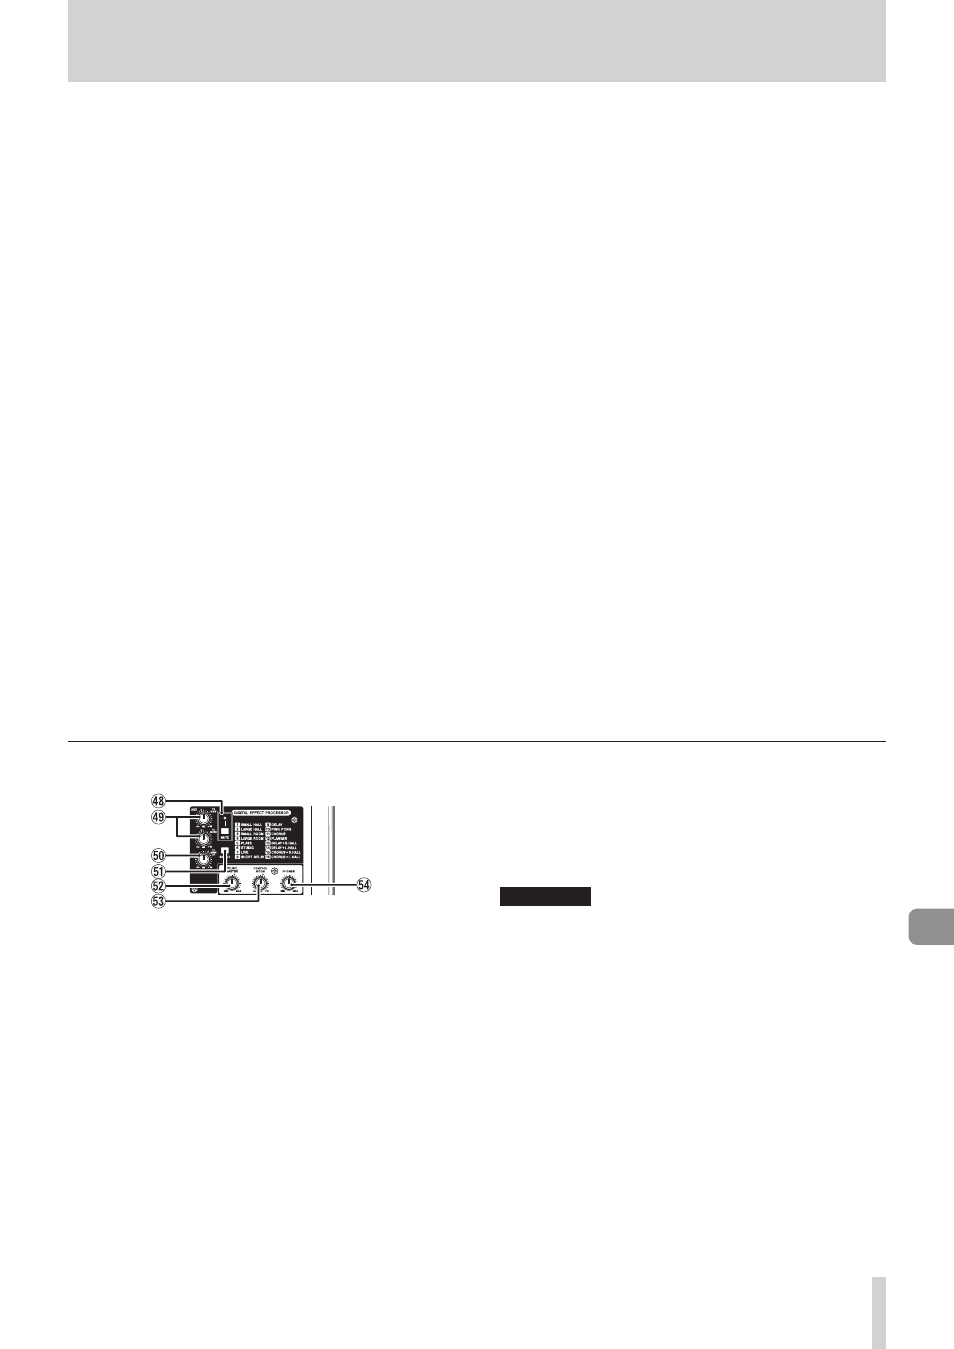
Built-in effects operation section
*
MUTE switch/indicator
When the
MUTE
switch is on (pushed in,
MUTE
indicator lit),
the signal from the built-in effect is muted.
(
TO MON 1/TO MON 2 knobs
Use these to adjust the levels of signals sent from the built-in
effects to the MONITOR OUT 1/2 buses.
)
TO MAIN LR knob
Use this to adjust the levels of signals sent from the built-in
effects to the MAIN MIX L/R buses.
Q
SELECT button
Open the
EFFECT
Screen and make built-in effect settings.
(See “Using the built-in effects” on page 38.)
The built-in effect return signal is return to the MAIN MIX L/R
bus and MONITOR OUT 1/2 buses.
W
PFL/AFL MASTER knob
Use this to adjust the send level from the PFL/AFL L/R bus.
E
CONTROL ROOM knob
Use to adjust the output levels of the
CONTROL ROOM L/R
jacks.
R
PHONES knob
Use this to adjust the headphone output level.
V
CAUTION
Before connecting headphones, minimize the volume with
the
PHONES
knob. Failure to do so could result in a sudden
loud noise that could harm hearing, for example.