Setting midi time code operation, Restoring factory default settings, Formatting sd cards – Tascam Model 24 - Digital Mixer, Recorder, and USB Audio Interface User Manual
Page 47: 9 – settings and information
TASCAM Model 24
47
9 – Settings and Information
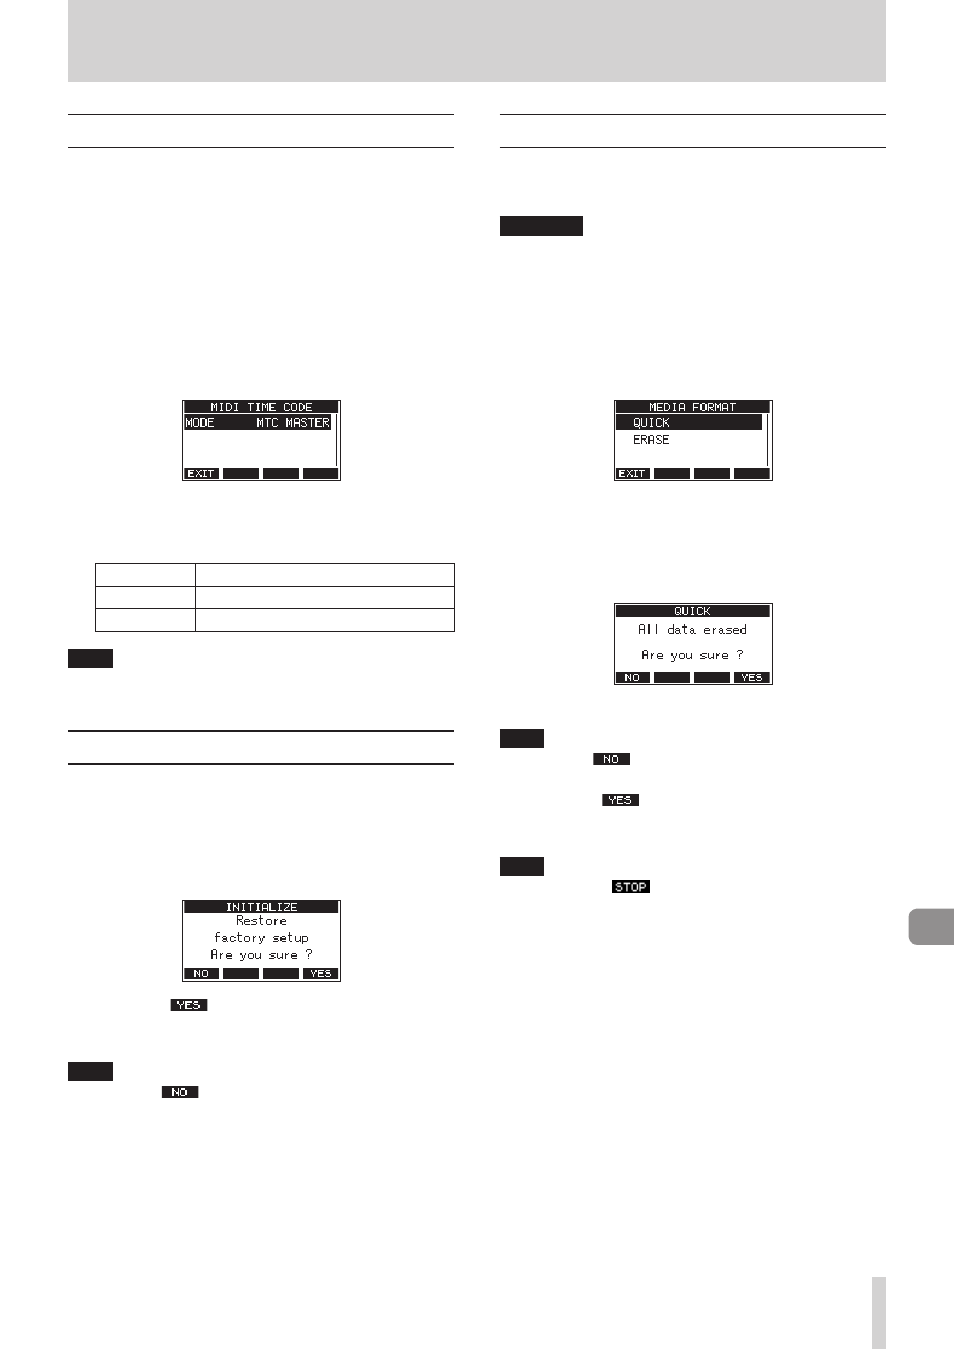
Setting MIDI time code operation
When connected to a computer, this unit can send MIDI time
code (MTC) as a USB MIDI device.
When MIDI time code is enabled, it sends quarter-frame
messages during playback and recording. It sends full messages
when locating.
A DAW, for example, can be set to synchronize with the MIDI
time code from this unit so it can operate in time with the
recorder of this unit.
For details, check the operation manual of that application
being used.
1.
When the recorder is stopped, on the
SYSTEM
Screen, select
MIDI TIME CODE
to open the
MIDI TIME CODE
Screen. (See
“Menu operation procedures” on page 27.)
2.
Select
MODE
, and press the
MULTI JOG
dial.
This opens the
MODE
Screen.
3.
Turn the
MULTI JOG
dial to set MIDI time code operation.
Option
Meaning
OFF
(default)
MIDI time code is not transmitted.
MTC MASTER
MIDI time code is transmitted.
NOTE
The MIDI time code frame type sent by this unit is 30 frames
per second (non-drop).
Restoring factory default settings
You can restore the various settings stored in the memory of the
unit to their factory default values.
Use the following menu procedures to do so.
1.
On the
SYSTEM
Screen, select
INITIALIZE
to open the
INITIALIZE
Screen. (See “Menu operation procedures” on
2.
Press the
F4
button to restore the factory default
settings.
3.
When the setting completes, the
SYSTEM
Screen will reopen.
NOTE
i
Press the
F1
button to cancel execution.
i
The date and time setting is not initialized.
Formatting SD cards
Formatting erases all music files on the SD card and automati-
cally creates new
MTR
,
MUSIC
and
UTILITY
folders as well as a
tascam_m.sys
file.
ATTENTION
i
Formatting an SD card erases all the data on it. This cannot be
undone.
i
Always use this unit to format media to be used with it. Op-
eration of this unit might be affected when using an SD card
that has been formatted by a computer or other device.
1.
On the
SYSTEM
Screen, select
MEDIA FORMAT
to open the
MEDIA FORMAT
Screen. (See “Menu operation procedures”
QUICK
: Execute quick formatting.
ERASE
(Recommendation): Erase and format the card.
2.
Select the format method, and press the
MULTI JOG
dial.
A confirmation message will appear on the
QUICK
or
ERASE
Screen.
Shown when
QUICK
selected
NOTE
Press the
F1
button to cancel formatting and return to
the previous screen.
3.
Press the
F4
button to start formatting.
4.
When formatting is complete, the
SYSTEM
Screen will
reopen.
NOTE
i
Pressing the
F1
button during an ERASE format will
cancel erasure and execute a QUICK format instead.
i
The writing speeds to SD cards and other storage media
that use flash memory tend to decrease after writing occurs
repeatedly.
If the writing speed decreases, this could have a negative
impact on recording.
Using the
ERASE
function of this unit should restore the writ-
ing speed of the SD card.*
For this reason, we recommend using the
ERASE
function at
the following times.
o
Whenever the card has been written to until it became
completely full
o
On a regular schedule (about once per month)
o
Before starting important recordings
* Writing speed might not be restored depending on the SD
card condition (including malfunction and age).