Installation, Installation hints, Stove clearances – Avalon Firestyles Cypress User Manual
Page 8: For qualified installers only)
8
Installation
(for qualified installers only)
© Travis Industries
4121130
100-01311
Installation Hints
Recommended Optional Equipment Installation Order:
-- Rear Vent Conversion (if applicable)
-- GreenSmart Remote
-- Blower
-- LP Conversion and other optional equipment (fireback)
Install the media (logs, driftwood, or stone set) last - they are fragile.
When determining the location of the stove, locate the wall studs (for horizontal penetrations) and
ceiling trusses (for vertical penetrations). You may wish to adjust the stove position slightly to ensure
the vent does not intersect with a framing member.
Fumes and smoke from the paint curing and oil burning off the steel may occur the first time you start
this heater. This is normal. We recommend you open windows to vent the room.
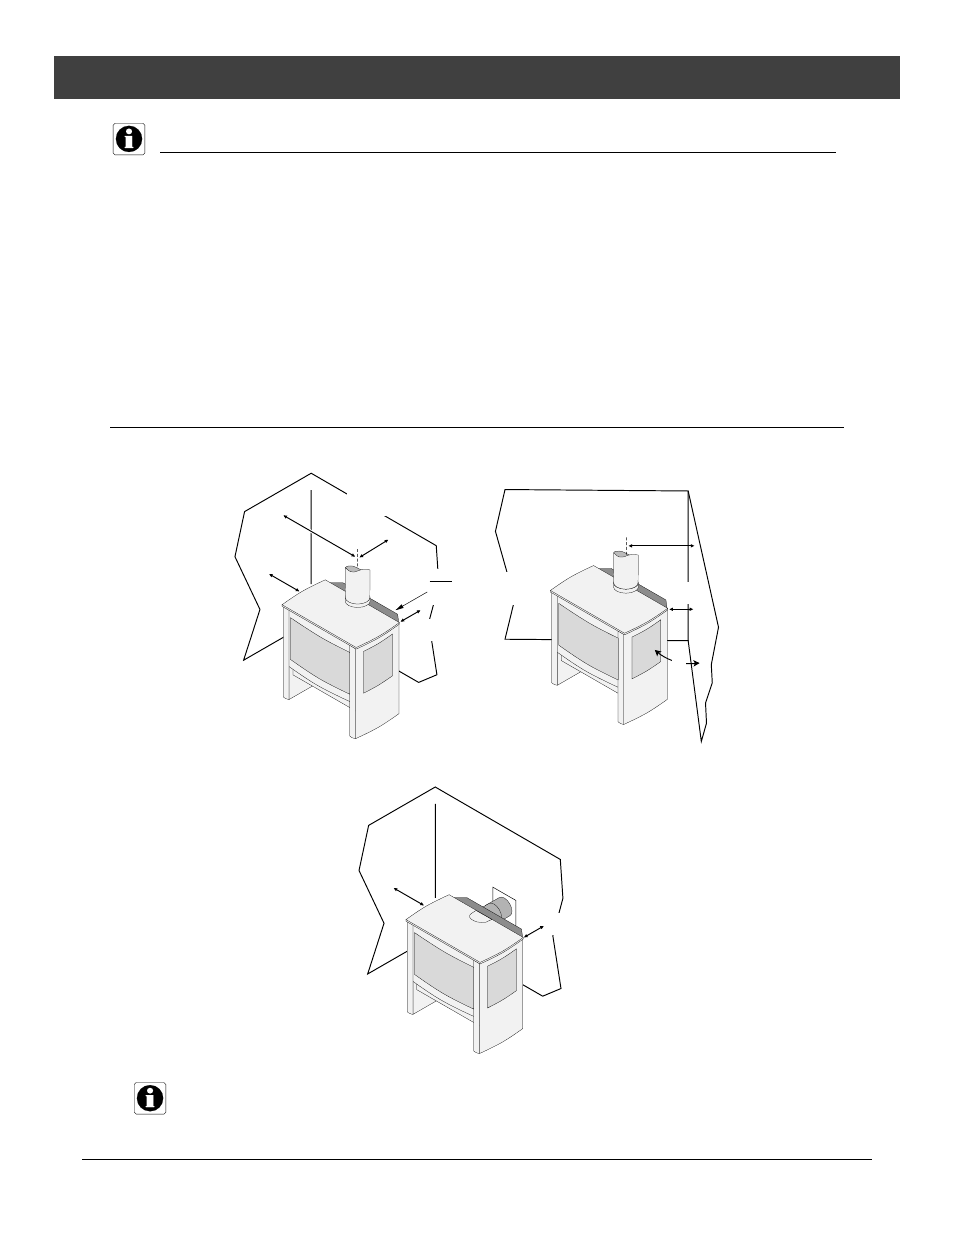
Stove Clearances
Rear vent installations may not use an elbow with a horizontal termination. We recommend
using a top vent configuration if placed in a corner
10" Min.
254mm
Top Vent
Straight Installations
Top Vent
Corner Installations
With this clearance, the vent is
centered 16-1/2" (420mm)
from the wall.
With this clearance the top vent is
centered 6-7/8" (175mm) from the
back wall, 25-1/8" (638mm) from
the side wall.
5" Min.
127mm
5" Min.
127mm
45°
10" Min.
254mm
Rear Vent (Straight) Installations
8-1/4" Min.
210mm
NOTE: At minimum clearance
the switch box is very close
(1/8" 3mm) to the rear wall.