Scheduling presentations – BrightSign Network WebUI User Guide v.3.9 User Manual
Page 33
29
Scheduling Presentations
General Managers, Publishers
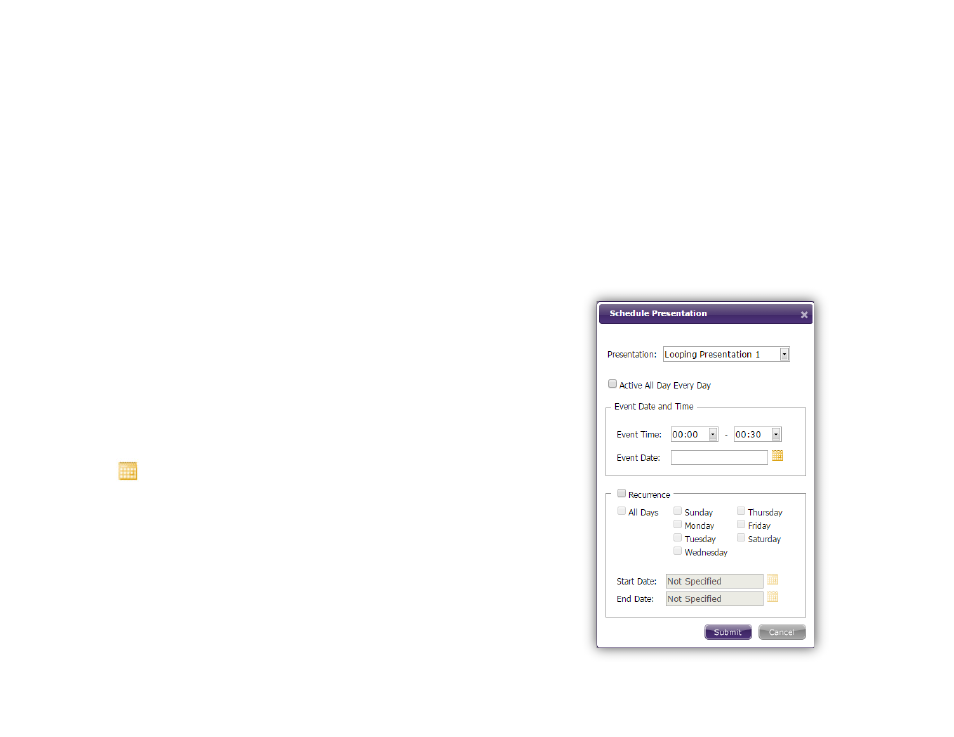
Follow these steps to add a presentation to a group:
1. Expand a group and click
Add Presentation to
open the
Schedule Presentation window.
Note: Alternatively, you can access this window by
accessing group
Properties, selecting the
Presentations tab, and clicking the Add button at the
bottom of the window.
2. Select a
Presentation from the dropdown list.
3. Check the
Active All Day Every Day box if you
would like the presentation to play at all times. This
disables all other scheduling options in the
Schedule Presentation window.
4. Use the
Event Time fields to specify a time range
for the presentation.
5. Use the
Event Date field if you want the
presentation to play during one day only. Use the
Calendar menu to select a specific date.
6. Check the
Recurrence box if you want the
presentation to play on a repeating schedule during
a specific date range. Check
All Days or specify
certain days of the week. It is necessary to specify a
Start Date and End Date if the Recurrence box is
checked.
7. Click
Submit once you have finished configuring
the schedule.
The scheduling process will fail if it conflicts with another
schedule that is already assigned to the group. Follow
these steps to edit a schedule or remove it from the
group:
1. Click the
Properties link next to the group name
and status.
2. Select the
Presentations tab. You will find a list of
presentations that are scheduled to play on the
current day.