Daktronics Sportsound 1500HD User Manual
Page 19
Maintenance & Troubleshooting
13
e. Lay the mesh across the frame and snap each clip into the tension channels
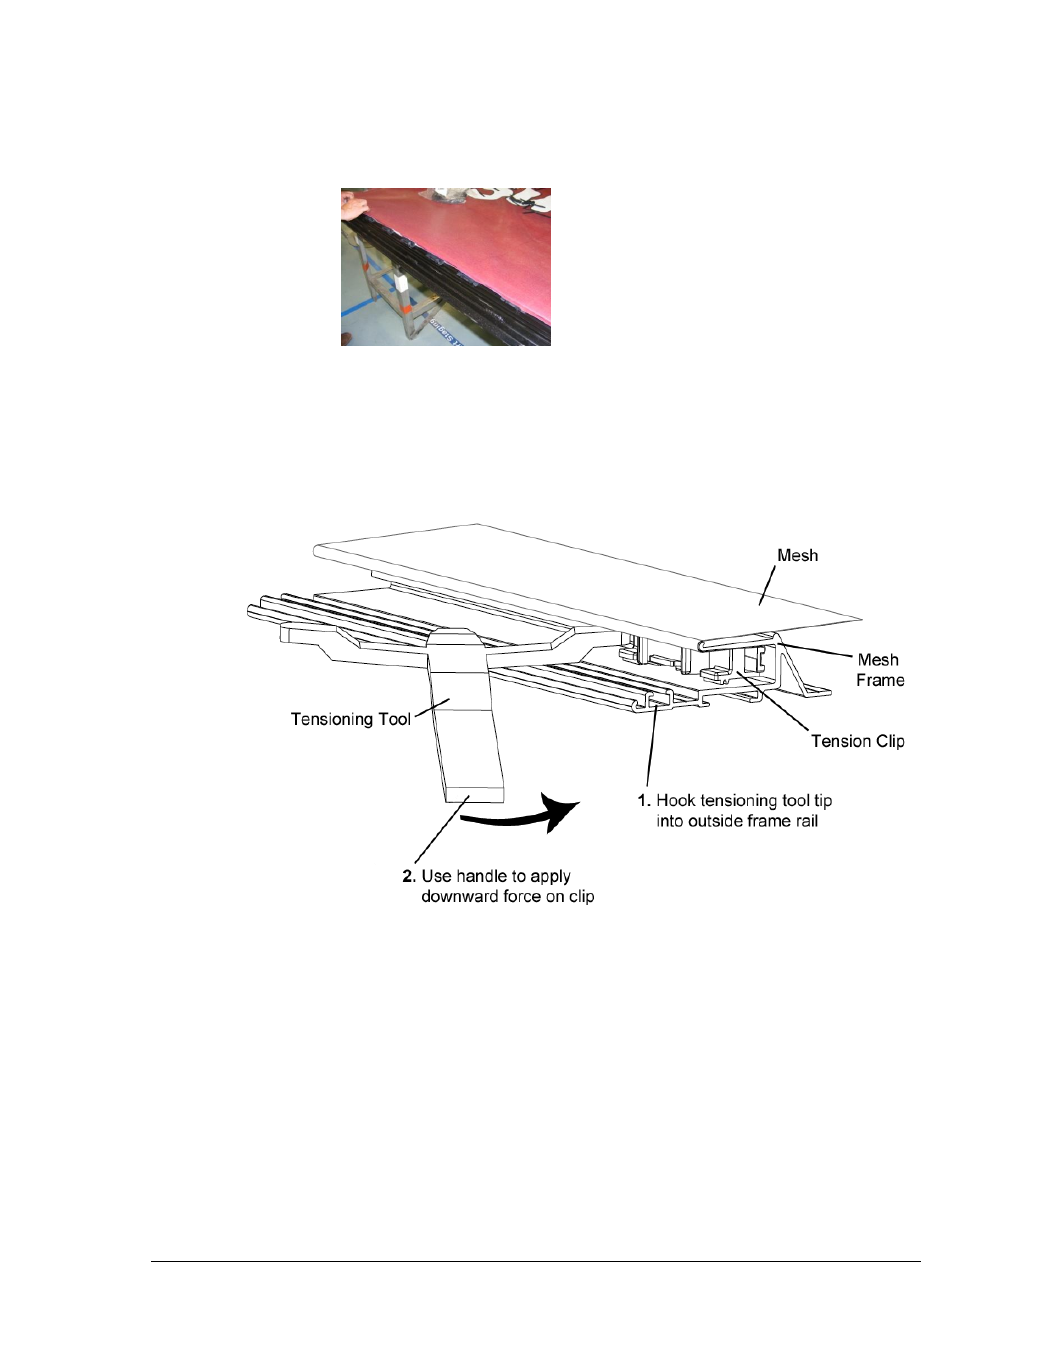
f. Use the tensioning tool provided with the mesh replacement kit (part # 0A-
1534-0046) to drive the tension clips into the tension channels (Figure 21).
Start with one or two clicks.
g. Work around the frame, tightening down all the tension clips until all the
wrinkles are removed and the mesh is properly taut.
Note: Do not over-tension! This may cause damage to mesh graphics. Apply
just enough tension to achieve a smooth, flat surface.
h. Place the radius covers on the end of the mesh frame and tighten the cover
screws to secure the radius cover.
4. Reattach Mesh Frame
Safely lift mesh frame back in place on the front of the sound cabinet and attach with
the eight (8)
3
/
8
" hardware sets. Ensure the frame is snug tight against the cabinet.
Figure 20: Clips in Channels
Figure 21: How to Use Tensioning Tool
Note: Pull on the corners of the mesh
to remove any wrinkles. When
pulling on the fabric, do not pull
directly on the fabric flap or tension
clip, or the clip may pop off. When
pulling on the face, grasp the fold
and pull the face into place.