MacroSystem Akaba – New Concept User Manual
Page 10
10
11
5.) Mask mode
This button is used to switch to mask mode.
You can read more about this powerful tool in
section 3.5.4.
6.) Activate mask
Here you choose whether the current mask
should be used when drawing. If the checkmark
is visible, then the mask is used. If a dash is
visible then it is not used. We recommended
that you use the mask mode after you have
become acquainted with Akaba – New Concept.
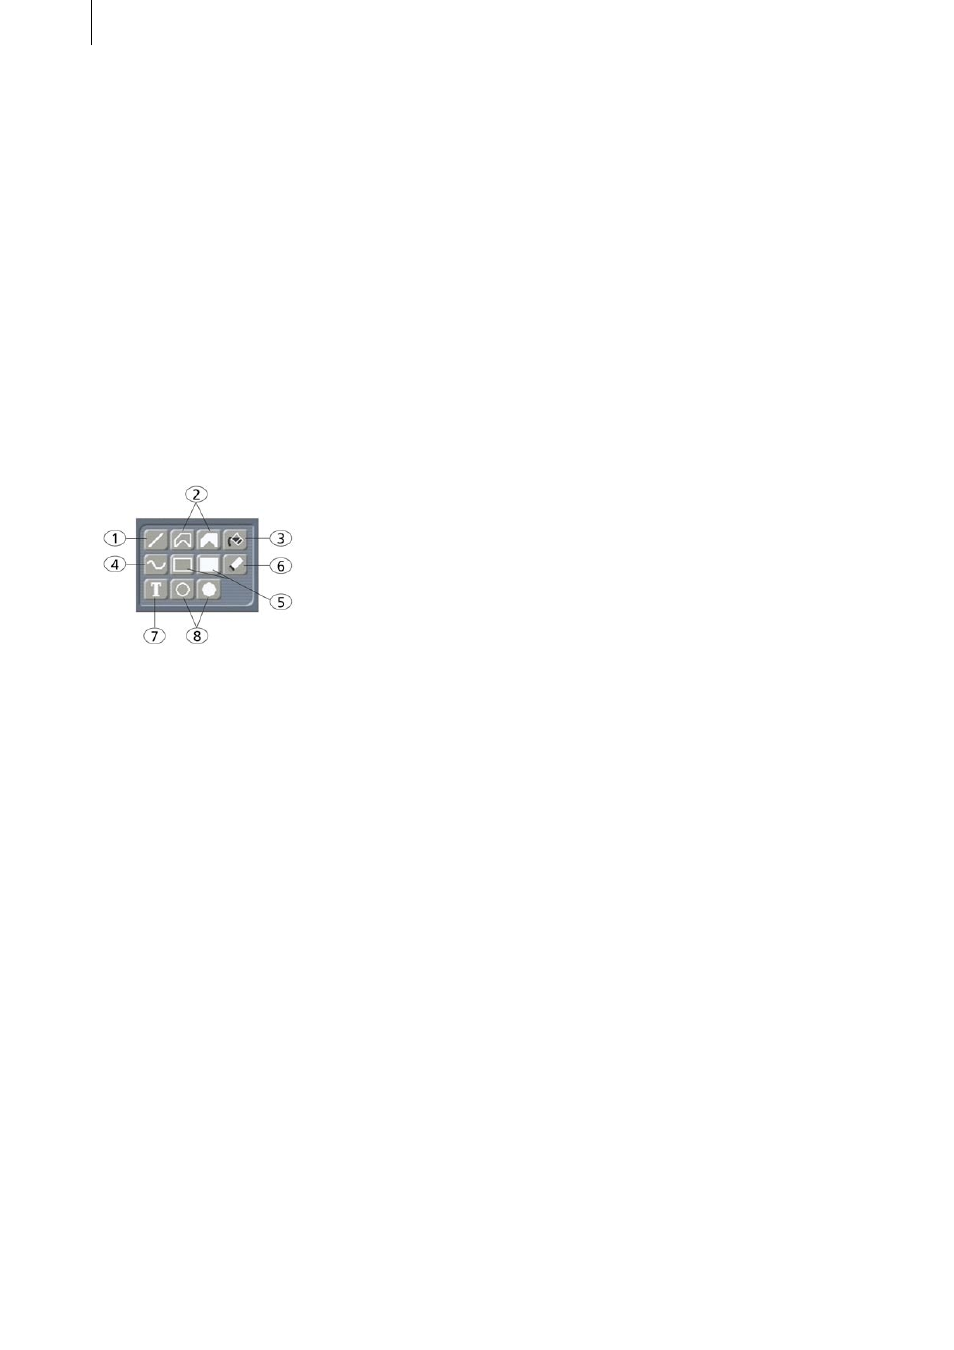
3.1.3 Tools
1.) Line
Clicking on this button causes the menu panel
to disappear, allowing you to draw a line in the
video material. A diagonal line segment (45°) is
displayed so that you can precisely position the
line.
The cursor is positioned to the upper-left end
and the point can now be positioned. A click on
the left trackball key sets the start point of the
line.
Now the cursor changes to the other end of the
line and you can set the end point of the line
with a second click.
Clicking on the left trackball key without having
moved the trackball itself causes a diagonal line
(45°) to be set.
In order to freely draw the line simply change
the position of the trackball before you confirm
the end point by clicking on the left key.
During the entire time, the line is displayed as it
will appear using the current pencil and color.
The next line can be drawn immediately after
setting the end point. Clicking on the right
trackball key returns you to the operating panel.
Optically vertical, horizontal or diagonal lines
(45°) are indicated during drawing by a change
in the trackball cursor (dash next to the symbol).
2.) Polygon (unfilled, filled)
Either a filled or unfilled closed polygon can
be drawn. Do the same as when drawing a
line; with the first click you set the start point
and with every additional click you add a line
segment.
To close the polygon and terminate the drawing
operation move the trackball cursor over the
start point. The start point is indicated by a
change in the cursor and you can click to finish
the polygon.
Depending on the pencil, the corner points
may show minor discrepancies during drawing
but will appear correctly after the polygon is
finished.
If you are drawing the polygon with a color
gradient and a selected color, then the polygon
is shown as a single color until it is closed, at
which time the color changes again.
3.) Fill
A certain region of the frame is filled with a color
(like from a paint bucket). This is a complicated
operation that requires you to make several
settings under Fill options in order to obtain the
desired result. More on this in section 3.5.3 Fill
options.
The fill operation is started by clicking within the
desired region. The object is filled with the color
defined in the active “color field” according to
the fill options you have set.
4.) Freehand
Clicking on this symbol starts the drawing mode.
Move the trackball cursor to the desired start
position and click on the left trackball key.
Do not hold down the trackball key!
Move the trackball to draw under the cursor.
A second click with the left key terminates the
operation.
Large pencils and fast movement might result
in drawing individual points and not continuous
lines.
So don’t move the drawing pencil with the
trackball too quickly!