MacroSystem Akaba – New Concept User Manual
Page 22
22
23
direction, e.g. to the lower right, and confirm
this by clicking again on the left trackball key so
that the palette window reappears.
Confirm your selection there with Ok. You now
see that your sun has taken on a color gradient.
Now call up the Pencils & Brushes window and
in the lower window area set some blur so that
the sun is not so strongly delineated against
the background. This produces a more natural
impression of the sun.
You can emphasize the blur even more by
increasing the width of the pencil. Try out a few
settings on your own and then close the Pencils
& Brushes window with a click on Ok.
After you have created and positioned the sun,
you can begin adding further effects.
Exit the submenu and return to the drawing-
mode operating panel by clicking on the right
trackball key (or on the rightmost symbol in the
operating panel). Then click on the Effect button
in order to call up the corresponding window.
In the following steps, settings are introduced
that are appropriate for this exercise example.
Please use them for this example, but
remember: in the future, the settings will be
determined by you for the particular need of
your project.
In order to learn about the complete
functionality of all options, please see chapter 3
Operation.
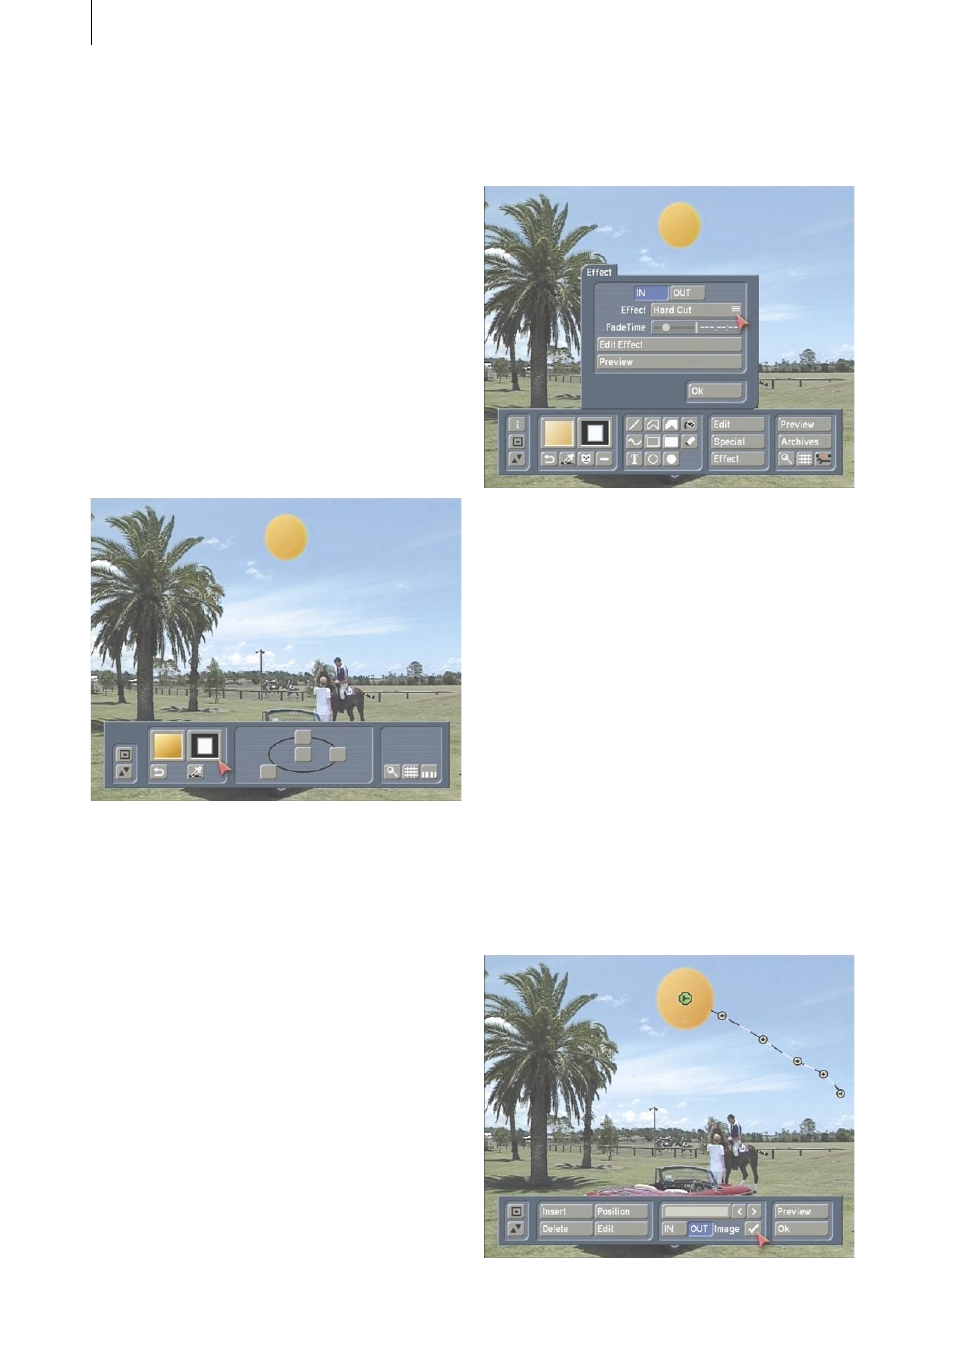
Click on IN in the Effect window in order to
specify the fade-in of the sun.Set the effect to
the setting Hard cut so that there is no fade-in
time.
Then click on OUT and set the effect to Custom.
Select 3 seconds for the fade time so that fade-
out occurs during 3 seconds and the effect has a
full display time of 2 seconds.
Next, click on the Edit effect button so that an
additional menu is called up. Here you can insert
path points to specify the movement of the sun.
You already see a green point, the start position
of the movement.
Click several times on Insert so that a number
of path points appear. Now you can click on a
desired path point so that it becomes active.
Using the Position button place the path point
until you have a route for the setting of the sun.
By activating the Image button you can display
the sun at the position of the currently active
path point.