MacroSystem Candy Factory User Manual
Page 15
16
17
Once the effect has been created, create a scene
using the Scene-button, and add this new scene
directly behind the single coloured scene and
delete the black scene containing the text effect.
Then, go to the Transition Effect menu, select
Candy Factory from the effect list and press
Insert.
Set the effect length to 5 seconds as well.
Now use the effect option to set the Background
to Texture. You will not require the content of
the first scene.
Tip: If you know that you will be working
with the Setting Background = Texture, you
can simply add the text scene twice to the
Storyboard, as the content of the first scene is
not relevant. In this fashion, you do not need to
create another scene and also do not need to
monitor the length.
Set DeInterlace to On, as the scrolling title is
moving and this will help to avoid jittering.
Further, set Calculating to Moving Scene, as we
are working with a scrolling title.
Now click onto the button Start program to
begin work with Candy Factory.
You will see an interface panel, where you must
press the button Default in order to use the
software‘s default settings. Confirm the next
requester with Yes.
You will see that the single coloured (orange)
scene has been replaced by the default
parameters of the program, and that the scene
now seems grey with a bright circle in the
centre, caused by a light source.
You can‘t yet see the text hovering above the
scene, s at this point in time of the scene, it must
first scroll into view.
Set the slider found to the top right to the
time code of 000.02:20 to see the text. You will
notice that it is no longer white. Instead, the
parameters of the software have made it appear
gold/yellow.
We will now start working on the text with
Candy Factory!
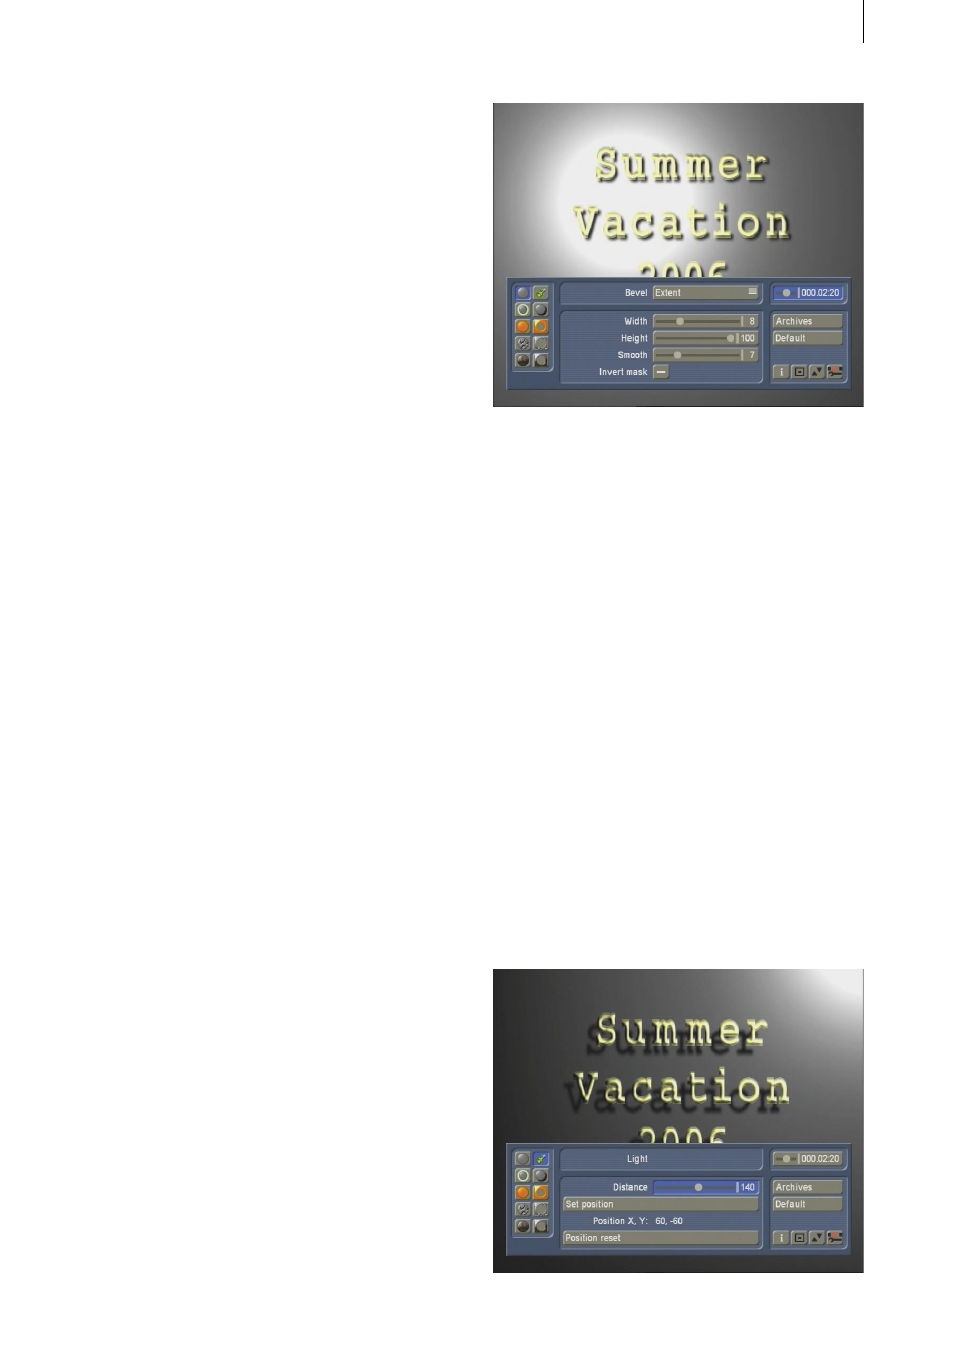
Leave the preset settings in the Bevel menu as
they are and go to the menu Light instead.
Change the position of the light source by
clicking on the Set position button. The interface
panel will disappear and you can use the
trackball to move the on-screen pointer to the
desired screen position.
For this example, we have gone for a light
source positioned at the following coordinates:
X = 60 and Y -60. While positioning the source,
you can monitor the coordinates inside the small
information panel near the top of the screen.
Once you have found the right position, press
the left trackball button to confirm and the user
interface will return.
Next, click onto the slider for Distance value and
move it to 140. This puts the light source further
away from the title.