MacroSystem PiP-Studio 3D User Manual
Page 18
18
19
To do so, click on Add path, select the
positioning option After and load the Current
style which had previously been saved in the
archives.
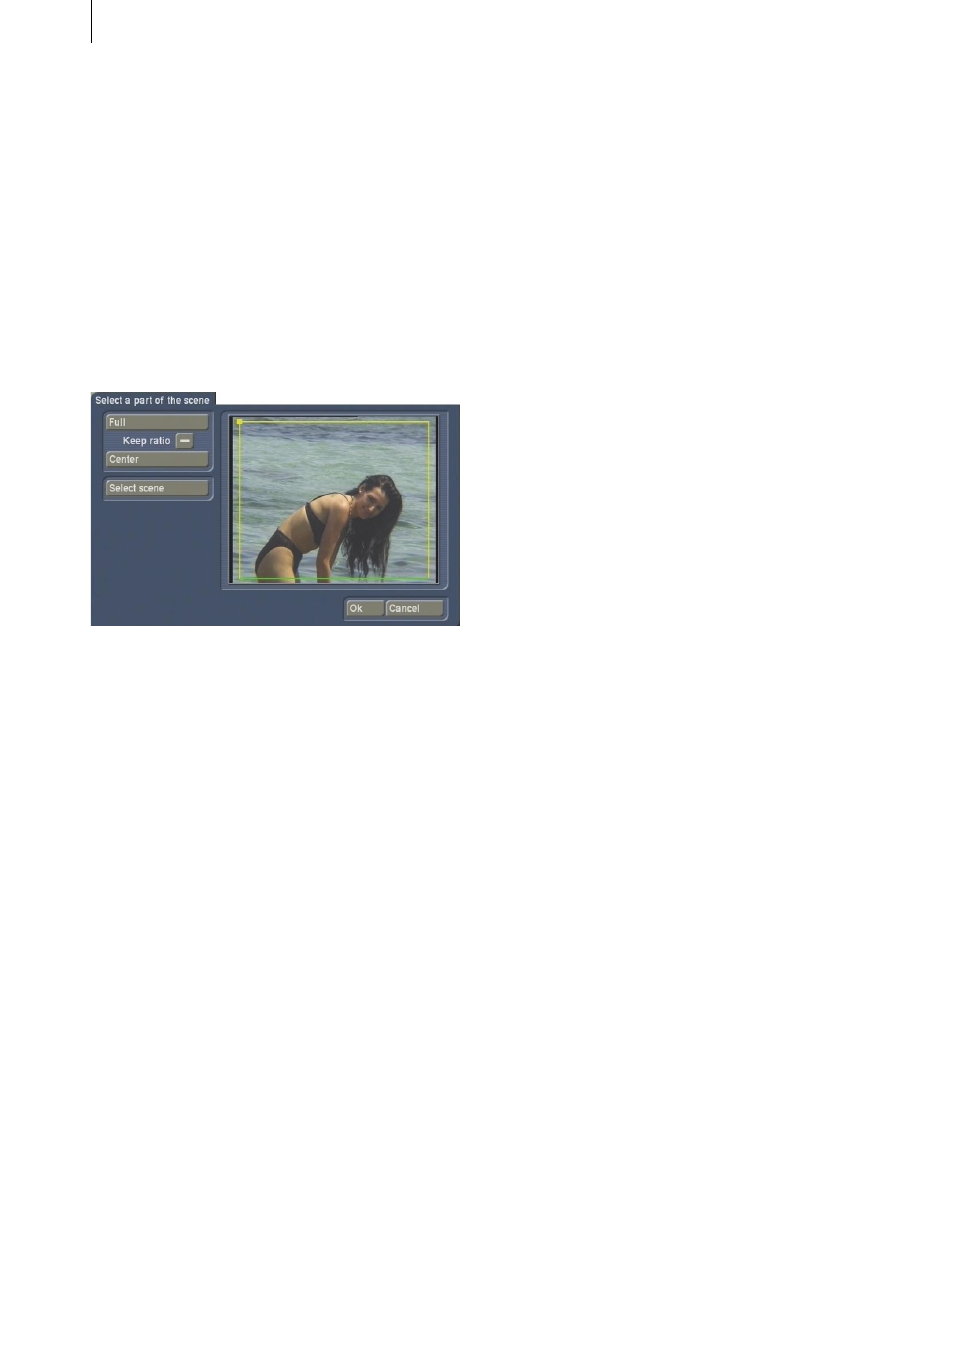
Then select the second scene. To do so, pull up
the Style menu and click on the Select scene
button.
Select the second scene from the scene bin,
confirm with Ok and determine the desired
extract. Confirm with Ok.
To determine a finishing position for this PIP,
move the finishing point to the right, making
sure that it is on the same horizontal line as the
first PIP.
Then incline the PIP by selecting the y axis from
the Waypoint menu and incline the image until
you reach the value of –58 degrees.
The image size 40 (HDV project = 125) was
transferred from the archive and is therefore still
applicable.
Then set another way point on this path too and
change it into a route point. Then slide the route
point onto the finishing point.
Set the y axis at this point to –58 degrees as well
and the time of the route point to the maximum
possible setting (here: 9:23).
Now you can edit the starting position of the
second PIP. Activate the starting route point and
move it to the right hand side of the image.
Finally, use the preview symbol to display the
effect.
The second path should now for instance be
saved as “Scene 2 Style” under current style.
You should also save all scene with the name
“Opposite”.
Exit the program via the menu symbol in the
bottom right hand corner of the toolbar and start
the calculation of the scene. You can see how
the two PIPs or scenes are opposite each other.
Since you will notice that no stand time has
been set, during which the scenes are opposite
each other, you need to add them now.
Note: You can also load the current stand of this
exercise from the archive which is provided, to
compare it for instance with your stand.
To do so, activate your first (left) path and load
the entry “Lesson 1a Path 1” from the Archives
menu, current path.
In order to also load the outline properties, you
have to load the entry “Lesson 1 Style” for each
path from Active, active style.
Do the same for the second (right) path. But in
this case load “Lesson 1a Path 2” and “Lesson 1
Style”.
Now you can set the stand time for the image.
You have already prepared this setting since
you have placed a route point over the finishing
point in the path of both PIP movements.
Once you have restarted PIP Studio 3D, change
the path slightly.
Pull up the Scene menu and continue clicking
on the Prev path button until it can no longer be
selected.
Then, from the Current path menu, use the
Prev waypoint and Next waypoint button to
select the middle position in the path, in other
words the route point between the starting and
finishing point.
Then pull up the Waypoint menu and set the
control for the time setting to 7:00 (as long as
you are still working with scenes which are
10 seconds long. Otherwise change the time
accordingly). This enables you to determine at
which point in time the PIP should reach this
position.