MacroSystem PiP-Studio 3D User Manual
Page 7
6
7
4.2 Start PIP-Studio 3D
Use the Start PIP-Studio 3D function to create
your own customised PIP.
Use this option only once you have already
created a PIP scene from Select PIP-Studio 3D
preset.
Once you have clicked on the Start PIP-Studio
3D button, you will reach the first menu, namely
the scene menu.
In addition to the basic settings of the paths on
the scene which you will find in this menu, there
are also jump keys for other menus, which are
identical in all menus.
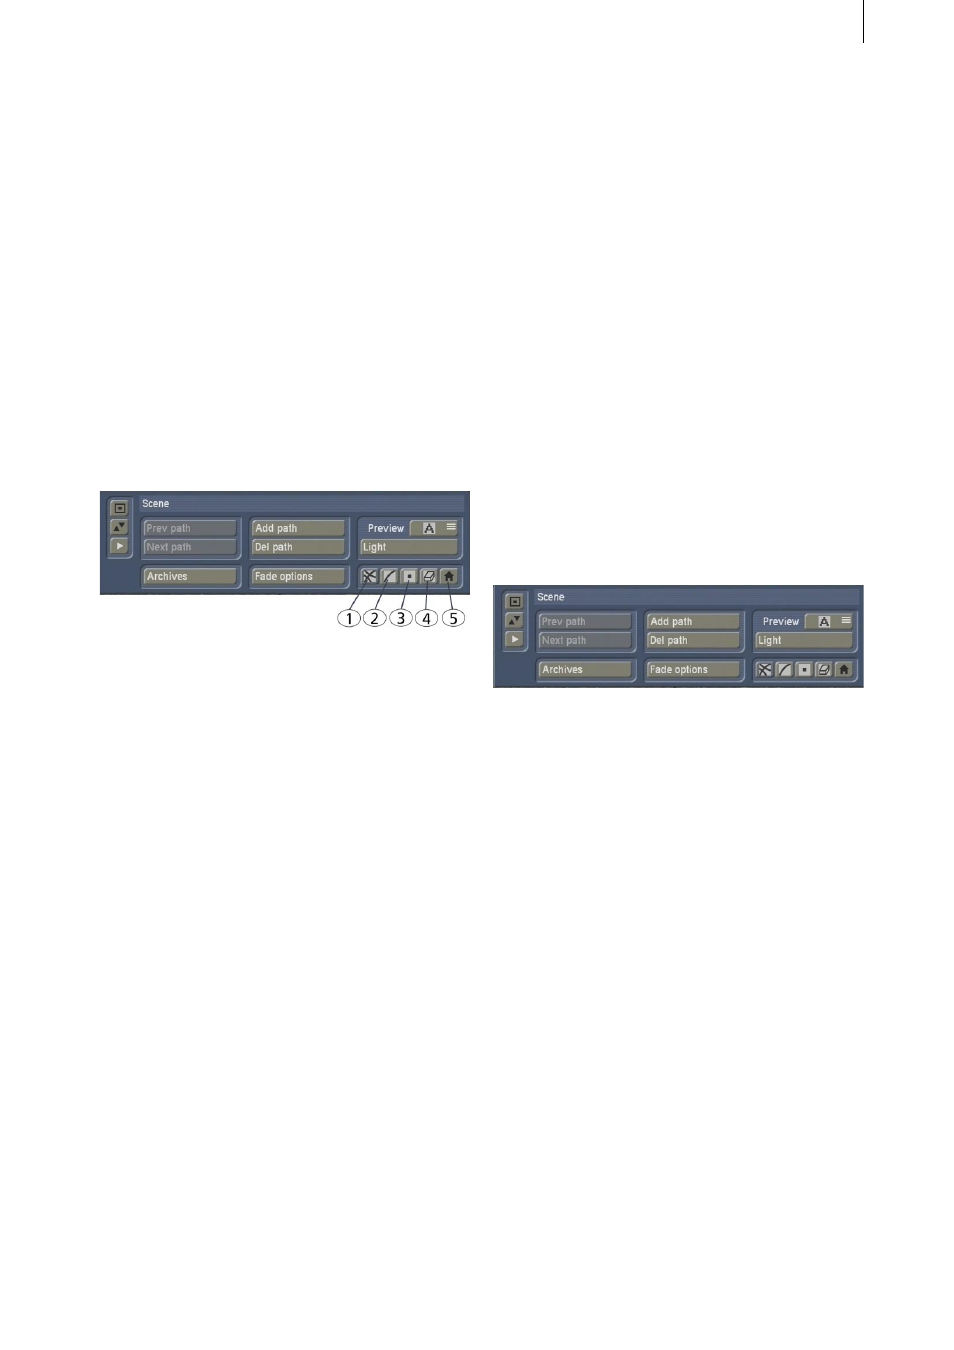
(1) Scene menu
(2) Current path menu
(3) Waypoint menu
(4) Style menu
(5) End program, accept all settings
In addition, you will also see three buttons
on the left hand side of the screen, which are
used to minimize the bar, move the bar to the
opposite side of the screen and call up a preview
(Play symbol).
Note: The preview shows the background image
and displays the PIP scene(s) which are placed
on it as grey scenes.
Note: When you start the PIP-Studio 3D program
for the first time after it has been installed and
haven’t yet pulled up the PIP-Studio 3D default
settings, you will see your background scene
with a PIP, which includes the same scene. In
order to make a clear distinction here, please
change the PIP scene.
To do so, click on the Style menu button and
then on Select scene from the next window.
Another menu appears, and again click on
Select scene. From the scene bin which appears,
you can now select a different scene. Then close
the scene bin and the next window by clicking
on Ok and then click on the relevant symbol to
go to the Scene menu.
The exact procedure for creating the menu is
described in Chapter 4.2.4 Style.
4.2.1 Scene menu
In this menu you can determine the global
settings of the path. You can also add or delete
other paths.
You can also define the lighting effect, for which
up to three light sources are available and which
can be individually adjusted.
In the background you can see a large
representation of your scene.
• Prev path / Next path: If you have used more
than one path, you can use these buttons to
activate the different paths. These buttons are
not active if you are using only one path.
• Add path: With the PIP-Studio 3D, you are able
to use several PIPs in one creation process. To
do so, click on this button to add a path for each
one.
Since paths can also cross, make sure that when
the screen prompt appears, you define whether
this path is to be added in front of or behind the
current path.
• Del path: Use this button to delete the path
which is currently active, after you have
confirmed the warning message.
• Fade options: Use this button to pull up a
window where you can set the fade-in and fade-
out times of the path.
An alpha value can also be assigned to the
object.