MacroSystem PiP-Studio 3D User Manual
Page 5
4
5
Please make sure that the effect length is set
for the whole time of the scene which has been
added.
Then look at the options shown on the right next
to the effects list (see below).
4.1 Select PIP-Studio 3D preset
Use the Select PIP-Studio 3D preset function
to quickly create animations with a PIP (small
image on the scene) via a simple manager.
The settings which are defined here are
transferred to the PIP Studio 3D menu (see
Chapter 4.2 Starting PIP-Studio 3D), when you
then start the program.
We would recommend that you first try this way
of PIP creation to gradually familiarise yourself
with the program.
After you have clicked on the Select PIP-Studio
3D preset button, this takes you to a new menu,
which you can use to produce the first PIP effect
in two steps.
Note: If you want to use several PIPs in the
scene, you first have to create one PIP and then
create another PIP with the newly created scene.
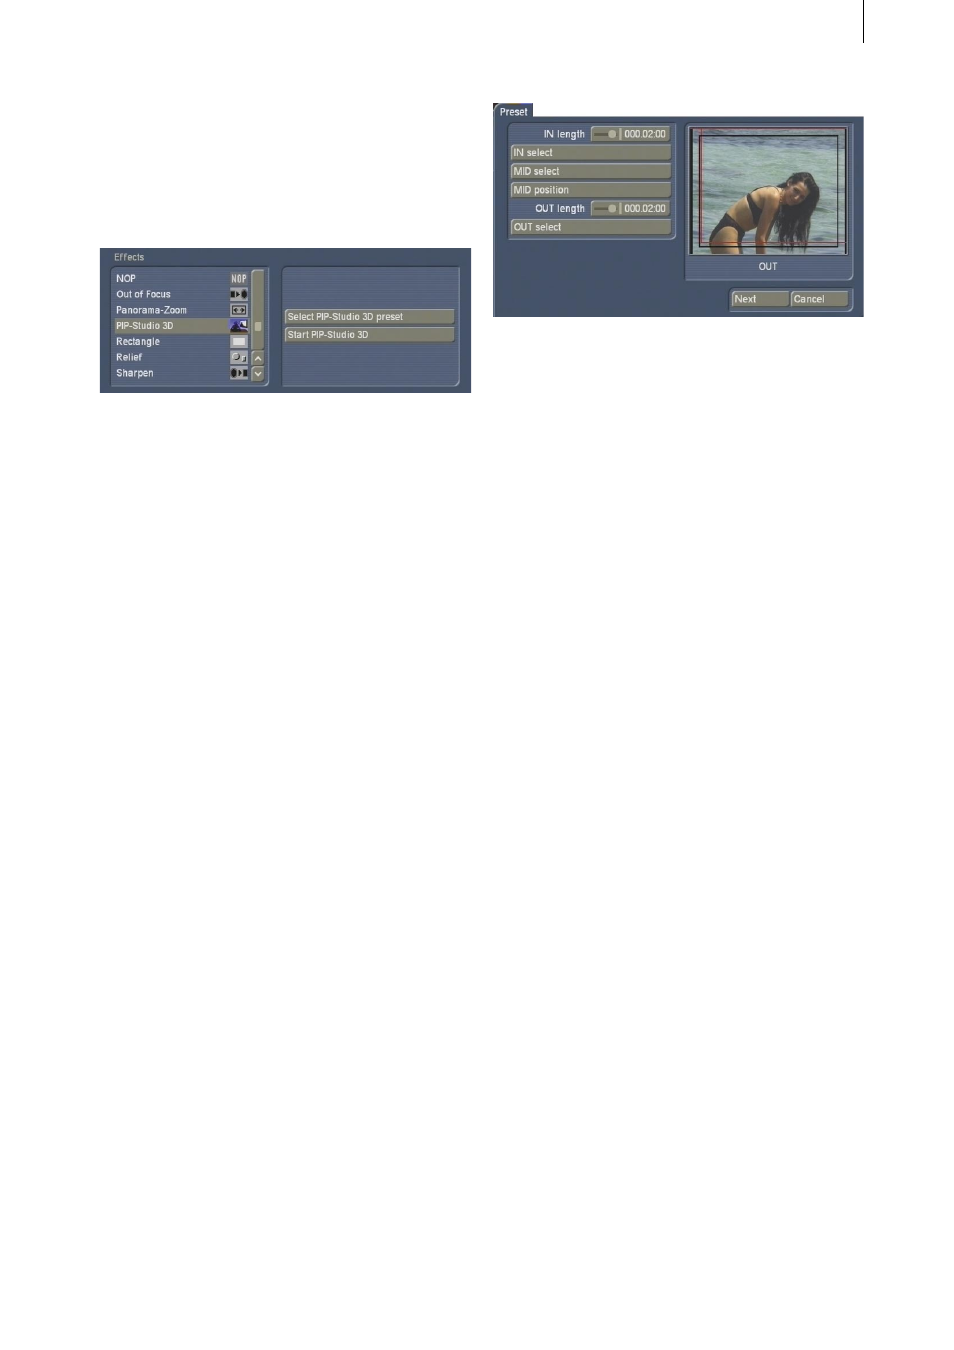
In the first menu you have the option to create
the PIP sequence.
A preview of your scene is shown on the right
hand side of the menu. On top of that is a
moving red outline which displays the current
setting of the PIP paths.
The following settings options are displayed on
the left hand side of the menu:
• IN length: Use this slider control to set the time
at which the PIP should fade in. The maximum
length is the length of the scene.
• IN select: Here you select the fade-in path.
You’re taken to a menu where you can set the
behaviour of the path. Select Preset Type to set
a more accurate definition of the path property.
You can either select Simple, Zoom or Rotation.
Once you have selected your option, this
changes the settings in the list above.
Select Mirror to mirror the selected path and to
change it as such. The red box in the preview
always shows you the path which has been set.
Once you have set the behaviour of the path,
click on Ok.
• MID select: Click on this function and a menu
appears which you can use to set the behaviour
of the PIP during the middle phase. Select
Type to set a more accurate definition of the
path property. You can either select Simple,
Bouncing, Rotation or Pulsation. Selecting one
of these options changes the settings in the list
above.
Select Mirror to mirror the selected path and to
change it as such. The red box in the preview
always shows you the path which has been set.
Once you have set the behaviour of the path,
click on Ok.