MicroLinks UM12 - user manual User Manual
Page 53

Microscope Software manual http://www.ViTiny.com
53
Copyright © 2008-2014 MicroLinks Technology Corp.
Non-Contacted (High Magnification)
Non-Contacted (Low Magnification)
Fig.5-34 Non-Contacted
Based on the above steps it can measure horizontal and vertical scale.
EX: Measurement for non-contact object.
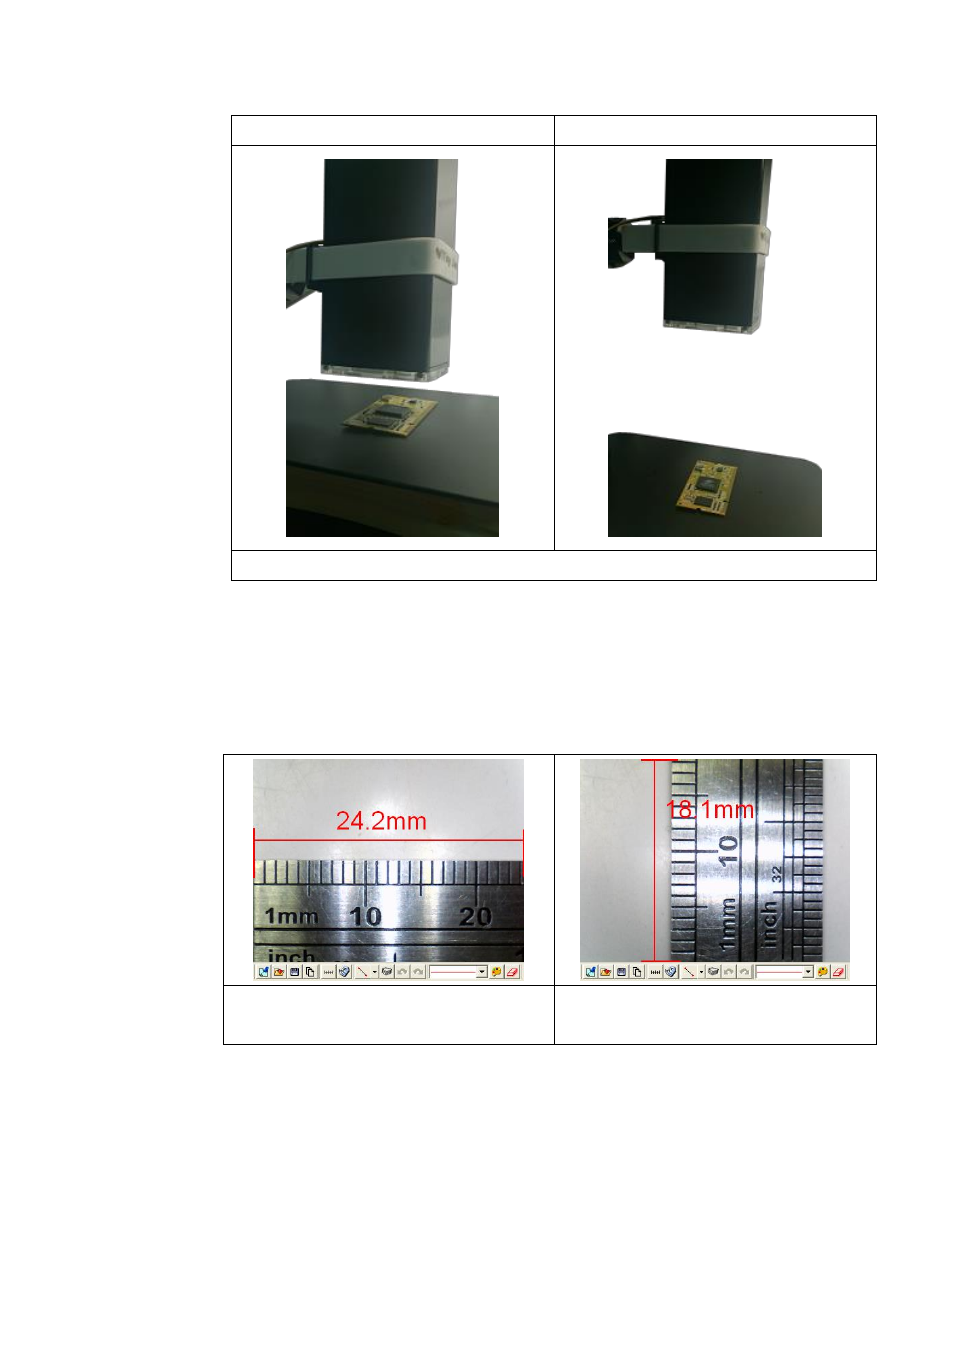
Use the “metal ruler” as a measurement base, the machine and the observation
object has distance, the focus of the video image is clear. Image shown in Fig.5-35
and Fig.5-36 is the result after measurement, horizontal and vertical scale range is
24.2mm and 18.1mm.
Fig.5-35 Horizontal scale range is
24.2mm
Fig.5-36 Vertical scale range is 18.1mm
9. Factors cause the inaccurate on the measurement
There are few factors could cause the inaccurate on the measured figures.
The used ruler is not exactly accurate, for example, a metal ruler is not
accurate than a calibrator.