3 hot swap components – OpenEye GraniteRack 3U User Manual
Page 98
Array Maintenance
4-10
4.3 Hot Swap Components
The disk array supports hot-swappable disk trays, power supply modules and
cooling fan unit. The following sections describe how to remove and install the
“Hot-Swap” parts without interrupting the data access while the disk array is on.
4.3.1 Replacing a disk
To replace a disk, perform the following steps (Refer to 2.6 Installing hard
disks)
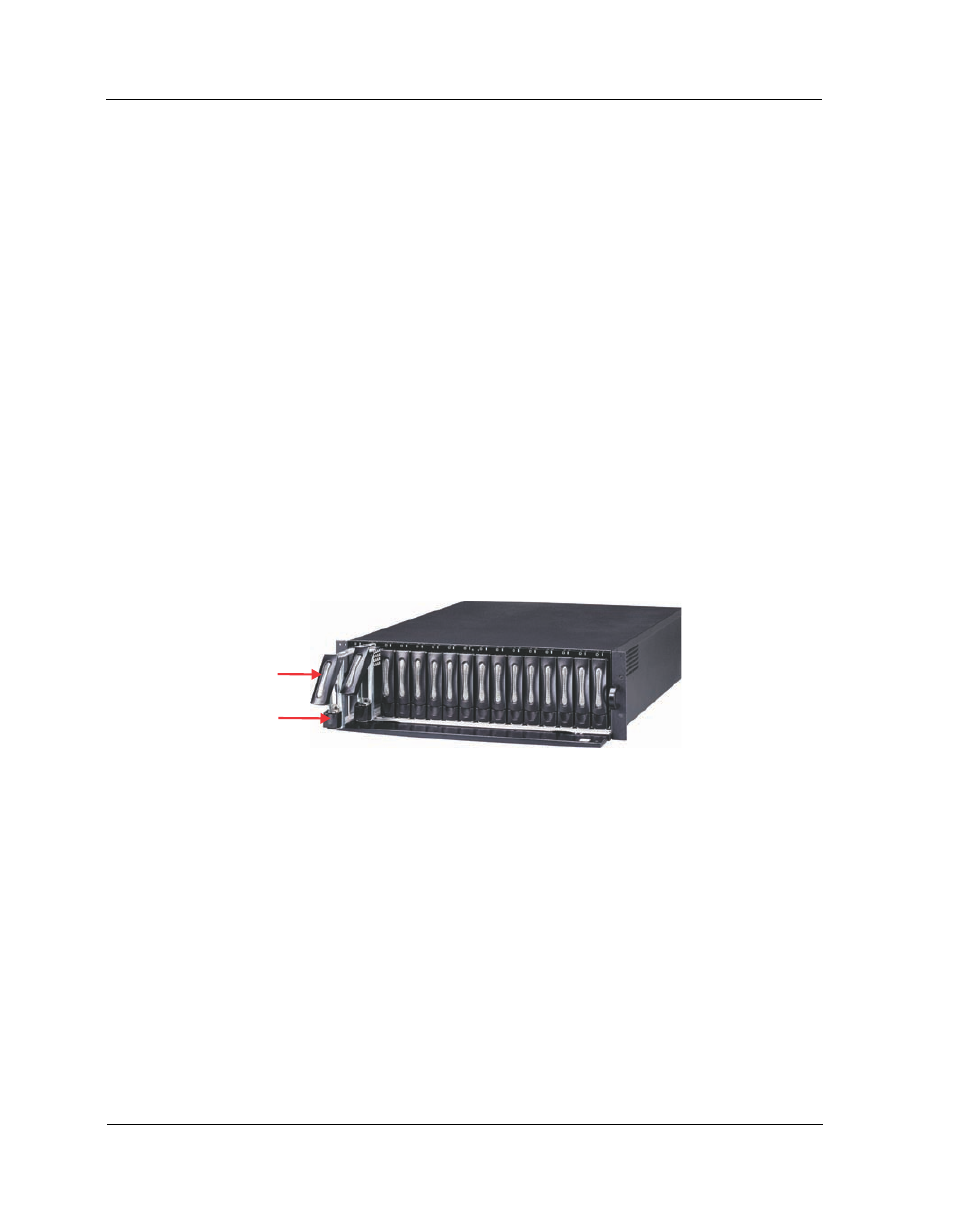
1. Open the tray lever by sliding the latch and wait for the drive to spin
down. The disk LED on the front panel will turn from green to red indi-
cate the disk is powered down.
Lever
Latch
2. Lift the lever to disengage the disk tray from the slot.
3. Gently pull the disk tray out of the slot.
4. Replace the HDD.
5. Slide the tray into a slot until it clicks into place. The HDD status LED will
turn green on front panel.
6. Press the lever in until you hear the latch click into place.