Front panel, Rear panel, Connecting your system – Synaps CHD-3000 User Manual
Page 7
7
5. Front panel
POWER KEY: To switch the receiver power on/stand by
MENU KEY
To enter into the main menu.
<,> KEY: To adjust volume level, or to move cursor left or right in the menu.
^, v KEY : To change channels, or to move cursor up or down in the menu
OK KEY: To see TV/Radio channel list, or to confirm in the menu.
Remote Sensor: Detects infrared signal from remote control unit
Display: Indicates operating status of receiver
POWER Indicator: while the receiver is power on and at standby mode.
Signal Indicator: When receiving signal is strong, the signal indicator is lighted.
Card Slot: One slot CA Interface for Conax, Insert the smart card chip side up!
Common Interface: One socket for Conditional Access Modules CAM (optional).
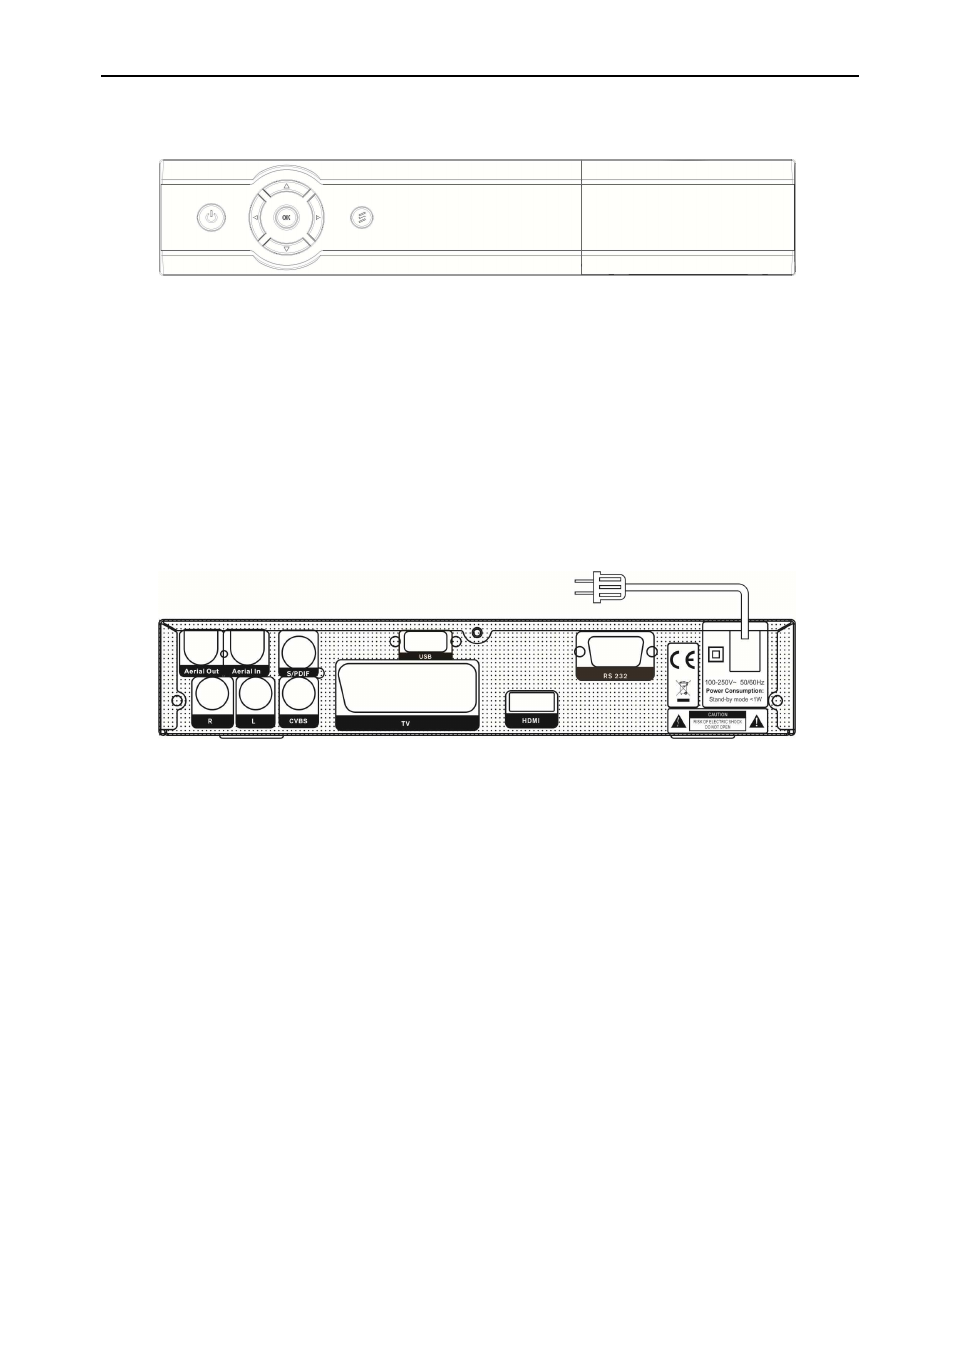
6. Rear Panel
Please refer to the diagram above for all possible connections of your receiver
Do not connect the unit to the mains socket until all other connections have been made and checked.
Your configuration can vary depending on model
AERIAL OUT: This enables the connection of another receiver.
AERIAL IN : This port is to connect the coaxial cable from terrestrial antenna or cable network.
TV : This is used to connect your TV through SCART cable.
CVBS : This RCA connector is used to connect any external video.
AUDIO R/L : These RCA connectors are used to connect any external audio amp or system.
COAXIAL: Digital Audio interface, connect to AV amplifier S/PDIF input terminal.
HDMI: Audio and Video output socket for TV set with HDMI Input Jack only.
USB: USB 2.0 Host, connect to USB hard disk, or flash disk
RS 232C SERIAL PORT: This is used to connect your receiver to a computer through a serial cable.
7. Connecting Your System
There are three ways to connect the receiver to your existing TV system. We recommend using one
of the following cases for the best result:
1. If you have a high definition television set, you should use a HDMI cable for best result, Plug one
end of the cable into the HDMI socket on the receiver, and the other end into the matching socket on
your television. In this case, you do not have to make audio connections because the HDMI connector
can output stereo audio or Dolby digital audio.
2. Connect one end of SCART cable to the TV (SCART) jack on the back of the receiver and the other
end to a SCART jack on your TV.
3. Connect one end of RCA cable to the RCA jack on the back of the receiver and the other end to a