MCZ AirSystem 70 DX User Manual
Page 28
Chapter 4
INSTALLATION AND USE MANUAL
page
28
Installation and assembly
Technical service – MCZ S.p.A. all rights reserved - Reproduction prohibited
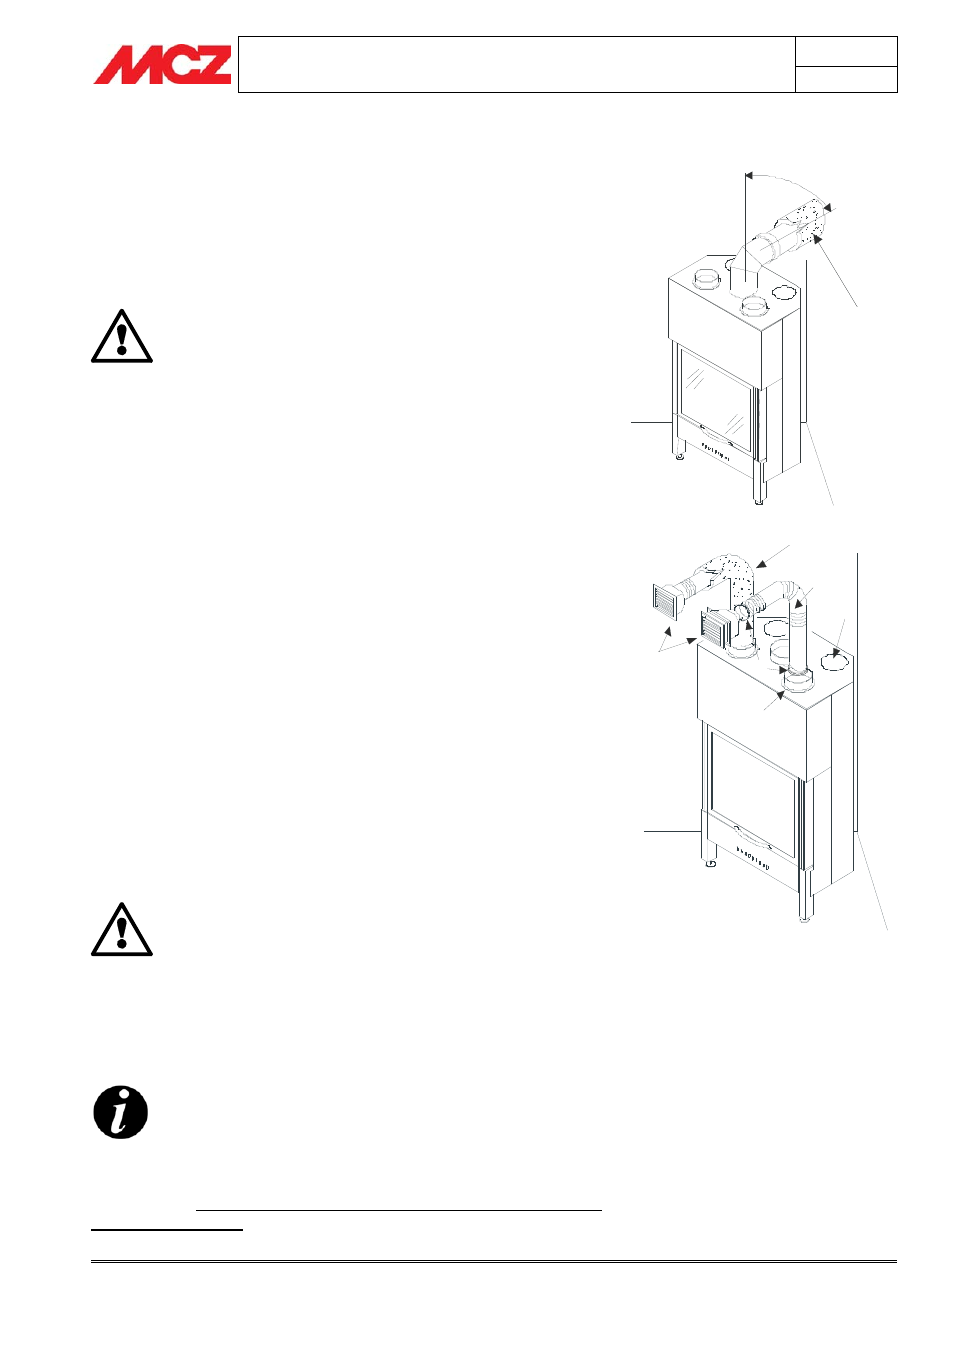
4.11. CONNECTION TO THE FLUE PIPE
We recommend connecting the stove to the flue pipe by means of pipes
and bends in aluminised steel, capable of withstanding the high
temperatures which are reached in that section of pipe, and of resisting
corrosion from the fumes. These connecting pipes are available on
request in various sizes (see our price list), and they simplify
installation, as they are assembled by fitting one into another.
Any increase in the section of the connecting pipe
must start immediately above the hood of the
fireplace and not along the flue pipe section
When installation is complete, the smoke connection
must be insulated with ceramic fibre matting or
material that is resistant up to at least 600°C.
4.12. INSTALLATION OF HOT AIR OUTLET KIT
For the ducting of hot air, it is necessary the install the hoses Ø 150
mm C (optional) on the flanges located on the upper part of the
fireplace stove B. First of all, remove the knockout panels A located at
the top, using a rubber mallet or a similar tool. After breaking out the
knockout panel, remove it so as to fasten the flanges B. Fasten the
flanges with the screws provided. Connect the hoses C using the hose
clamps D. In the part opposite the hose, apply the adjustable nozzles E
which will subsequently be anchored to the decorative hood lining.
(see
figure 22)
It is advisable to:
• Insulate the ducting tubes, for example with ceramic fibre, to
isolate them from the decorative hood liner and avoid the
transmission of vibrations from the forced air fan.
• Limit the ducting to 2 linear metres for natural
ventilation, and 4 linear metres for forced ventilation.
• Insert the hot air outlet nozzles at least 2 m above the floor.
• If possible, provide ducts of the same distance to prevent
different quantities of air at different outlets.
ATTENTION! Make sure that when the stove is lit, the
shutters on the nozzles are completely open, to avoid
dangerous overheating.
4.13. INSTALLATION OF CLADDING AND HOOD
LINER
BEFORE YOU START INSTALLING THE CLADDING OF
THE FIREPLACE STOVE, READ CHAPTER 5.2
“OPERATING TEST”
The fireplace stove and the parts of the cladding must be attached to
one another WITHOUT COMING INTO CONTACT WITH THE
STEEL STRUCTURE to prevent transmission of the heat to the marble
Figure 22 – Hot air outlet kit assembly
45° Max
INSULATION
B
A
C
D
E
INSULATION