MCZ AirSystem 70 DX User Manual
Page 29
Chapter 4
INSTALLATION AND USE MANUAL
page
29
Installation and assembly
Technical service – MCZ S.p.A. all rights reserved - Reproduction prohibited
and/or stone, and to allow normal thermal dilation. Use care with wood
finsihes such as crossbeams or shelves.
We recommend making the hood liner in fire-resistant
plasterboard of 15/20 mm. thickness, with a self-supporting frame in
galvanised profile, so as not put weight on components of the cladding
(such as wooden beams and marble architraves) which do not have a
load-bearing structure and to make it easy to work in the event of
future anomalies and/or maintenance.
Dry install the fire bed of the cladding, leaving an aperture of 1 cm
between the fireplace stove and the fire bed to provide insulation.
(Figure 5)
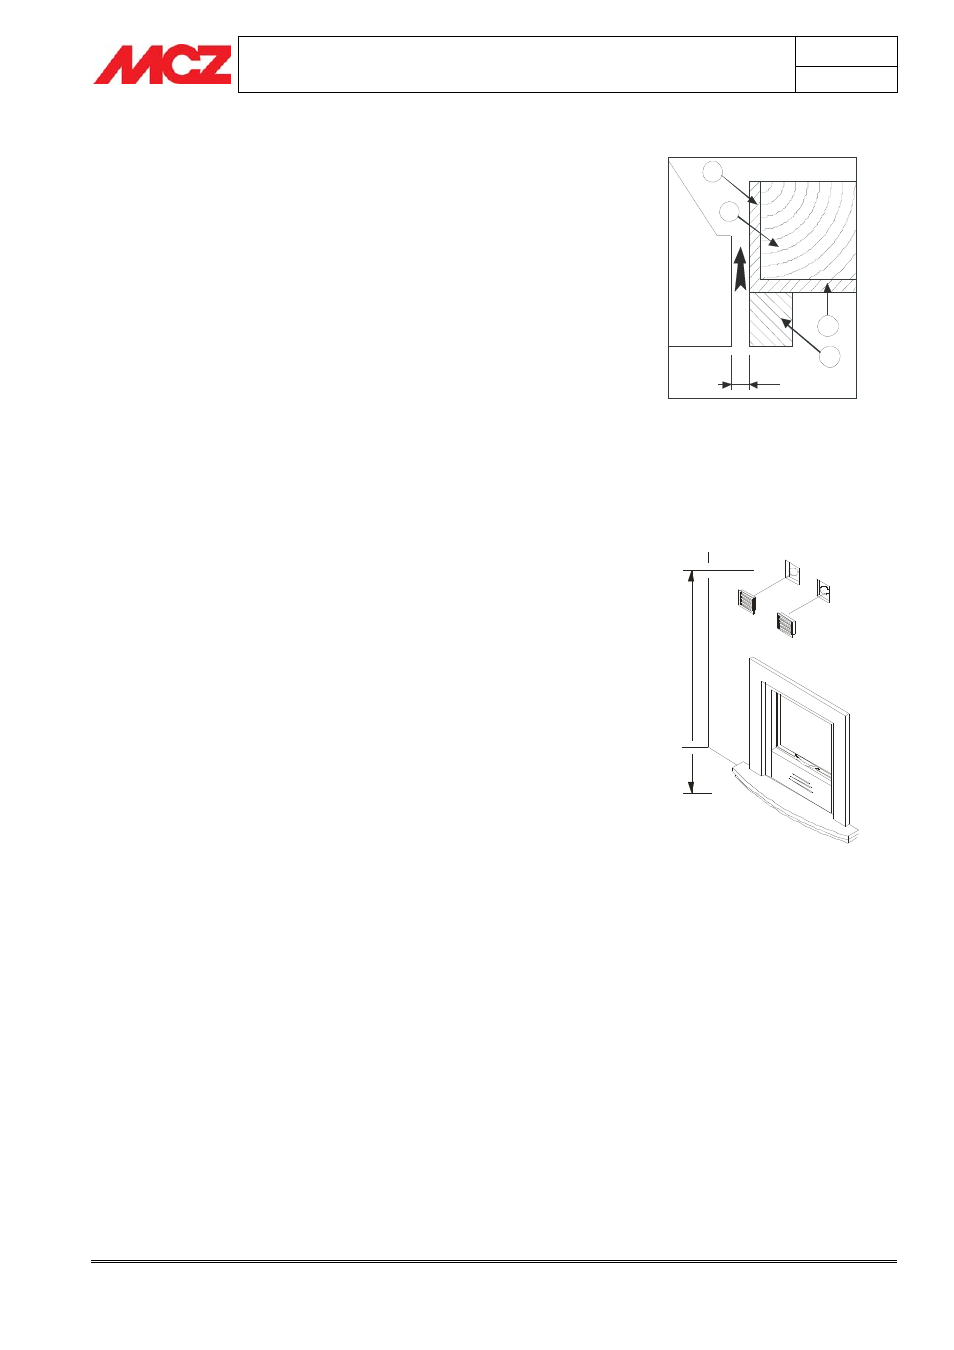
4.14. INSULATING A WOODEN BEAM
The wood beam must be protected with adequate insulation from
heated parts to prevent the risk of fire or damage of the cladding.
(figure 23)
4.15. INSTALLATION OF HOT AIR OUTLET NOZZLES
After making the two square holes 18x18, position the connectors on
the hood liner and fasten them. Insert the grilles which will snap into
place automatically by means of four hooks.
It is advisable to place the nozzles at a height of not less than
2 m from the floor in order to keep hot air from flowing directly
onto individuals.
As an alternative, it is possible to install a single nozzle (see our price
list) which is to be placed by making a rectangular hole of 16x48 on the
front or side where the hoses Ø 150 mm for hot air outlet are to be
connected
(Figure 24).
2 mt
m
in
imo
Figure 24 – Hot air nozzle kit assembly
Figure 23 – Beam insulation
THERMAL PROTECTION OF CROSSBEAM
1. Insulation applied or to be applied.
2. Wood beam
3. Marble or other material
1
1
2
3
10 mm