Disassembly and assembly – Subaru Robin RGV12100 User Manual
Page 37
34
9. DISASSEMBLY AND ASSEMBLY
9-1 PREPARATION and PRECAUTIONS
1) Be sure to memorize the location of individual parts when disassembling the generator so
that the generator can be reassembled correctly. Tag the disassembled part with the neces-
sary information to facilitate easier and smoother reassemble.
2) For more convenience, divide the parts into several groups and store them in boxes.
3) To prevent bolts and nuts from being misplaced or installed incorrectly, replace them tem-
porarily to their original position.
4) Handle disassembled parts with care; clean them before reassemble using a neutral clean-
ing fluid.
5) Use all disassembly / assembly tools properly, and use the proper tool for each specific job.
9-2 DISASSEMBLY PROCEDURES
9-2-1 CONTROL PANEL
(1) Remove the front panel.
(2) Disconnect the connectors on the wiring
from the front panel to the alternator.
9-2-2 ALTERNATOR
(1) Remove the end cover.
(2) Remove the brush cover and the brush
holder.
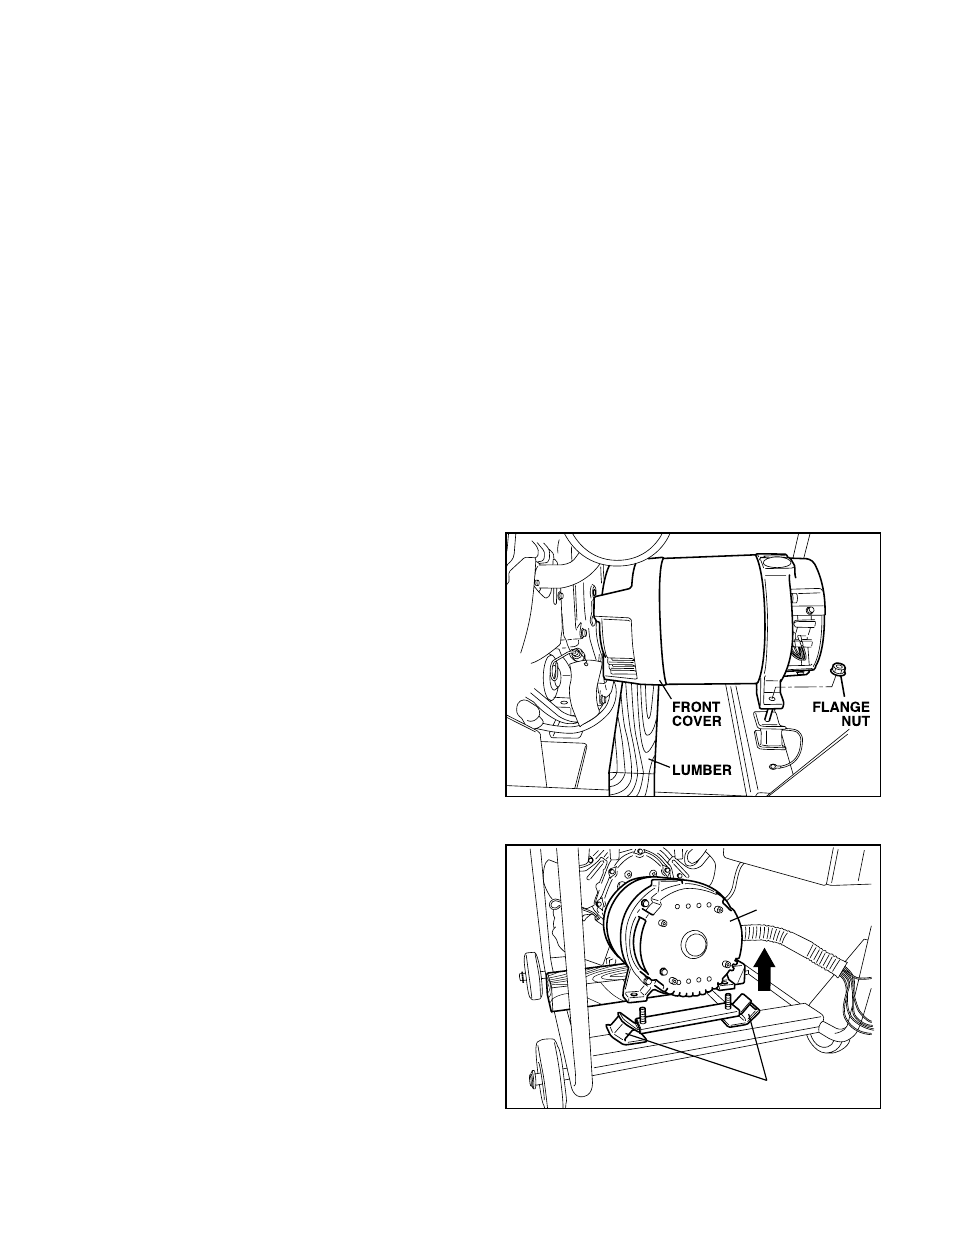
(3) Take off the two flange-nuts and lift the
front cover with a piece of lumber.
(See Fig. 9-1)
NOTE : Lift the front cover until completely
the rear cover removes from the
mount rubber. (See Fig. 9-2)
(4) Remove the rear cover.
(5) Remove the bushing.
(6) Remove the stator cover.
REAR COVER
MOUNT RUBBER
Fig. 9-1
Fig. 9-2