Adjusting the audio levels – Sony X85K 50" 4K HDR Smart LED TV User Manual
Page 39
39
Adjusting the Audio Levels
Cha
p
te
r 4
B
a
s
ic
O
per
at
io
ns
Adjusting the Audio
Levels
This section describes how to adjust the audio level for
recording/playback before you start recording or playback.
The recording level is set automatically when you select
the input port, and the playback level is set automatically
when you select the output port.
To adjust the recording level
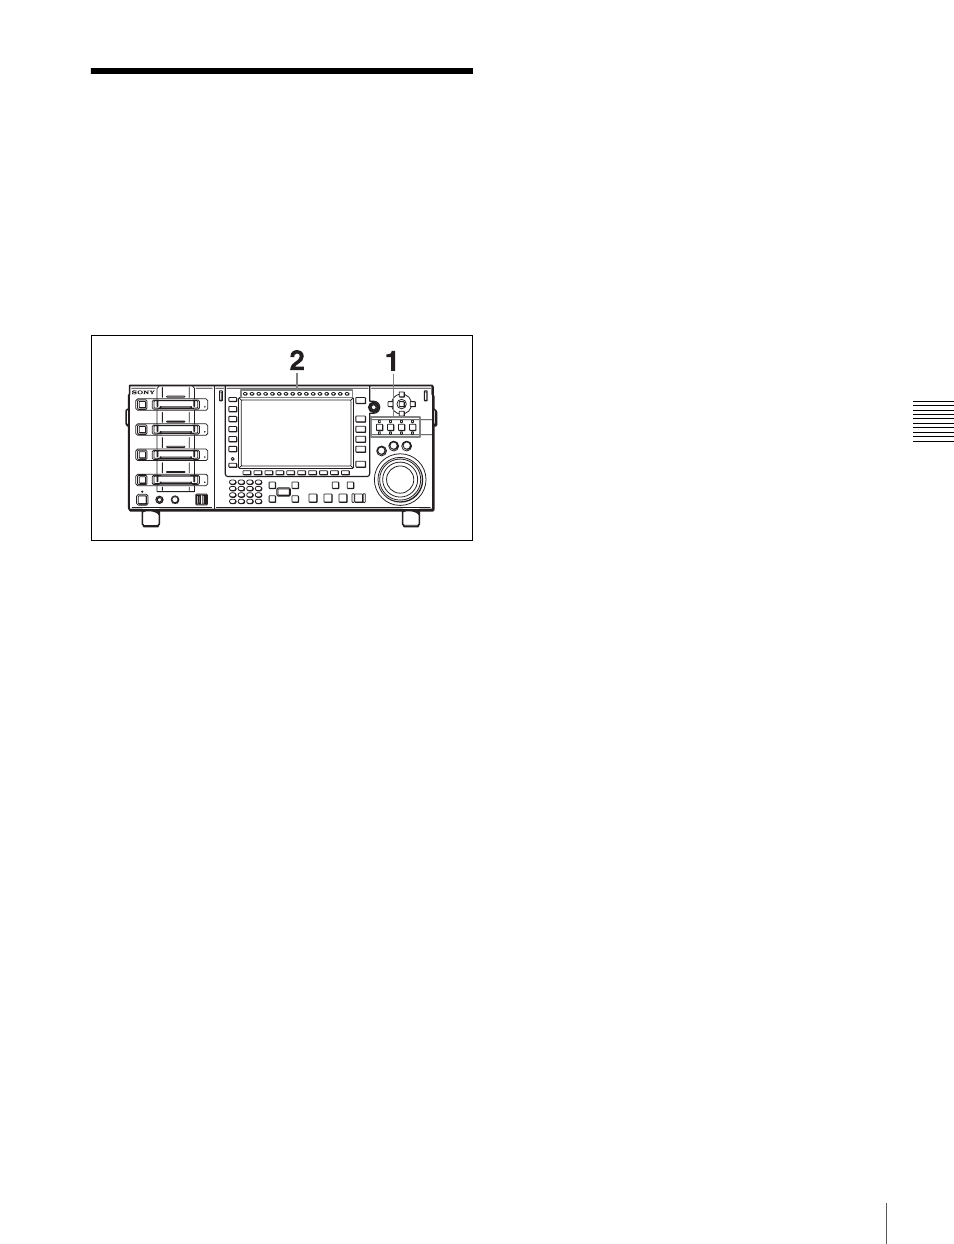
1
Press the PORT SELECT button of the input port you
want to set once or twice to display the one-port
display screen on the color display.
2
Press the button for the channel you want to adjust to
make the channel active.
Check that the audio level meter is displayed
highlighted and that the level display bar appears on
the right of the meter.
3
Use the cursor buttons or MULTI CONTROL knob to
adjust the level.
To exit level adjustment mode
Press the button of the channel that is being adjusted again.
The display of the audio level meter for each channel
returns to normal.
Level settings of input ports
To record at the reference level
Press the AUDIO button while the one-port display screen
is displayed to enter level adjustment mode. Then, make
the channel you want to record at the reference level
active, and press the MULTI CONTROL knob to set the
setting to the reference value. You can also restore the
reference value by pressing the center cursor button. When
you exit level adjustment mode, audio level meter
highlighting is turned off.
To adjust the recording level manually
Press the AUDIO button while the one-port display screen
is displayed to enter level adjustment mode. Then, make
the channel you want to adjust manually active, and use the
cursor buttons or MULTI CONTROL knob to adjust the
level so that the audio level meter indicates a level that is
close to the reference –20 dB when at the average volume
level. When you press the AUDIO button again to exit
level adjustment mode, a horizontal yellow line indicating
the setting value appears on the right of the audio level
meter to indicate that the recording level has been adjusted
manually.
Level settings of output ports
To output at the preset level (output at +4 dB for
a level recorded at the reference –20 dB)
Press the AUDIO button while the one-port display screen
is displayed to enter level adjustment mode. Then, make
the channel you want to output at the preset level active,
and press the MULTI CONTROL knob to set the setting to
the preset level. You can also restore the preset level by
pressing the center cursor button. When you exit level
adjustment mode, the audio level meter display will no
longer be highlighted.
For details on changing the reference output level for the
preset level, see the Installation Manual.
To adjust the playback level manually
Press the AUDIO button while the one-port display screen
is displayed to enter level adjustment mode. Then, make
the channel you want to adjust manually active, and use the
cursor buttons or MULTI CONTROL knob to adjust the
channel to the desired level. When you exit level
adjustment mode, a horizontal yellow line indicating the
setting value appears to the right of the audio level meter
to indicate that the playback level has been manually
adjusted.