d&b J-Series User Manual
Page 28
11. Remove the wheel board of the next cabinet.
12. Add the next cabinet. With one person to each side of the cabinet
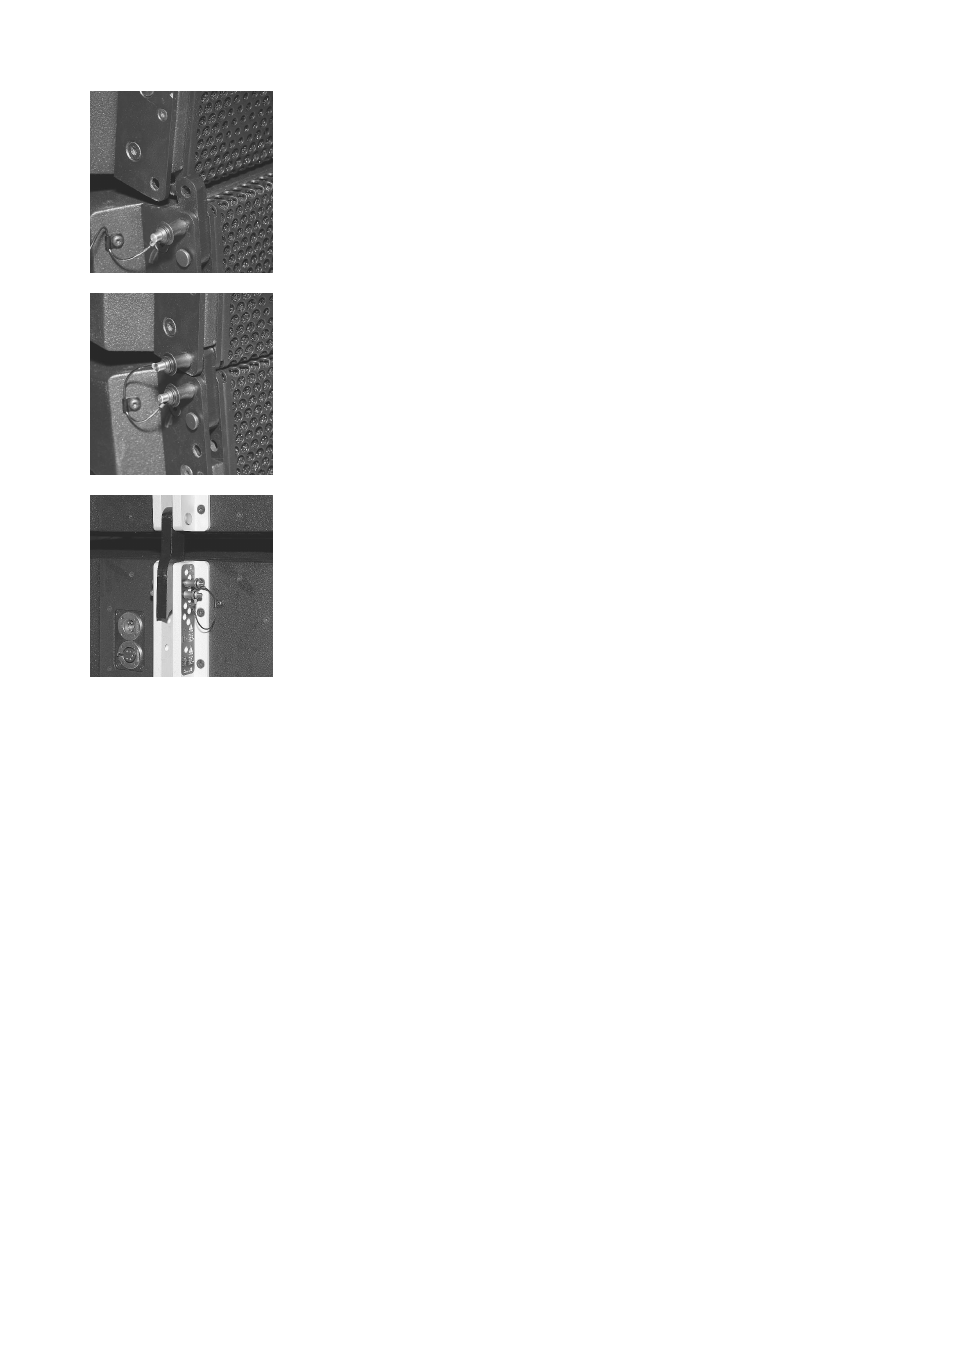
insert the Front links to the rigging tracks at the front of the cabinet -
Fig. 40a.
13. Fix the cabinets Front links with the second Locking pins - Fig. 40b.
14. Fold out the Splay link of the cabinet and connect it to the cabinet
below as follows:
•
Lower the back of the cabinet until the Splay link has
hooked over the preset Locking pin.
•
Raise the back of the cabinet until the Splay link has
completely hooked into the Locking pin.
•
Insert the second Locking pin to fix the desired splay angle.
15. Attach all cabinets in the same manner until the assembly is
completed.
Wiring
16. Connect the cables and link cables according to the number of
amplifier channels and cabinets used.
Securing the set up
Secure the ground stack against movement and possible tipping over.
Derigging
To dismantle the ground stack, follow the assembly instructions in
reverse order. The same safety instructions apply.
J-Series Rigging manual
(1.3 EN)
Page 28 of 34
a)
b)
c)
Fig. 40: Attaching the J8/J12 cabinets