2 saving custom patterns to the sd card – Doremi GENeration3D User Manual
Page 30
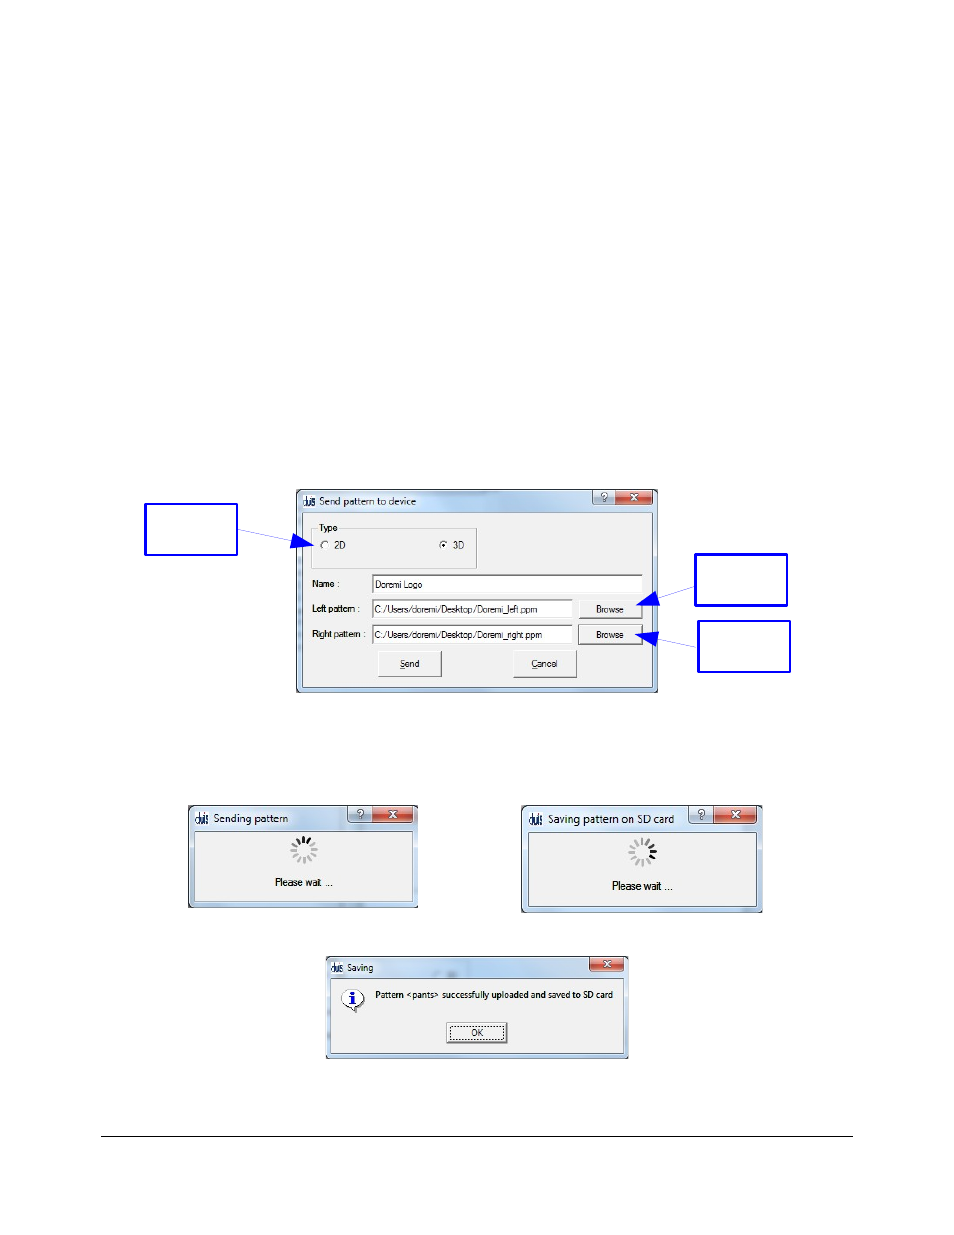
6.4.1.2 Saving Custom Patterns to the SD Card
1. To save a custom pattern from your PC to the SD card, press the “Add” button (Figure 13).
2. For 2D patterns, click the 2D radio button on the “Send pattern to device” pop-up window
3. For 3D patterns, click the 3D radio button on the “Send pattern to device” pop-up window
4. Type a name for the pattern in the “Name” field (Figure 14). This will be the name
displayed on the front panel of the Generation 3D and in the Patterns list for this pattern.
5. Press the Browse button next to the “Left pattern” field and locate the file for the left eye
image (Figure 14).
6. Press the Browse button next to the “Right pattern” filed and locate the file for the left eye
image (Figure 14).
•
For 2D patterns, press the Browse button next to the “Pattern” filed and locate the
single image file.
7. Click the “Send” button to send the pattern to the Generation 3D and save it on the SD card
Figure 14: Send pattern to device window
•
DUIs will display a loading window while the pattern is being loaded to the device and
saved to the SD card (Figure 15).
•
Once the load and save are complete, DUIs will display success message (Figure 16).
Figure 15: DUIs Loading windows
Figure 16: DUIs Success message
G3D.OM.002067.DRM
Page 30
Version 1.3
Doremi Labs
Browse to
load the left
Pattern
Browse to
load the right
Pattern
2D or 3D
Radio buttons