Adjusting element and layout durations, Additional layout and element options – Daktronics Show Control System User Manual
Page 48
41
Daktronics Show Control System
Presentations 201
Adjusting element and layout durations
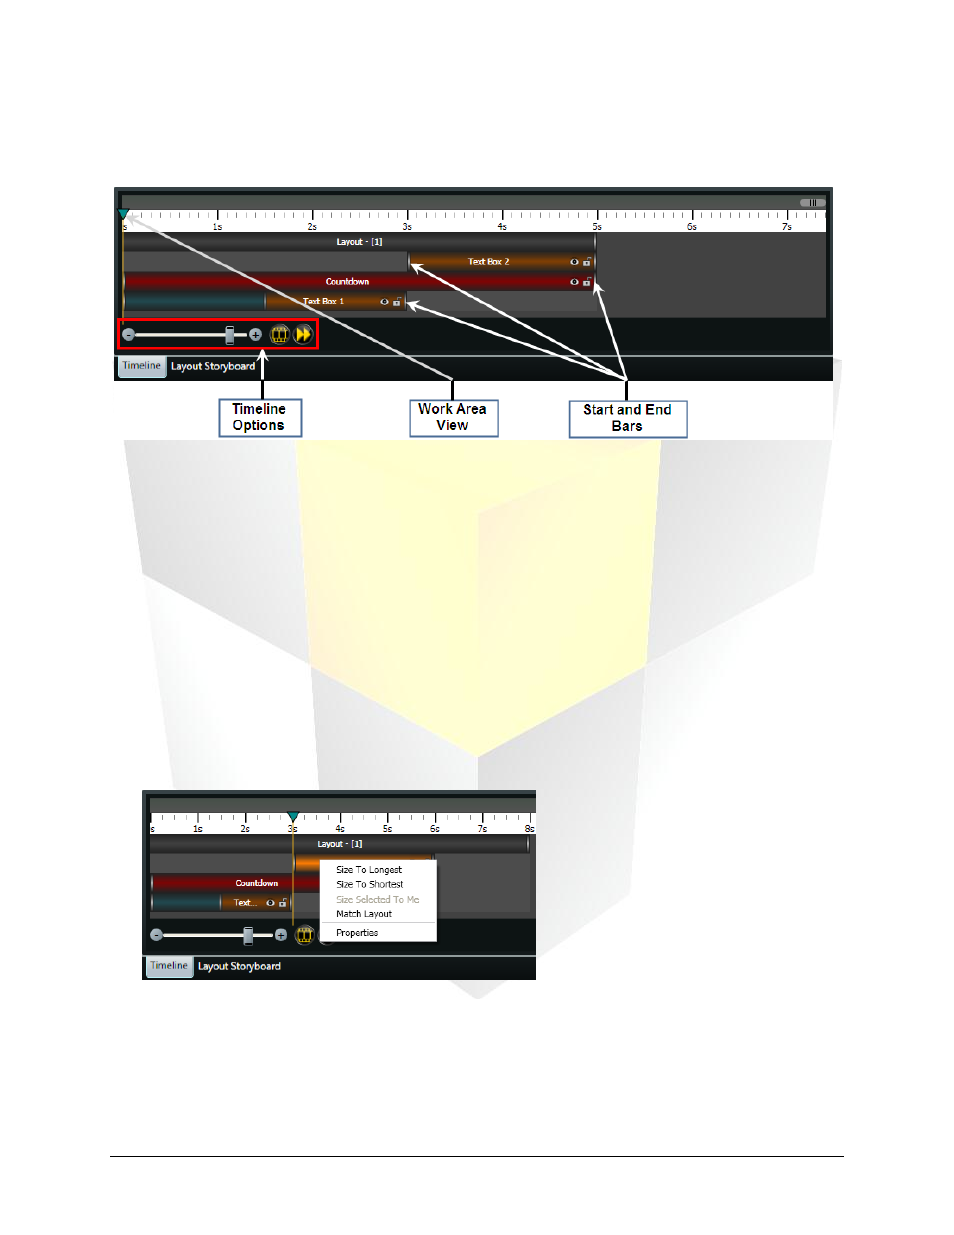
First, there are a few pieces of the timeline that you should be familiar with:
The example above is of a layout containing an image and two text boxes. The bar on top (labeled
“Layout – [1]”) represents the layout’s duration, which is currently set at five seconds. The bars below the
layout’s bar represent each element on the layout, and designate each element’s start and end times.
They will cause the elements to be displayed as follows:
00:00.00 – “Layout – [1]” starts, “Countdown” image appears and the transition set for “Text Box 1” begins
00:01.52 – “Text Box 1” transition completes
00:03.00 – “Text Box 1” disappears, “Text Box 2” appears
00:05.00 – “Text Box 2” and “Countdown” disappear and layout ends
To adjust the duration of a layout, and the start and end times of elements, click and drag the appropriate
Start or End Bar to set the desired start or end point for the element or layout.
Additional Layout and Element Options
1. Right-click on an element or layout to open its context menu.
2. Choose from the following menu options to assist in adjusting an element’s duration:
Size To Longest: Adjust the element’s duration to match the element with the longest duration.
Size To Shortest: Adjust the element’s duration to match the element with the shortest duration.
Size Selected To Me: Adjust multiple selected elements’ duration to match this element’s
duration.