Adjusting the handlebar, Adjusting the pta, Parallel trimming action) lever - sprint – DR Power Self-Propelled 6.75 Pro-XL (September 2010 - April 2013) User Manual
Page 11: And pro
CONTACT US AT www.DRpower.com 11
Before performing any adjustment, maintenance procedure or inspection, stop
the engine, wait five (5) minutes to allow parts to cool and disconnect the
spark plug wire, keeping it away from the spark plug.
Adjusting the Handlebar
It is important to find a Handlebar height that allows the Mow-Ball Support to
hover just above the ground and remain balanced so you do not have to push
down or pull up on the Handlebar. When in use, proper adjustment is critical to
best performance.
At the proper height, your hands should rest at a comfortable level and the front
end of the Trimmer should glide easily on the Mow-Ball Support as shown in
Figure 22 on page 16. You may find you like different Handlebar heights for
different mowing conditions.
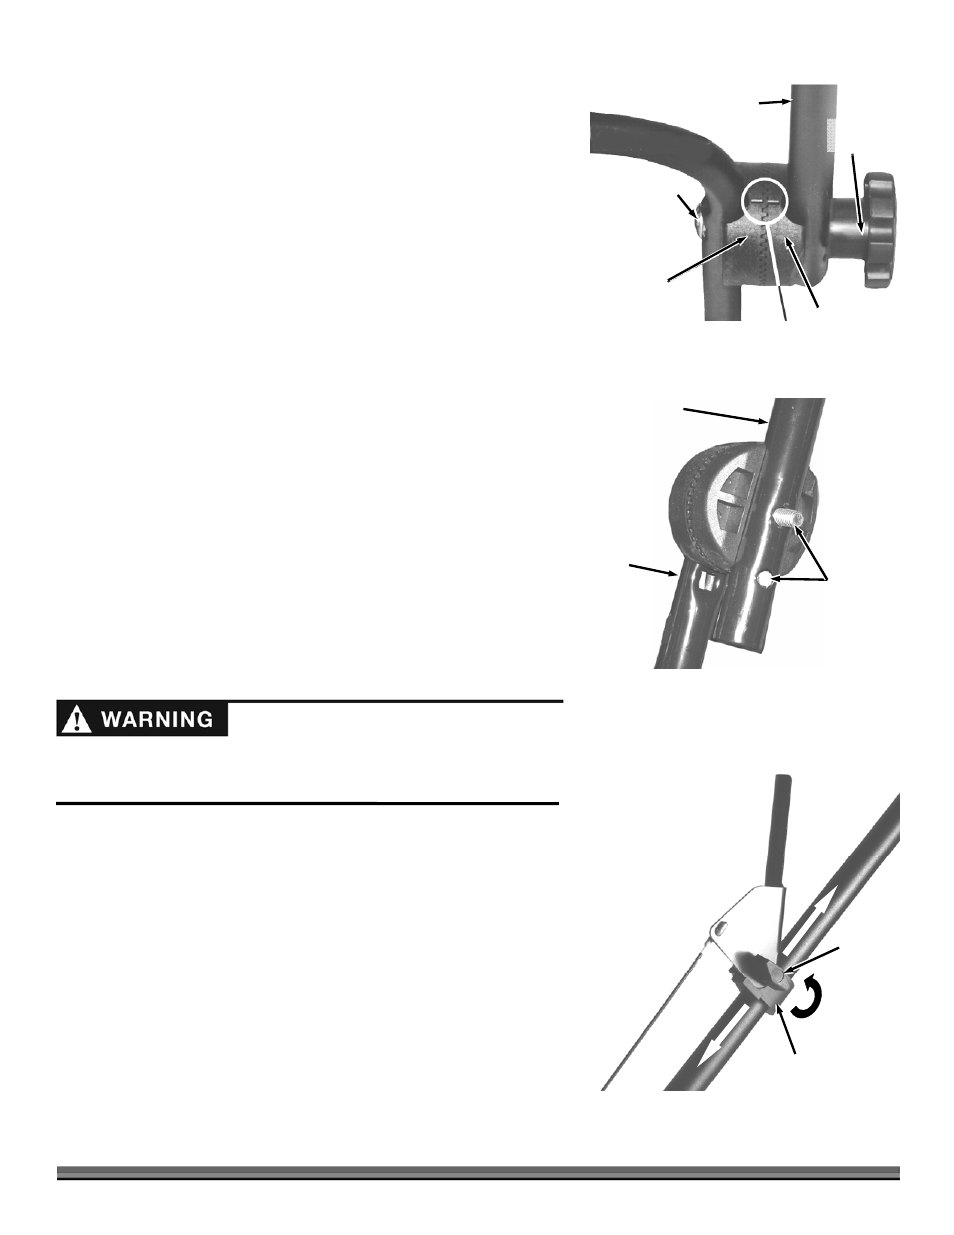
There are two ways to adjust the height of the Handlebar outlined in the
following steps:
1. Loosen both the Adjustment Knobs and move the Handlebar up or down
until the adjustment is the same on both sides. Use the Notches on the
Adjusters (Figure 13 “A”) to measure how many Teeth you have moved away
from the center. When you have found a comfortable height, tighten the
Adjustment Knobs securely.
2. For additional height adjustment options, there are two holes in the Upper
and Lower Handlebars where the Adjustment Knobs are located (Figure 13
“B”). Most people start with the Handlebars set in the Lower holes of both
the Upper and Lower Handlebar. You can adjust the height up or down by
removing the Adjustment Knob Assembly and repositioning the Handlebars
to a higher or lower hole. Be sure the Notches in the two Adjusters line up
when you reassemble them (Figure 13 “A”). You may need to adjust the
PTA Lever as well. See the next section.
Adjusting the PTA
(Parallel Trimming Action) Lever - SPRINT
and
PRO
It is easy to adjust the PTA feature. If you have moved the Handlebar up or
down, the PTA (Parallel Trimming Action) Lever may need adjustment. When
the PTA feature is properly engaged, there should be just a little slack in the
cable. For more information on PTA, please read the section called Using
PTA (Parallel Trimming Action) in Chapter 3.
1. Loosen the Knob on the PTA Control by turning it counterclockwise (Figure
14).
2. Move the Assembly up the Handlebar to tighten the cable or down the
Handlebar to loosen it.
3. Retighten the Knob.
Loosen
Knob
Figure 14
Slide Up or
Down to adjust
l k
Notches
Lined Up
Outside
Adjuster
Inside
Adjuster
Bolt
Adjustment
Knob
Lower Handlebar
Upper
Handlebar
“A”
Figure 13
“B”
Upper
Handlebar
Lower
Handlebar
Height
Adjustment
Holes