Trimmer head belt - all models – DR Power Self-Propelled 6.75 Pro-XL (September 2010 - April 2013) User Manual
Page 22
22
DR
®
TRIMMER/MOWER
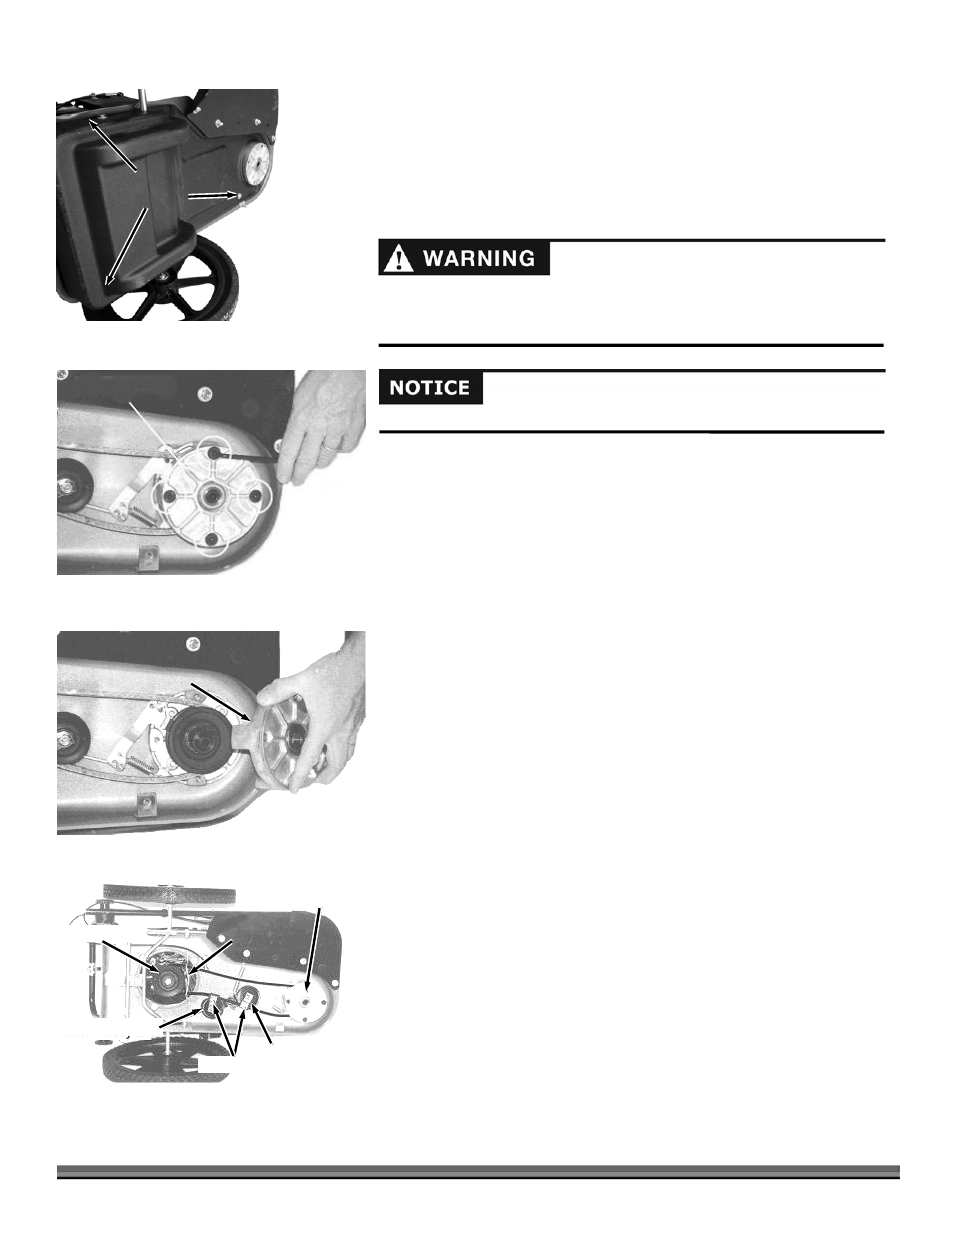
3. Remove the Bottom Shield by sliding it out from under the Side Shield and
lifting it up and over the Bearing Housing (Figure 31).
4. Reinstall the Bottom Shield in the reverse order.
5. Reinstall the Mow-Ball
®
Support Assembly.
Trimmer Head Belt - All models
Tools and Part needed:
9/16" Wrench
3/16" Allen Wrench or Hex Driver
DR Drive Belt #114431
1. Remove the Mow-Ball
®
Support Assembly. See “Removing the Mow-Ball
®
Support Assembly” on page 19.
2. Remove the Stone Guard Flap. See “Removing the Stone Guard Flap” on
page 20. This step is not applicable to the Self-Propelled model.
3. Remove the Bottom Shield. See “Bottom Shield” on page 21.
4. Remove the four Hex Head Mounting Bolts on the underside of the Lower
Bearing Plate (Figure 32). The Lower Bearing should come off with the Plate
(Figure 33).
5. Remove the Belt.
6. Install the new Belt. Be sure the Belt is on the inside of Idler Pulley #2, the
outside of Idler Pulley #1 and correctly fitted around the Engine Pulley and
in between the Engine Pulley Belt Guide (Figure 34).
7. Replace the Lower Bearing Plate, being sure to align the notch with the
locking tool hole in the side of the Trimmer Housing and install the four
Hex Head Mounting Bolts in this order: Install one Mounting Bolt and
make snug, then install and snug the Mounting Bolt opposite it. Repeat for
the remaining two Hex Head Mounting Bolts.
8. Tighten all four Hex Head Mounting Bolts in the same pattern. Do not over
tighten.
9. Reinstall the Bottom Shield and Stone Guard Flap as applicable.
10. Reinstall the Mow-Ball
®
Support Assembly.
Use only DR belts on your machine. Do not use hardware store variety belts.
Before performing any adjustment, maintenance procedure or inspection,
stop the engine, wait five (5) minutes to allow parts to cool and disconnect
the spark plug wire, keeping it away from the spark plug.
Engine Pulley
Belt Guide
Lower Bearing
Housing Plate
Engine Pulley
Idler Pulley #2
Idler Pulley #1
Belt Guides
Figure 34
4 Set Screws
Figure 32
Figure 33
Lower Bearing Plate
Side Shield
Bottom
Shield
Bolts to
Remove
Figure 31