Installing the trimmer cords – DR Power Self-Propelled 6.75 Pro-XL (September 2010 - April 2013) User Manual
Page 9
CONTACT US AT www.DRpower.com 9
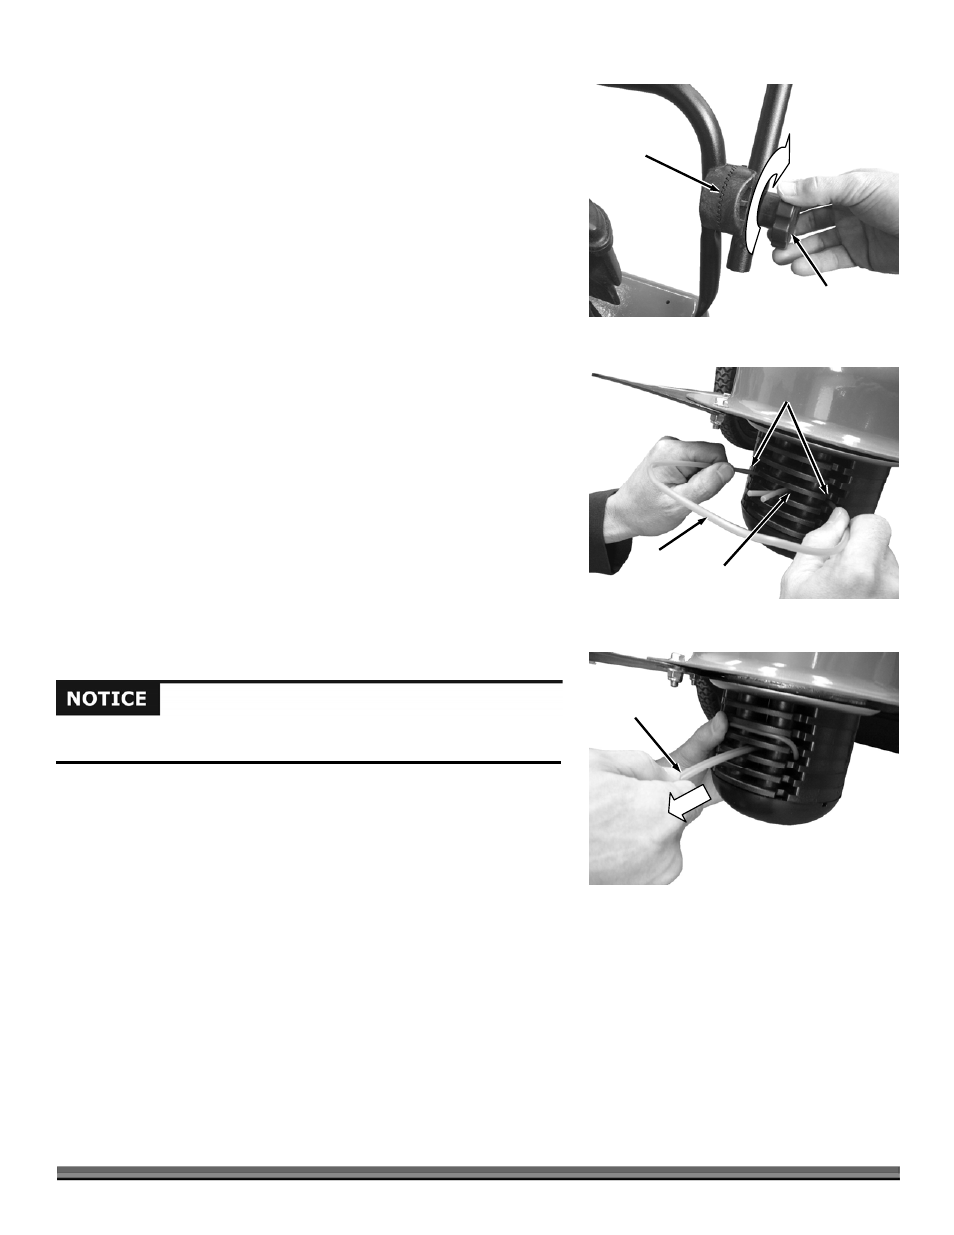
13. Lift the Upper Handlebar until it is near the operator position and tighten
the Handlebar Adjuster Knobs (Figure 8). The correct operating position is
about waist high and can be adjust for comfort.
NOTE: Ensure that the teeth of the Handlebar Adjuster mesh correctly as you
tighten the Knobs.
Do not discard your Trimmer packaging materials. Store the shipping box and
all inserts in a dry, safe area for future use. If there are any questions, contact us
at www.DRpower.com or call 1-800-DR-OWNER (376-9637).
If for any reason you need to ship the machine back to us, use the original
packaging and follow the reverse order of the previous unpacking instructions.
Installing the Trimmer Cords
There are two installation points on each Line Plate. Each point is 180 degrees
apart. Always install two Cords, one opposite the other at the same height.
14. Insert the ends of the Cords into the side openings in the Line Plate
(Figure 9).
NOTE: The photo shows the Cords being installed at the third opening from the
bottom. This allows for a 2-1/2" cutting height. Refer to “The DR
Trimmer/Mower Cutting Cords” section in Chapter 3 for more detailed
information and for setting the cutting height and other important Cord
details.
15. Push the Cord through until the ends come out the center hole in the Line
Plate. Adjust the Cords so the tips are even.
16. Pull the Cords under the loop and push the loop up into the Line Plate
groove above them (Figure 10) and then pull the Cords tight.
Handlebar
Adjusting Knob
Figure 8
Meshing
Teeth
Side
Openings
Center
Opening
Figure 9
Cord
Cord Ends
Figure 10
If the tips of the cords are not even, it can cause unbalance of the trimmer
and will result in increased vibration.