Bottom shield - sprint, And pro, Bottom shield - pro-xl self-propelled – DR Power Self-Propelled 6.75 Pro-XL (September 2010 - April 2013) User Manual
Page 21
CONTACT US AT www.DRpower.com 21
Tool needed:
3/8" Wrench
1. Remove the screws on either side of the Stone Guard and drop it from the
Frame (Figure 29).
Tip: Keep the screws together with the Stone Guard.
Bottom Shield - SPRINT
and PRO
NOTE: You do not need to remove the Side Shield or any of its hardware when
removing the Bottom Shield.
Tool needed:
3/8" Wrench
1. Remove the Mow-Ball
®
Support Assembly. See “Removing the Mow-Ball
®
Support Assembly” on page 19.
2. Remove the Stone Guard Flap. See “Removing the Stone Guard Flap”
above.
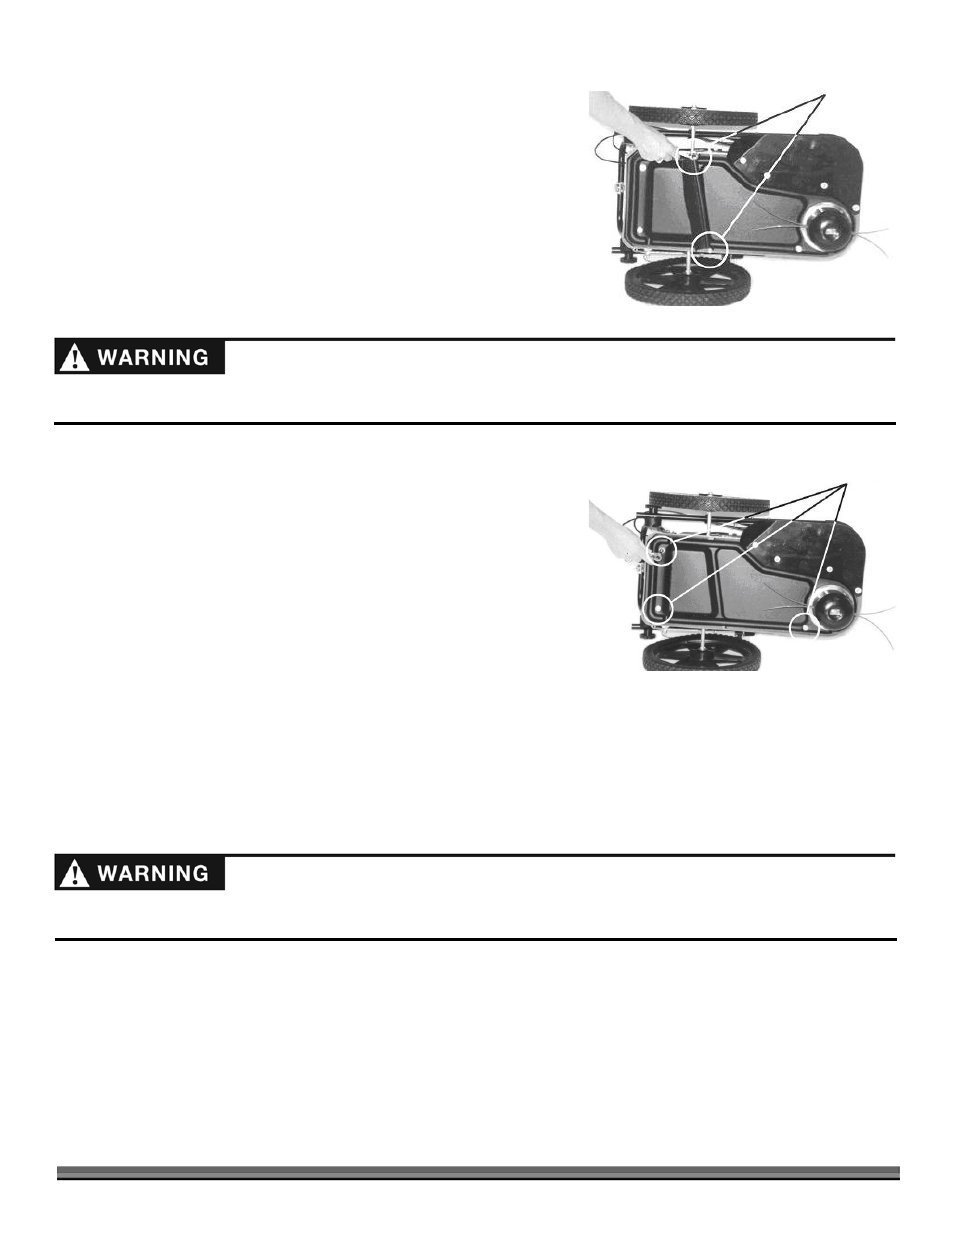
3. Remove the two mounting Bolts and Washers at the rear of the Frame
(Figure 30).
4. Remove the third mounting Bolt and Washer from the front of the Frame on
the outer edge near the Bearing Housing.
5. Slide the Bottom Shield out from under the lip of the Side Shield and remove
it.
6. When reinstalling the Bottom Shield, be sure to tuck it under the lip of the Side Shield first, then finish positioning it and
install the mounting hardware.
7. Reinstall the Stone Guard Flap in the reverse order that you removed it in the previous section.
Bottom Shield - PRO-XL SELF-PROPELLED
Tools needed:
7/16" Wrench
NOTE: You do not need to remove the Side Shield or any of its hardware when removing the Bottom Shield.
1. Remove the Mow-Ball
®
Support Assembly. See “Removing the Mow-Ball
®
Support Assembly” on page 19.
2. Remove the two mounting Bolts and Washers on the sides of the shield, behind the Axle and the single mounting Bolt and
Washer near the Mow-Ball
®
mount using a 7/16" Wrench or Socket (Figure 31).
Before performing any maintenance procedure or inspection, stop the engine, wait five (5) minutes to allow all parts to cool.
Disconnect the spark plug wire, keeping it away from the spark plug.
Before performing any maintenance procedure or inspection, stop the engine, wait five (5) minutes to allow all parts to cool.
Disconnect the spark plug wire, keeping it away from the spark plug.
Figure 29
Remove Screws
Remove Screws
Figure 30