Attaching the chipper hopper – DR Power 13 HP Towable User Manual
Page 17
CALL
TOLL
FREE
1-800-DR-OWNER 13
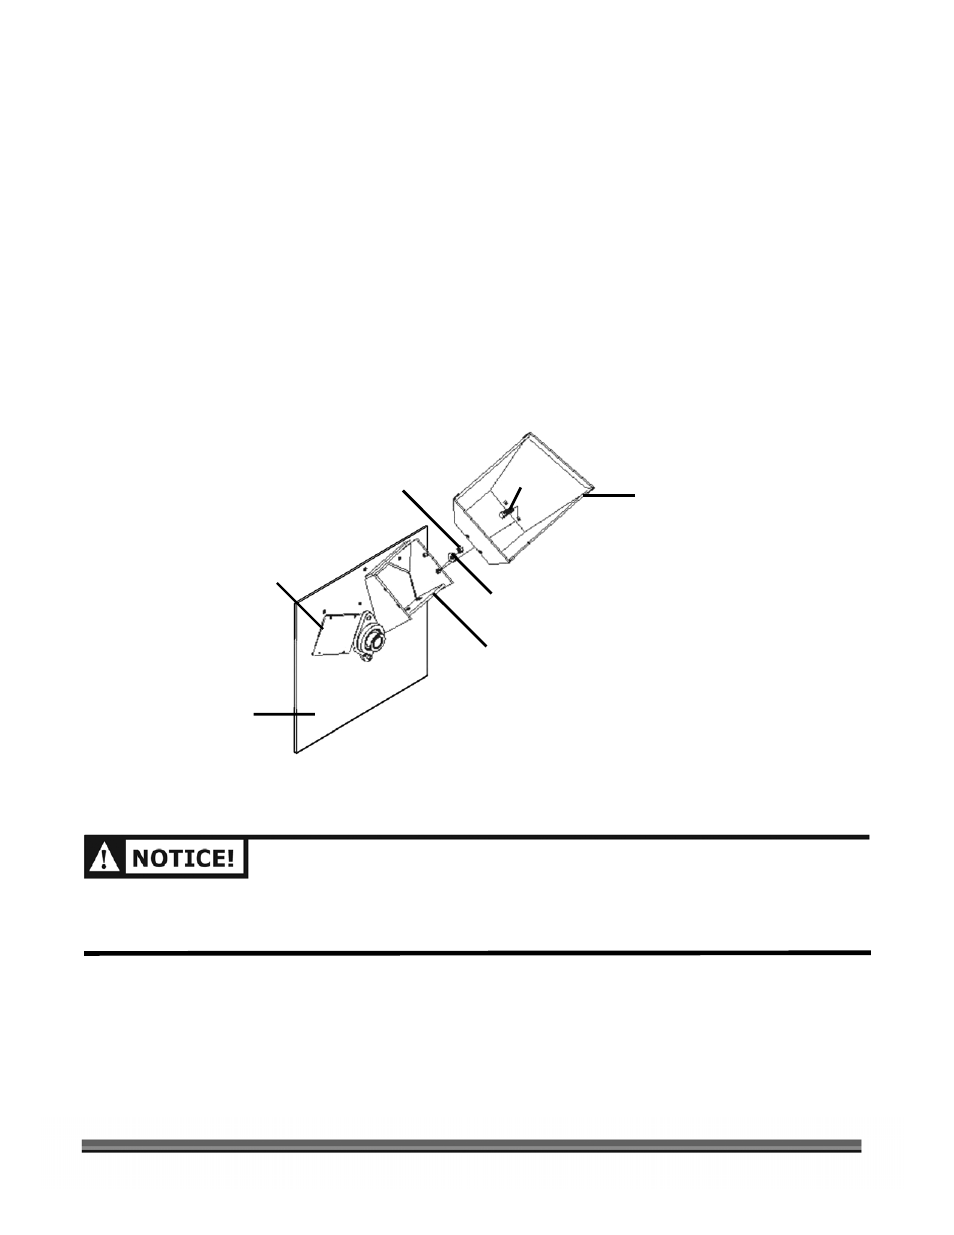
Attaching the Chipper Hopper
Tool Needed:
•
(2) 1/2" Wrench or Socket
Tip: Insert a towel or large rag into the opening to keep the Bolts from falling into the Chipper.
1. Attach the Chipper Hopper to the machine using four (4) 5/16"-18 x 3/4" Carriage Bolts, four (4)
5/16" Flat Washers and four (4) 5/16"-18 Nylon Lock Nuts.
NOTE: Be sure to insert the bolts from the inside of the Chipper Hopper so that the threads are sticking out
(Figure 1).
2. Install a Flat Washer, then a Lock Nut on each bolt. Initially install the Bolts and Nuts finger tight and
then tighten the Nuts one (1) turn using two (2) 1/2" Wrenches (Figure 1). Check to see that the
Hopper is centered on the Inlet Chute and then tighten the Nuts securely.
3. If you used a towel or rag in the Chipper opening, remove it now.
BE SURE TO FILL THE ENGINE WITH OIL AND GAS BEFORE USE
.
IF YOU START THE ENGINE WITHOUT
OIL IN THE CRANKCASE, THE ENGINE WILL BE DAMAGED BEYOND REPAIR AND WILL NOT BE COVERED
UNDER THE WARRANTY. SEE PAGE 16 FOR OIL AND FUEL FILL.
Figure 1
Chipper Hopper
Bolt (4)
Nut (4)
Washer (4)
Chipper Left Side Panel
Access Cover
Inlet Chute