Attaching the tow beam and hitch plate – DR Power 13 HP Towable User Manual
Page 18
14 DR
®
13 HP CHIPPER
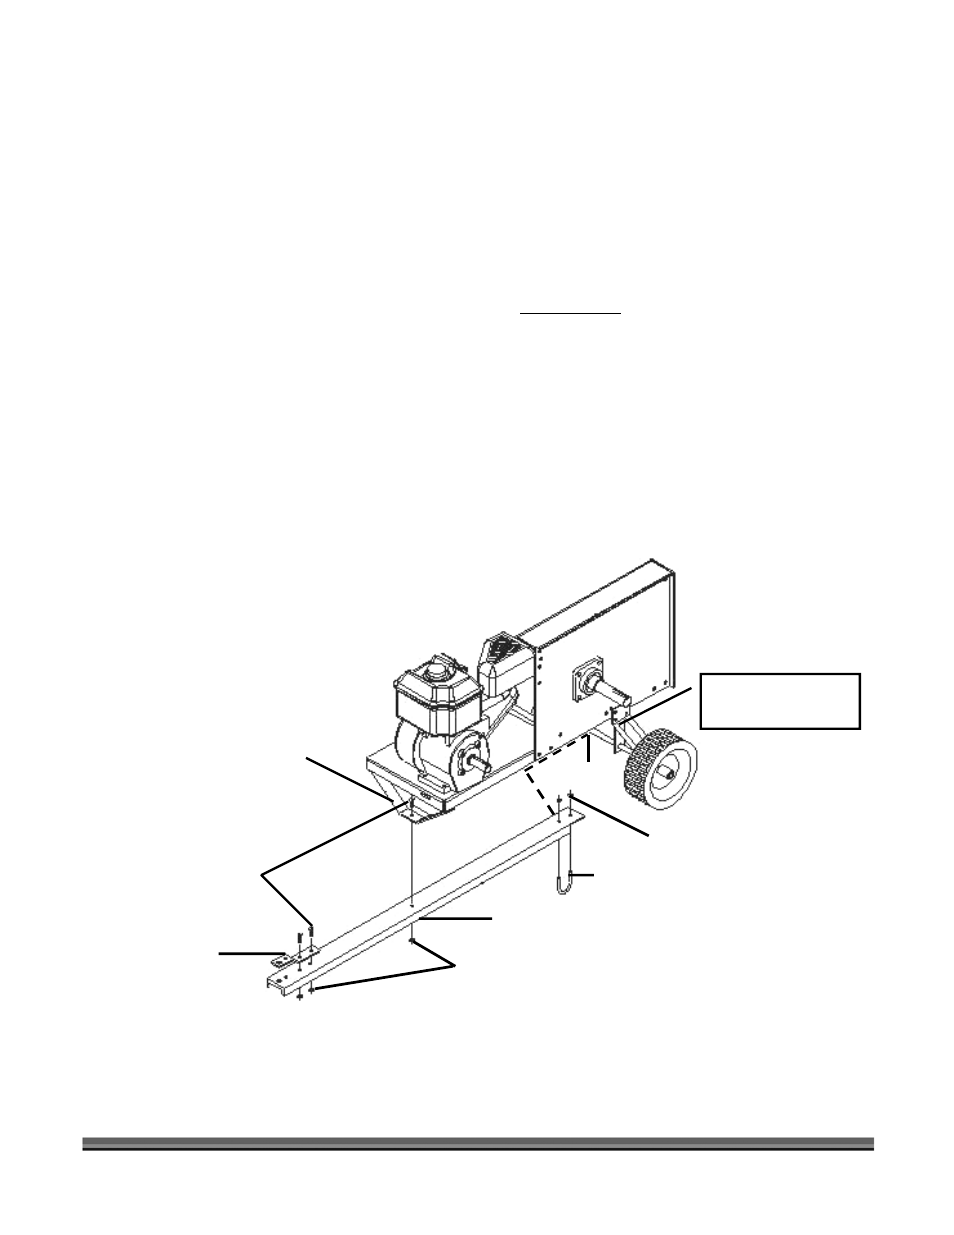
Attaching the Tow Beam and Hitch Plate
Tools Needed:
•
(1) 7/16" Wrench or Socket
•
(2) 1/2" Wrench or Socket
1. Attach the Tow Beam to the center of the Axle between the Axle Supports by putting the U-Bolt
around the Axle from underneath and up through the two holes on the Tow Beam (Figure 2).
Install two (2) 1/4"-20 Lock Nuts on the U-Bolt but do not tighten at this time.
2. Lift the machine and attach the center of the Tow Beam to the front of the Base by inserting a
5/16"-18 x 1” Bolt down through the Base and through the Tow Beam (Figure 2). Install a 5/16"-18
Lock Nut but do not tighten.
3. Rest the Tow Beam on a stand up off the ground, re-check the center of the Tow Beam on the Axle
and tighten the two (2) 1/4"-20 Lock Nuts on the U-Bolt.
4. Now tighten the 5/16"-18 Lock Nut at the center of the Tow Beam.
5. Attach the Hitch Plate to the Tow Beam with two (2) 5/16"-18 x 1” Bolts and two (2) 5/16"-18 Lock
Nuts (Figure 2). Tighten the Nuts securely.
Figure 2
Hitch Plate
5/16" Bolt (3)
5/16" Lock Nut (3)
U-Bolt
1/4" Lock Nut (2)
Tow Beam
Axle
Tow Beam centered
between Axle Supports
Base