Adjusting the wear plate gap – DR Power 13 HP Towable User Manual
Page 39
CALL
TOLL
FREE
1-800-DR-OWNER 35
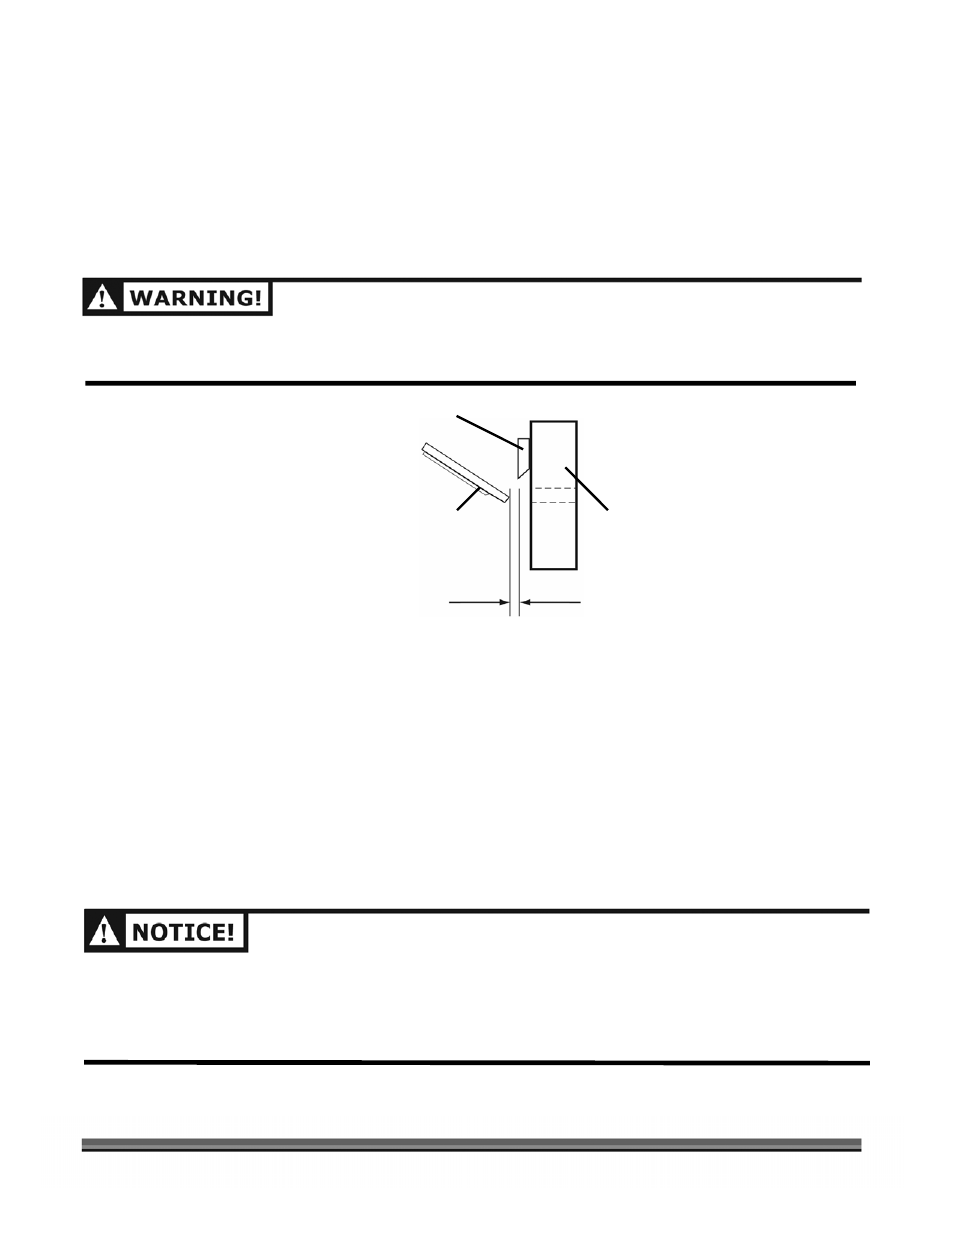
Adjusting the Wear Plate Gap
When you replace the Knife, check and set the clearance between the Knife and Wear Plate. Set this
clearance or gap to 1/16" (Figure 17). If the gap between the Wear Plate and the Knife is not set correctly,
you will have excessive vibration when chipping and the Knife will seem to be dull. The Wear Plate should
have a square edge and be free of dents or gouges. The Wear Plate can be hand sharpened. Be careful not
to overheat it during the sharpening process. This will change the characteristics of the steel and you will
then have to replace the Wear Plate.
BEFORE PERFORMING ANY MAINTENANCE PROCEDURE OR INSPECTION, STOP THE ENGINE, WAIT FIVE
(5) MINUTES TO ALLOW ALL MOVING PARTS TO COME TO A COMPLETE STOP AND COOL. DISCONNECT
THE SPARK PLUG WIRE, KEEPING IT AWAY FROM THE SPARK PLUG.
Tools Needed:
•
(2) 1/2" Wrench or Socket
•
7/16" wrench or socket
•
Gap Gauge (provided)
1. To prevent accidental Starter engagement, disconnect the battery at the negative terminal (if equipped).
2. Remove the Chipper Hopper by performing the steps on page 13 in the reverse order.
3. Rotate the Chipper Disk using a stick until the Knife is opposite the Wear Plate.
4. To adjust the Wear Plate Gap, loosen the three (3) 1/4" Nuts and Bolts while holding the Wear Plate in
place. Now slide the Wear Plate up or down (in or out) to achieve the correct gap setting.
5. Take the Gap Gauge and slide it between the Knife and Wear Plate. If the gap is set correctly, the Gap
Gauge will lightly touch both the Knife and Wear Plate. If the gap is too small, you will not be able to get
the Gauge between the Knife and Wear Plate. If the gap is too large, there will be excess room between
Gap Gauge, Knife, and Wear Plate.
6. Tighten the Nuts and Bolts when the Wear Plate is in the correct position (Figure 17).
7. Replace the Chipper Hopper.
AFTER ANY KNIFE OR WEAR PLATE MAINTENANCE OR ADJUSTMENT, ROTATE THE CHIPPER DISK BY
USING A WOODEN STICK AND WATCH AND LISTEN CAREFULLY FOR ANY UNUSUAL NOISES, CLICKING
OR VIBRATION. IF YOU DETECT ANY OF THESE, INSPECT THE MACHINE FOR DAMAGE, OR ANY LOOSE
PARTS. REPAIR OR REPLACE ANY DAMAGED PARTS AND TIGHTEN ANY LOOSE PARTS BEFORE STARTING
THE DR 13 HP CHIPPER.
8. Re-connect the negative battery terminal wire and spark plug wire.
Chipper Knife
Figure 17
1/16" Gap
Wear Plate
Flywheel