Clutch removal, disassembly, and re-assembly – DR Power 13 HP Towable User Manual
Page 42
38 DR
®
13 HP CHIPPER
Clutch Removal, Disassembly, and Re-Assembly
If it is necessary to disassemble your Clutch, follow these steps.
Tools and Supplies Needed:
•
9/16" socket with extension
•
Pliers, Retainer Ring
•
Pliers (wrap the gripping surface in tape to avoid scratching the spring surface)
•
Anti-seize compound
1. Perform steps 1 through 4 on the previous page to remove the Clutch.
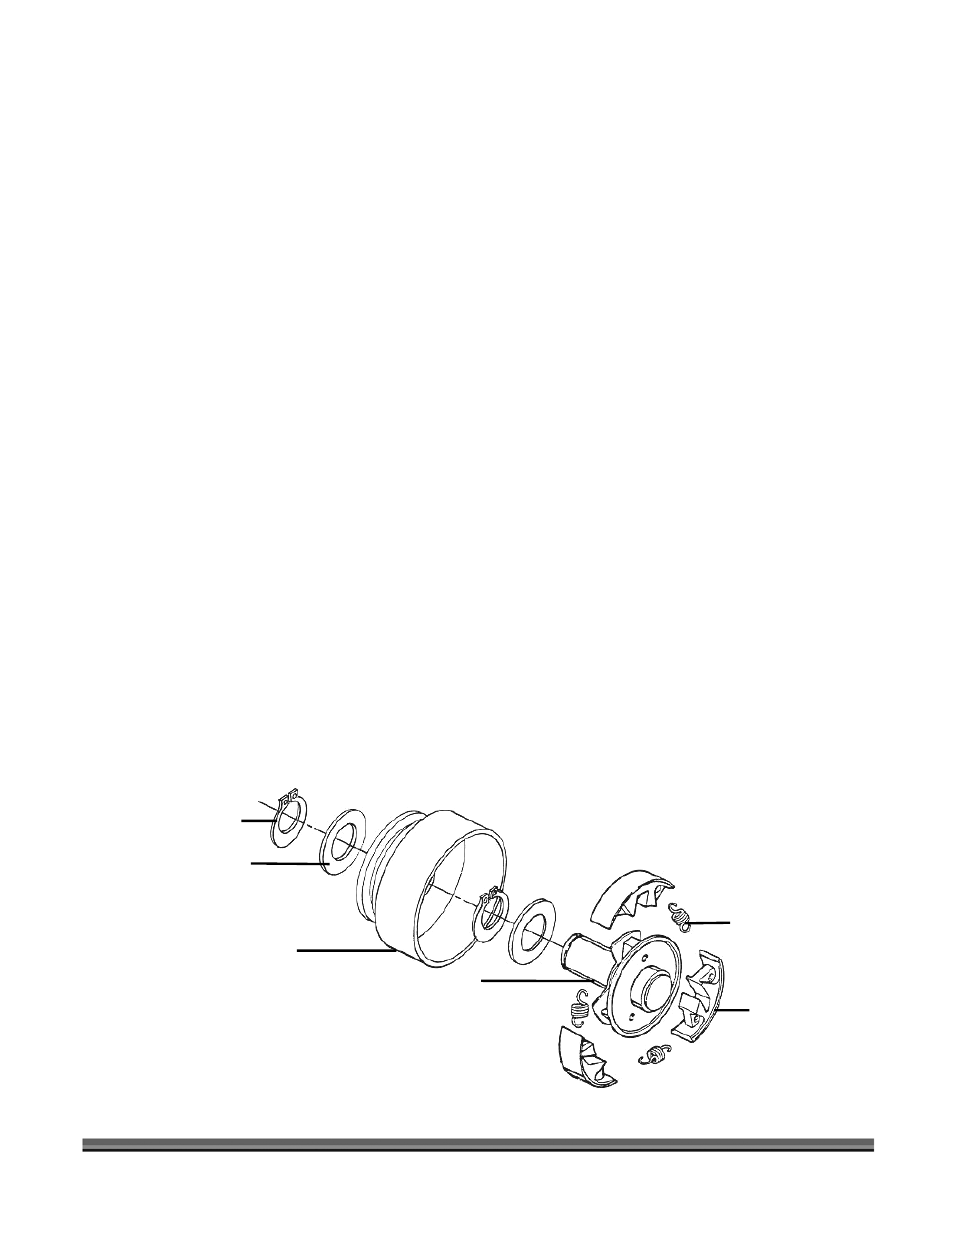
2. Remove the Retainer Ring and Flat Washer and slide the Hub out of the Drum Assembly (Figure 18).
3. Unhook one Spring from its Shoe (Figure 18).
NOTE: Use tape wrapped pliers to avoid nicking the Spring.
4. Carefully note the position of Shoes and remove Shoes from the Hub (Figure 18).
5. Position the new Shoes correctly on the Hub, noting how the old ones were removed.
6. Place one end of each Spring over a Shoe pin, stretch the Spring just enough to clear pin on the
other Shoe. Use tape wrapped pliers to avoid nicking the Spring. Avoid over stretching that may
damage the Spring. Repeat for all Shoes.
7. Reassemble the Drum to the Hub, reinstall the Washer on Hub Shaft, and secure in place with the
Retainer Ring (Figure 18).
8. Clean the engine crankshaft and remove any burrs, then apply anti-seize compound to the
crankshaft.
9. Install the Key in the keyway of the Clutch Hub, align the Key with the slot in the engine crankshaft,
and then slide the rebuilt Clutch Assembly onto the crankshaft followed by the Flat Washer, Lock
Washer, and 3/8" Bolt. Tighten the Bolt securely.
10. Reinstall the Drive Belt and set the Drive Belt tension and alignment per Steps 3 through 5 on page
30.
11. Reinstall the Belt Guard.
Figure 18
Retainer Ring
Flat Washer
Drum
Hub
Shoe
Spring