Adjusting or removing and replacing the drive belt – DR Power 13 HP Towable User Manual
Page 34
30 DR
®
13 HP CHIPPER
Adjusting or Removing and Replacing the Drive Belt
BEFORE PERFORMING ANY MAINTENANCE PROCEDURE OR INSPECTION, STOP THE ENGINE, WAIT FIVE
(5) MINUTES TO ALLOW ALL MOVING PARTS TO COME TO A COMPLETE STOP AND COOL. DISCONNECT
THE SPARK PLUG WIRE, KEEPING IT AWAY FROM THE SPARK PLUG.
USE ONLY A DR BELT ON YOUR MACHINE. THE BELT HAS BEEN THOROUGHLY TESTED AND
PROVEN FOR MANY HOURS OF USE.
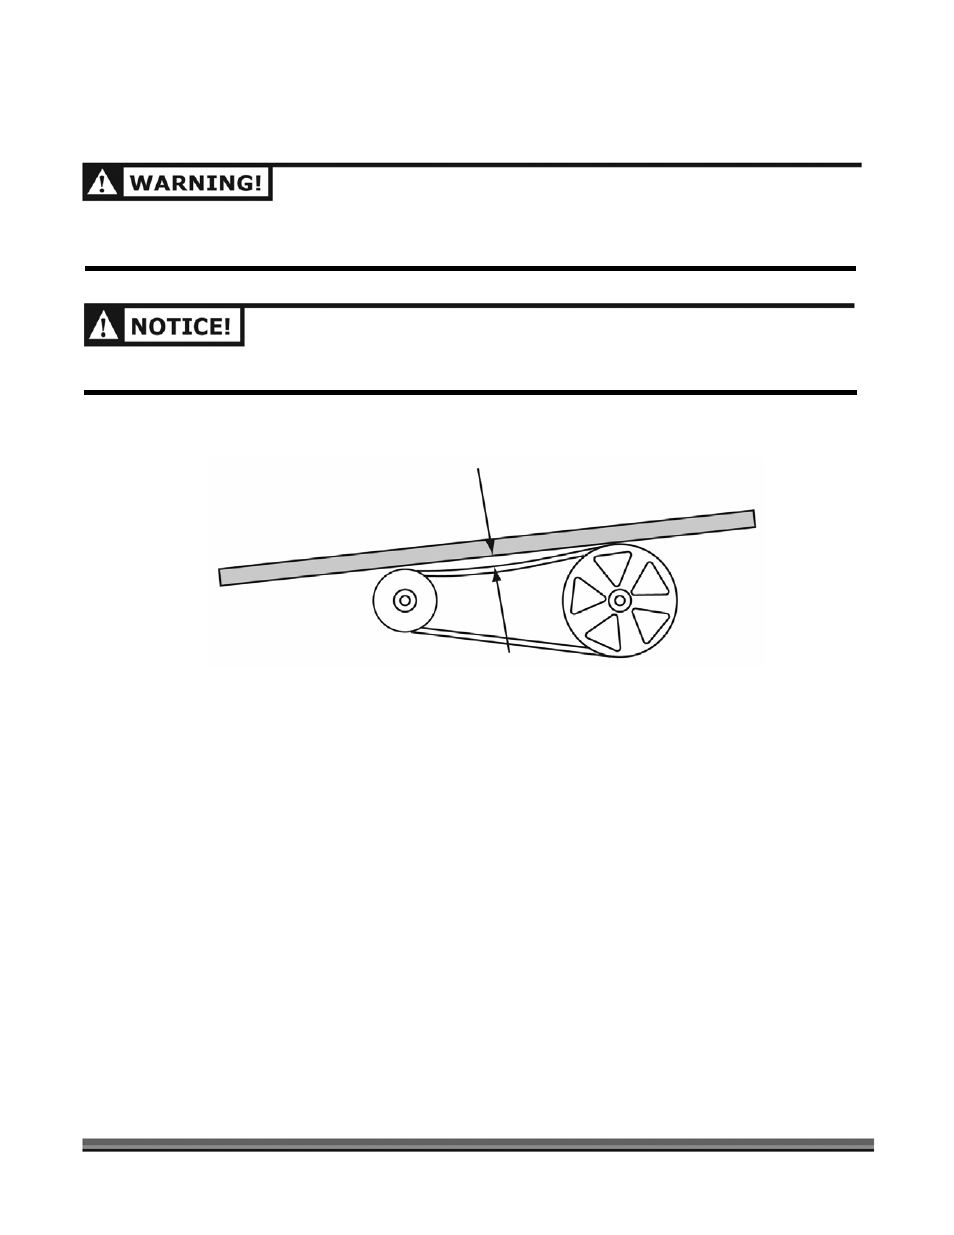
The Belt on your DR 13 HP CHIPPER should deflect 3/8" under approximately three (3) pounds of pressure
as shown in Figure 10, if it doesn’t, adjust per the following directions.
Tools Needed:
•
(2) 1/2" Wrench
•
5/32" Allen Wrench
•
Loctite
®
243 (if needed)
1. Remove the Belt Guard by removing the retaining Bolts using a 1/2" Wrench.
2. Loosen the four (4) Engine Bolts (2 in the Front and 2 in the Rear) using two (2) 1/2" Wrenches, one
(1) on the Bolt and one (1) on the Nut underneath (Figure 11 on page 31).
3. Tighten or loosen the nut on the Belt Tensioner (Figure 11 on page 31) using a 1/2" Wrench until you
have the correct tension as shown in Figure 10.
4. Retighten the four (4) Engine Bolts.
5. Check the alignment of the Clutch with the Drive Pulley by placing a straightedge across both faces as
shown in Figure 12 on page 31. If adjustment is necessary, correct the alignment as follows:
a) Remove the two (2) Set Screws in the Drive Pulley Hub with a 5/32" Allen Wrench
(Figure 13 on
page 32) and set them aside.
b) Using a straightedge, align the Clutch and Drive Pulley as shown in Figure 10 by moving the Drive
Pulley in or out on the Rotor Shaft (Figure 13 on page 32). Do not make the adjustment by moving
the Clutch on the Engine Shaft.
Figure 10
Straight Edge
Clutch Drum
Chipper Drive Pulley
3 lbs. of pressure required
to move Belt 3/8"