Final steps – Infloor Standard Electric Cable User Manual
Page 11
Infloor Installation Manual
11
installed. Do not damage any waterproofing components, and do not run the heating cable
through a non-masonry curb, causing it to overheat.
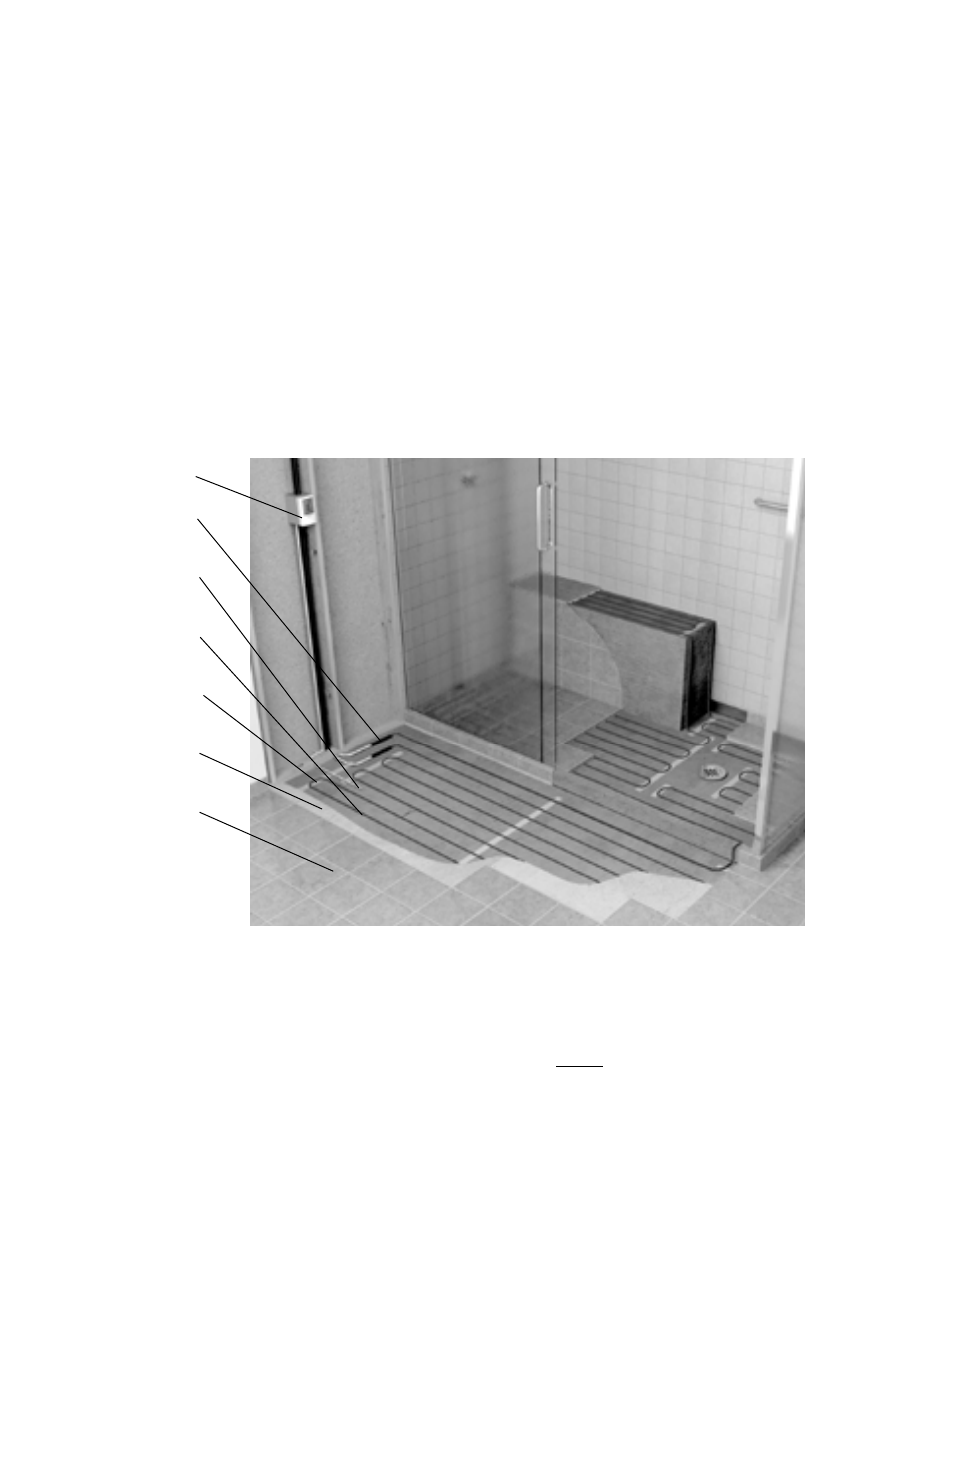
STEP 5.23 If covering a shower floor, cut lengths of strap and secure to the floor with adhe-
sives. Do not use fasteners that penetrate any waterproofing membrane or waterproofing
system. Fill in the floor area with cable. Around the drain leave at least 2” spacing from the
edge of the flange. Make sure cable is not placed where door hardware, handrails, or other
items may mount to the floor.
STEP 5.24 If covering a bench seat in the shower, cut lengths of strap and secure to the top
surface of the seat with adhesives. Do not use fasteners that penetrate any waterproofing
membrane or waterproofing system. Use hot glue to secure a single run of cable up the side
of the bench riser. Fill in the seat area with cable. Then secure a single run of cable down the
riser if needed.
STEP 5.25 If the cable cannot exit the shower area, the end of the cable has a waterproof
splice that may be located in the shower area, fully embedded into the mortar like the heat-
ing cable.
STEP 5.26 If any part of the heating cable entering a shower area is damaged during instal-
lation, do not attempt to repair it. A field repair or modification of the cable may result in
serious shock hazard.
Final Steps
STEP 5.27 If a second cable is to be installed in the area, all power leads must come back
to the control, or to a junction box and then to the control . NEVER run power leads across
heating cables, under baseboard areas, or other potentially damaging areas . Never join two
cables in series .
STEP 5.28 To secure long lengths of heating cable, place additional, short lengths of the
strap at 3–4-ft . intervals . Spray the back of the strap with a high-tack adhesive, and slide the
strap, upside down, under the cables . Turn the strap over when it is positioned and adhere
to the floor . Press the tabs down over the cables . If a spray adhesive was not used, carefully
secure these short lengths of strap to the floor without damaging the cable .
STEP 5.29 After the cable installation is completed, inspect the work . Make sure all tabs are
pressed down, cable spacings are correct, no cables cross over each other, all the cables are
undamaged, and all areas to be heated are covered with cable .
STEP 5.30 Take resistance readings of the cable again to make sure it has not been damaged
during the installation . This is very important to do . Record these readings in the Cable and
Sensor Resistance Log (Table 4) .
STEP 5.31 (optional) With the heating portion of the cable fully installed, it is recommend-
ed that the cable be temporarily connected to the power source and allowed to heat for
several minutes . After the cables begin to feel warm to the touch, disconnect the power .
STEP 5.32 Lay cardboard, carpet, or similar material over the cables to protect them from
damage until the floor covering is installed .
Infloor Cable Type (-W) installed in shower floors and/or bench-
es . See Step 5 .20 and Appendix 5 .
Infloor Control
Factory Splice
Thermostat
Sensor
Wire
Strap
Thin Set Mortar
Tile/Stone