3 changing the lamps – Ivoclar Vivadent Lumamat 100 User Manual
Page 16
16
7.3 Changing the lamps
The unit is equipped with a sensor that auto-
matically checks the performance of the
lamps. As soon as the performance drops
below a certain value, the display indicates a
corresponding Error message, e.g. Er11,
Er12, Er13. Then, the lamps have to be
replaced.
One defective lamp
For technical reasons, the lamps
are arranged in two groups
consisting of four lamps each.
That means that all four lamps stop working
if one lamp is defective. The defective groups
can be determined by observing the lamps
through the viewing window (1).
Acceptable lamp operating hours
If all eight lamps light up, although Er11 or
Er14 has been displayed, the light
performance is inadequate and the lamps
have reached the end of their life cycle.
Replace all lamps.
Disconnect power during chan-
ging of the lamps and if the unit
has to be opened.
Make sure that the lamp
protection is correctly mounted,
since otherwise the unit cannot
be correctly closed.
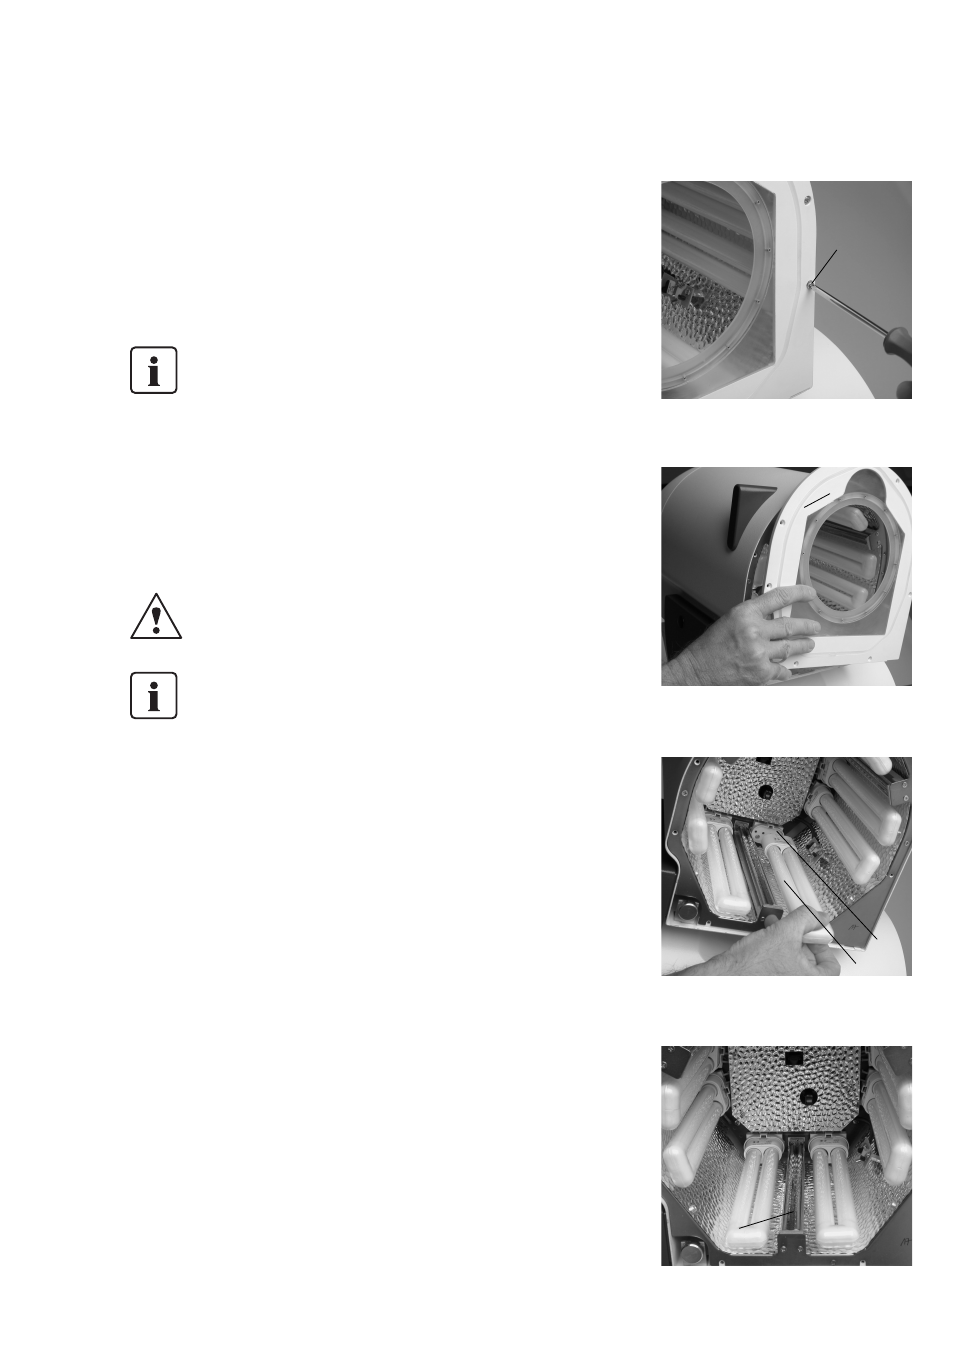
Description of how to change the lamps
Step 1
Disconnect power.
Step 2
Remove the eight screws (36) of the lamp
protection.
Step 3
Remove the first lamp of the defective group
from its socket (19) and position the new
one.
Step 4
Close swivel arm with the curing chamber.
Step 5
Connect power.
Step 6
Start Program P2.
Step 7
Look through the viewing window to make
sure that the correct lamp has been replaced.
If all lamps light up, continue with Step 11.
Step 8
If one group of lamps still remains dark,
interrupt the program by pressing Stop.
Step 9
Disconnect power.
Step 10
Repeat Steps 4 to 10 until the defective lamp
has been found.
Step 11
Interrupt program by pressing Stop (47)
Step 12
Disconnect power.
Step 13
Mount the lamp protection (17) with the
corresponding screws (36).
Step 14
Connect power.
36
17
19
18
26