4 changing the dust filter, 5 changing the fuse, 7 special configuration modes – Ivoclar Vivadent Lumamat 100 User Manual
Page 17: 6 calibration
17
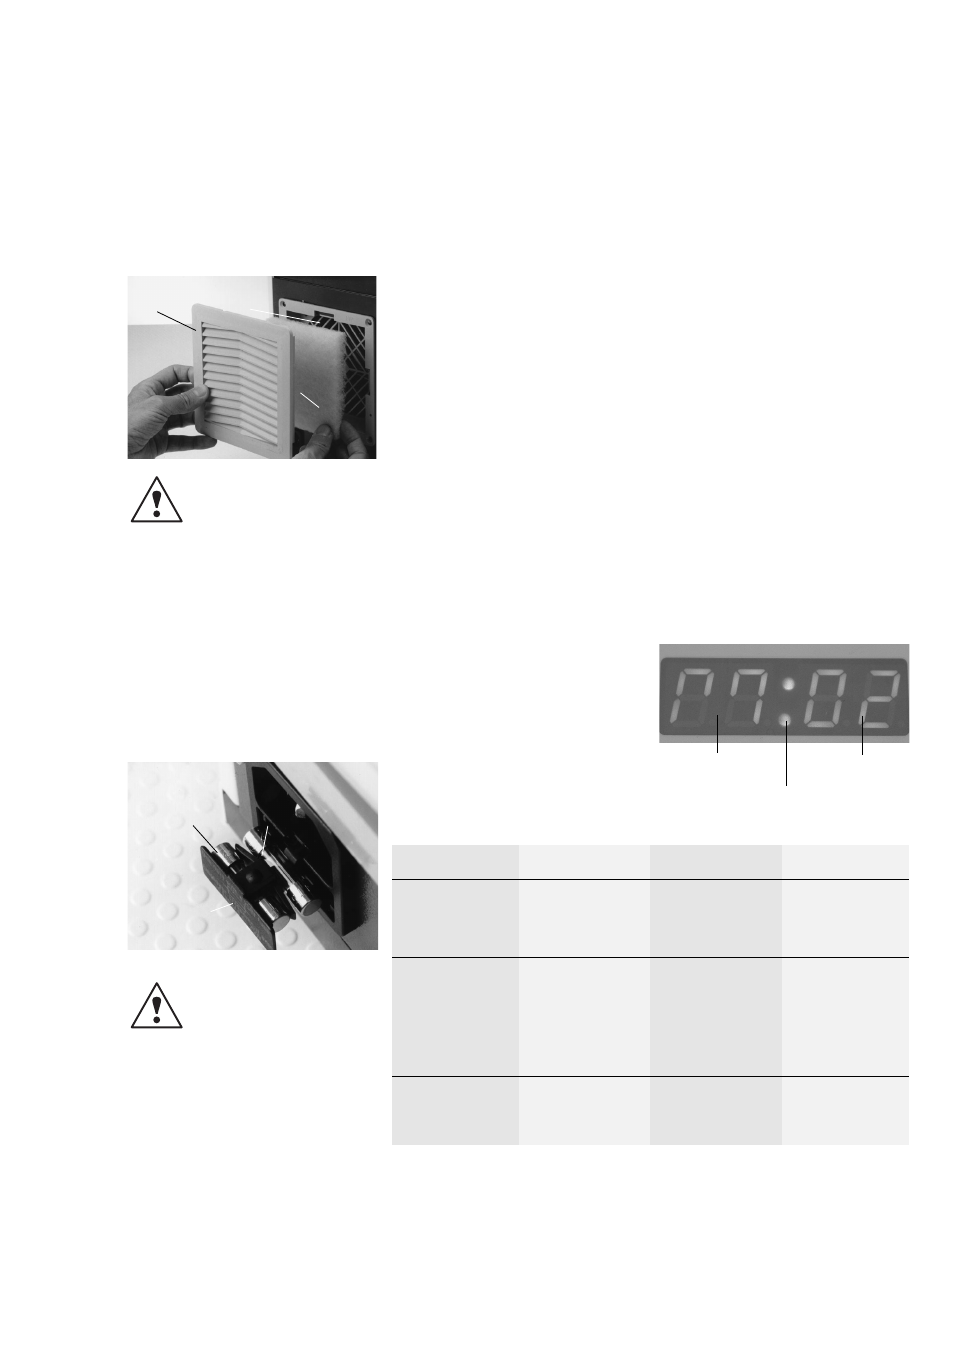
7.4 Changing the dust filter
Remove filter (8) from the unit with a firm
tug. Clean filter pad (9) or replace it.
Remount the filter..
The unit may only be operated
with the dust filter.
7.5 Changing the fuse
Disconnect power cord (13). The fuse holder
(15) is located in the power socket of the
unit (10). Push the lateral fuse stop (14) in
the direction of the arrow using a screw-
driver. The fuse holder (15) is thus released
and may be removed from the unit. Check
fuse (12). Replace defective fuse and insert
the new fuse with its holder into the power
socket (10) until it snaps into place.
Important
Use only fuses with test labels
according to the respective values
specified in ‘Technical Data’
(Chapter 9.2).
9
8
23
7.7 Special configuration modes
With these special modes (functions of the
unit), certain configuration procedures may
be performed and information shown on the
display.
The desired mode is activated as follows:
Press the two keys according to the table
below, while simultaneously switching on the
unit. The display now briefly (3 seconds)
indicates the corresponding mode.
7.6 Calibration
In order to ensure optimum tempering even
after prolonged periods of time, the required
light performance and the corresponding
tempering temperature should be reached.
The temperature sensor of the unit may be
subject to small changes after prolonged use,
which affect the tempering temperature. The
lamps are also subject to a certain aging pro-
cess, which may compromise the light per-
formance.
These two parameters can be checked any
time by the user with the help of the Test Set
specifically developed for that purpose.
12
15
39
Mode
(Function)
1
2
3
Key Combination
P1 and P2
P3 and P4
START and STOP
Indication on the
Display
The current number of
lamp operating hours is
indicated.
The current calibration
value of the tempering
temperature is indicated.
Within 3 seconds, the 3
software versions of the
unit are indicated one
after the other.
Function
After changing the
lamps, the counter has
to be reset to 0 using
the '-' key.
If the Test Set results
have shown an incorrect
tempering temperature,
the temperature can be
adjusted using key '-'
and '+'. The new
calibration value has to
be confirmed with Enter.
Information about the
software version.
The active mode may only be ended by switching off the unit.
Therefore, we recommend checking the light
performance and tempering temperature
using the Test Set every six months.
The application of the Test Set is described in
the corresponding note accompanying the
Test Set (81). Please observe these
instructions when performing the calibration.
Procedure in case of negative test results:
– If the light performance is inadequate,
change all the lamps.
– If the tempering temperature is
inadequate, adjust the temperature with
the help of the special mode (No. 2).
Please observe the table in Chapter 7.7
for that purpose.
Mode (M)
no meaning
e.g. Mode 2