Modular service tool sd, Initialization & setting the time & date, Vav/cav/mua operator interface sd – Orion System VAV II Controller v.1 User Manual
Page 11: 11 modular service tool initialization, Setting the time & date
VAV/CAV/MUA Operator Interface SD
MODULAR SERVICE TOOL SD
11
Modular Service Tool Initialization
Modular Service Tool Initialization Screen
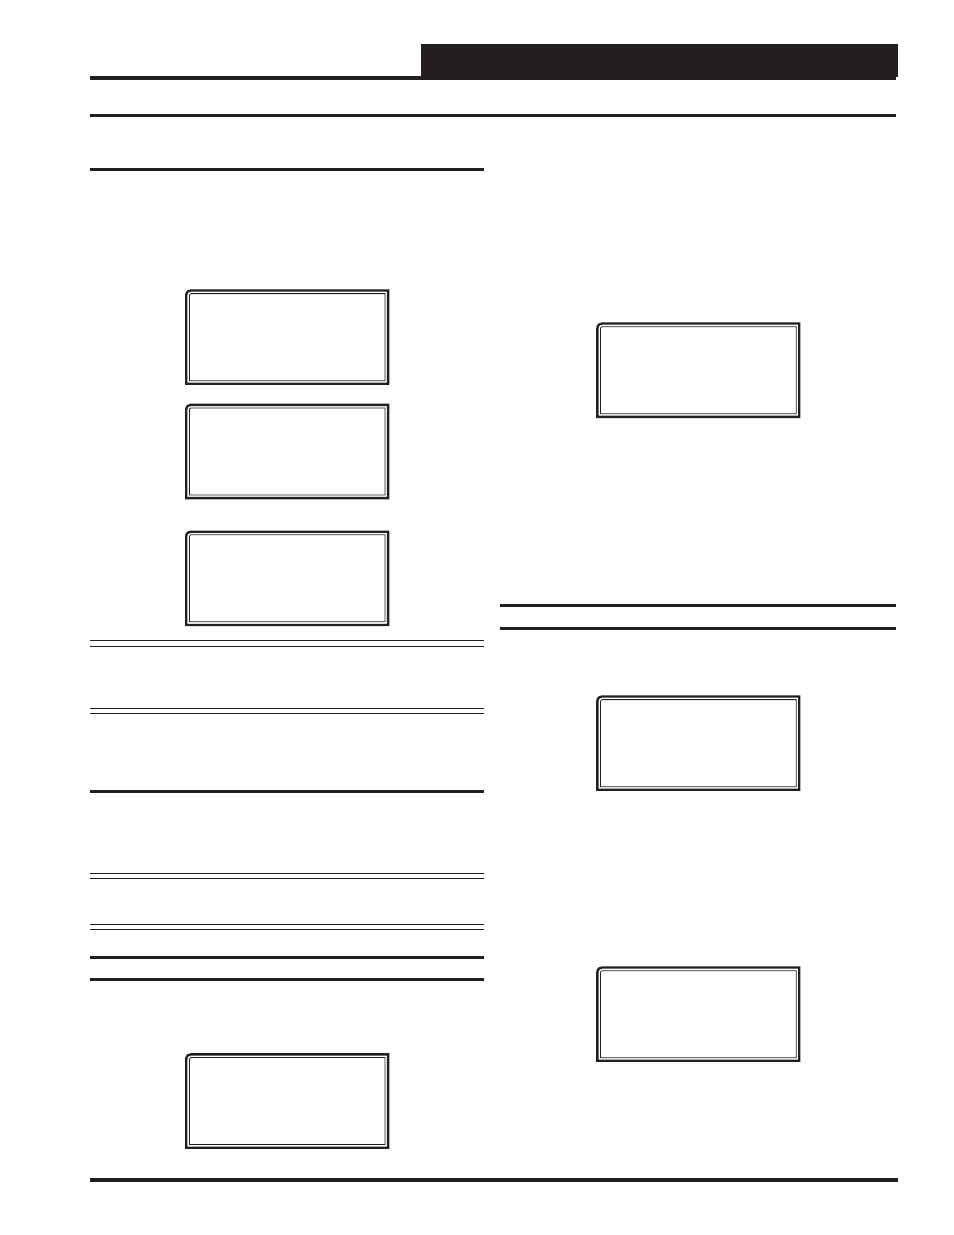
After connecting the Service Tool to the controller with the supplied
cable, press
<ON>
. The Initialization Screen will appear followed by
the Main Menus as shown below. If there is no SD card installed, the
second screen will display, “No SD Card Connected! Powering Down!”
Initializing
Service Tool vX.XX
WattMaster Controls
1) Set Time & Date
2) Communications
NEXT) More Options
ESC) Exit Menu
3) Energy Saving
4) Update Software
NEXT) More Options
ESC) Exit Menu
NOTE:
Once you press
<ESC>
while at the Main Menus shown
above, the only way you can access it again is to cycle
power.
Initialization & Setting the Time & Date
Setting The Time & Date
The Modular Service Tool is equipped with a real time clock chip
allowing it to maintain the correct time. Once you have programmed
the correct time and date, the information is broadcast globally to all
controllers on the entire system.
NOTE:
If you are in a time zone that has daylight savings, you
will need to manually adjust the time twice a year.
Programming the Time
From the Main Menu shown below, press
<1>
on your keypad to access
the Set Time & Date Screens. (You may have to cycle power to access
the Main Menu).
1) Set Time & Date
2) Communications
NEXT) More Options
ESC) Exit Menu
Although the times are displayed on the Main Screen in a standard 12-
hour format, you must program them using the 24-hour military format.
If you confi gured the Unit Controller to use its own Internal Schedules,
the Occupied/Unoccupied modes are calculated on the basis of the cur-
rent real time clock reading.
The two screens that follow will appear. To scroll through the fi elds,
press
<
>
or
<ENTER>
. In order to save a new value, you must
press
<ENTER>
.
Program Time/Date
Day (Sunday=0): X
Enter Hr. (0-23): XX
Enter Minutes : XX
Day -
Enter the Day of the Week (0 to 6)
Sunday
=
0
Hours (Hr) - Enter Hours in 24-Hour Military Format
(1700
=
5:00
PM)
Minutes -
Enter the Minutes
(0
to
59)
Programming the Date
To scroll through the fi elds, press
<
>
or
<ENTER>
. In order to save
a new value, you must press
<ENTER>
.
Program Time/Date
Month (1-12): XX
Day (1-31): XX
Year (00-99): XX
Month - Enter the Month (1 to 12)
Day -
Enter the Day of the Month (1 to 31)
Year -
Enter the current Year with two digits (00 to 99)
When you have fi nished programming the time and date, press
<ESC>
to return to the Main Menu shown below.
1) Set Time & Date
2) Communications
NEXT) More Options
ESC) Exit Menu
- CAV II Controller v.1 MUA II Controller v.1 VAV II Controller v.2 CAV II Controller v.2 MUA II Controller v.2 Modular System Manager SD VCB-X VCB-X Controller VCC-X Controller VCB-X Modular Service Tool VCM Controller Operator Interfaces SD VCM-X/RNE Controller VCC-X VCM-X/RNE Controller Operator Interface SD SA E-BUS Controller Modular System Manager SD Quick Start