Recording a stereo mix, Using the solo function, Using the auto-record function – Teac DR-680 User Manual
Page 30: Automatically starting and pausing recording, Auto-record function), 4 – recording
30
TASCAM DR-680
Recording a stereo mix
With this unit, in addition to recording up to 6 discrete
tracks from the 6 inputs, these inputs can also be
mixed internally and recorded as a stereo track.
Before starting the following procedures, input
selection and level adjustment for each track should be
completed, and the Home Screen should be open.
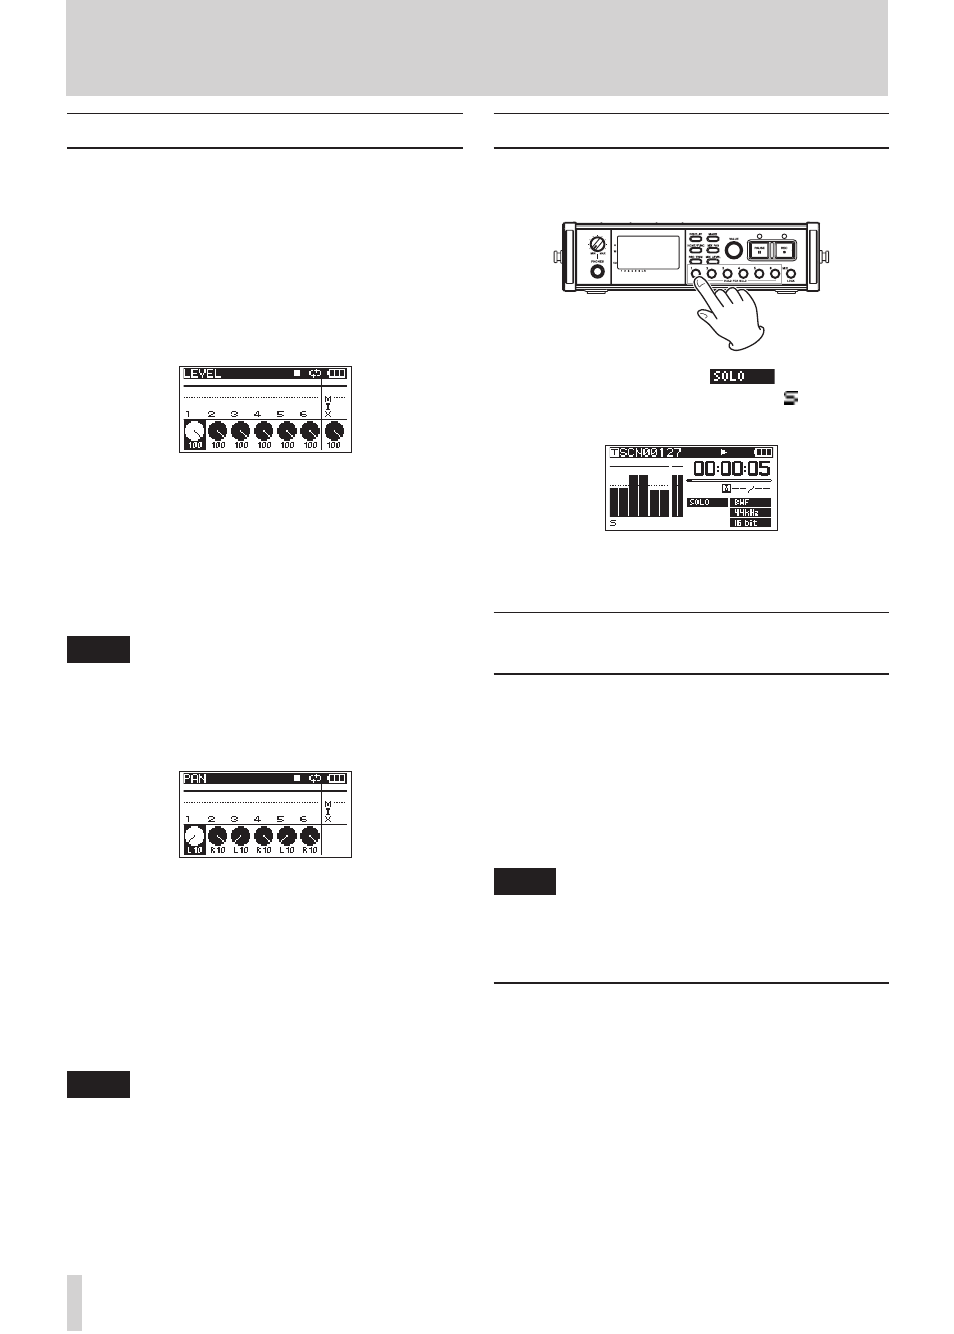
1 Press the
MIX LEVEL
key to open the
LEVEL
screen.
2 On this screen you can adjust the mix levels of
each input channel and the recording level of the
stereo track. Use the
1
–
6
and
MIX
keys to select
the channels that you want to adjust.
3 Use the
VALUE
knob to adjust each to a suitable
recording level in a range from 0–100 (default
value: 100).
NOTE
Adjust the levels so that overload indicators do not
appear at the tops of the meters.
4 Next, press the
MIX PAN
key to open the
PAN
screen.
5 On this screen you can adjust the pan (stereo
position) of each channel. Use the
1
–
6
keys to
select the channel that you want to adjust.
6 Use the
VALUE
knob to adjust each to a suitable
stereo position using values ranging from L10–L1
(left) to C (center) and R1–R10 (right).
(Odd number channels are set to L10 and even
number channels are set to R10 by default.)
NOTE
Adjust the pan settings of the channels so that the mix is
balanced as desired. You can check the balance with the
MIX meters at the far right.
7 When you have finished making the settings,
press the
HOME/FUNC
key to return to the Home
Screen.
Using the solo function
Press and hold one of the 1–6 keys on the front
panel to enable solo monitoring for that channel.
When solo monitoring, the
indicator
appears on the Home Screen, and the indicator
appears for the soloed channel.
To stop solo monitoring, press and hold the key
(
1
–
6
) for the soloed channel again.
Automatically starting and pausing
recording (auto-record function)
If you turn the auto-record function ON, you can
automatically start, stop and pause recording in
response to the level of the input sound.
If an input level greater than the level set in advance is
detected on any input channel, recording starts.
In addition, the unit can automatically cut silent parts
and add marks at points where recording starts again.
NOTE
The levels of input on all channels must remain below the
set level for at least one second before the auto-record
function is activated.
Using the auto-record function
1 When the Home Screen is open, press the
HOME/
FUNC
key to open the Functions Screen.
2 Use the
VALUE
knob to move the cursor and
select the
A.REC
item.
3 Press the
VALUE
knob to turn auto-recording ON
or OFF.
If auto-recording has been turned ON, the
A.REC
indicator appears with a dark background.
4 – Recording