Oscillator mode, Restoring the initial preference settings, 10 – miscellaneous functions – Teac DP-03 User Manual
Page 60
60
TASCAM DP-03
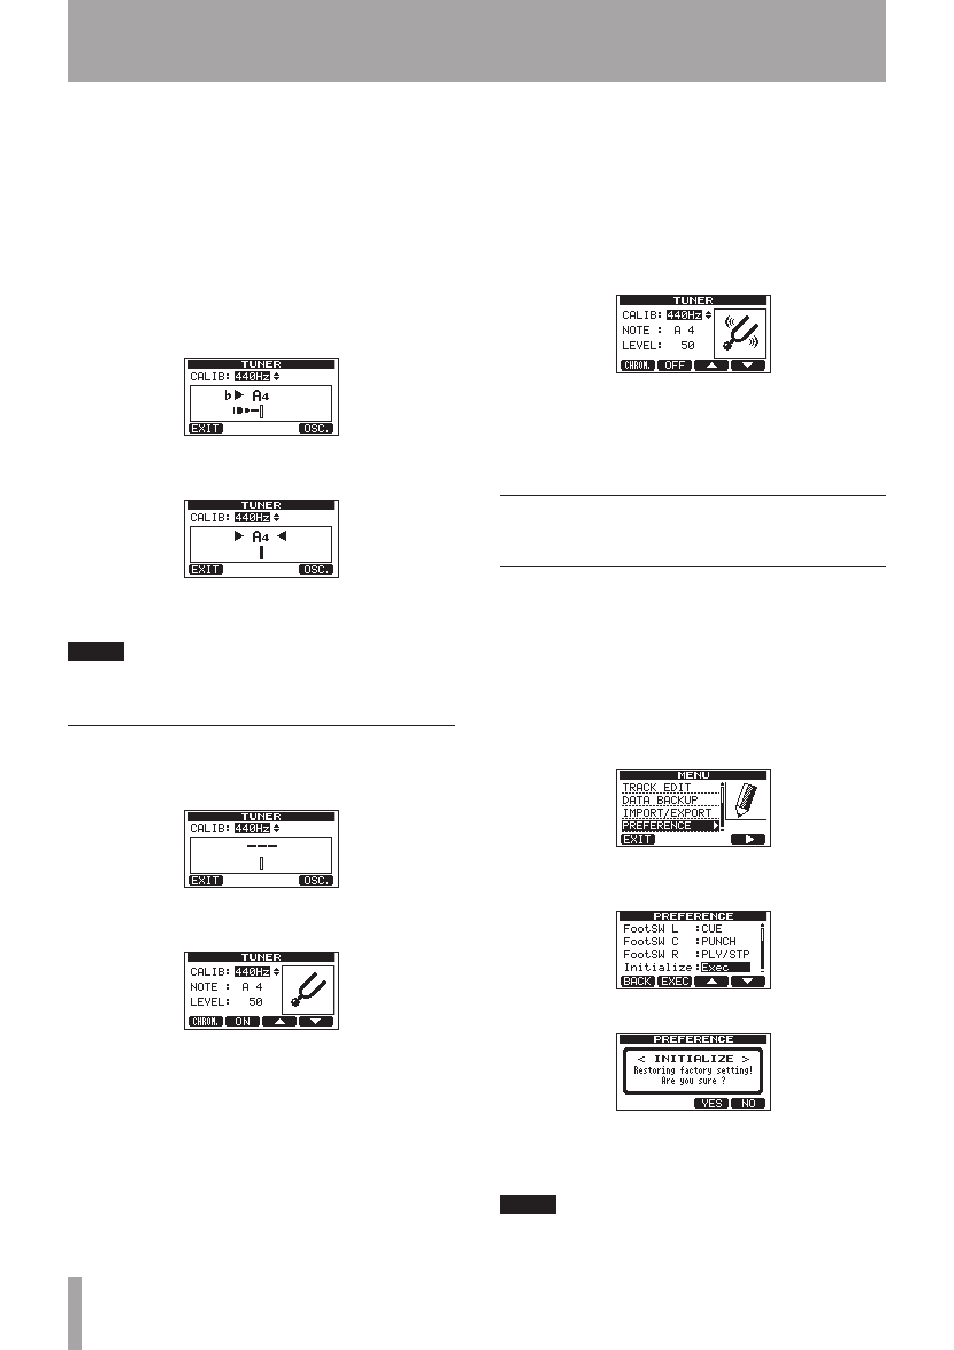
4 Turn the DATA wheel to set the standard frequency
of the A note between 435 and 445 Hz. The default
setting is 440 Hz.
5 Play the instrument and begin tuning. The pitch
name closest to the string appears above the
meters. Tune the string roughly until the sound
name that you want appears. Then, fine tune the
string until the rectangle at the middle of the
meter darkens, showing that the string is in tune. If
the pitch is too low, a bar extends to the left of the
middle and if it is too high it extends to the right.
The more out of tune, the longer the bar appears.
When the pitch played matches the note shown, the
note name appears between the ¥ icons.
6 When finished tuning, press the HOME button to
return to the Home Screen.
NOTE
If you want to monitor the input sound, press the REC
button of a track that has
INPUT A
assigned to it.
Oscillator mode
1 When the recorder is stopped, press the TUNER
button to open the
TUNER
screen.
2 Press the F4 (
OSC.
) button to display the oscillator
screen.
The following settings can be made on this screen.
CALIB
Use this to adjust the standard frequency of A4. The
setting range is 435Hz–445Hz.
The default setting is 440Hz.
NOTE
Use this to set the note output. The setting range is
C3
–
B5
.
The default setting is A4.
LEVEL
Use this to set the output level. The setting range is 10
(minimum) – 100 (maximum).
The default setting is 50.
Use the F3 (§) and F4 (¶) buttons to select
parameters, and use the DATA wheel to set the
parameter values.
Use the F2 (
ON
) button to turn the output ON and OFF.
Use the F1 (
CHROM
) button to change to chromatic
tuner mode.
3 When you have finished tuning, press the HOME
button to return to the Home Screen.
Restoring the initial preference
settings
You can restore the
PREFERENCE
screen settings to
their initial values (the values that they had when the unit
was shipped from the factory). This operation is called
initialization.
1 When the recorder is stopped, press the MENU
button to open the
MENU
screen.
2 Turn the DATA wheel to select
PREFERENCE
, and
press the F4 (¥) button to open the
PREFERENCE
screen.
3 Use the F3 (§) and F4 (¶) buttons to select
Exec
next to the
Initialize
item.
4 Press F2 (
EXEC
) to open a confirmation screen.
5 Press F3 (
YES
) to initialize the unit. The
PREFERENCE
screen reopens when the process
finishes.
NOTE
Press the F4 (
NO
) button to cancel initialization.
10 – Miscellaneous Functions