Attaching the mount bracket to the pole – Wavetronix SmartSensor Matrix (SS-225) - User Guide User Manual
Page 16
CHAPTER 1 • INSTALLING THE SMARTSENSOR MATRIX
15
˽
Take into consideration the sensor’s field of view, which reaches 140 ft. (42.7 m) from
the sensor. Place the sensor so that the field of view covers all the areas of interest.
˽
The mast arm is frequently a good place to mount the sensor.
˽
The mounting position should have a clear view of the detection area. Poles, mast arms,
signal heads, or other objects should not block the view of the detection area.
˽
Placing the sensor higher will result in less occlusion. Placing it lower could result in
more occlusion. However, if the nearest detection area is less than about 20 ft. (6.1 m)
away, the sensor may perform better with a lower mounting position.
Note
It is possible to mount the sensor lower than 12 ft. (3 m) in some scenarios. The sen-
sor will continue to detect vehicles at lower heights, but missed detections due to
occlusion may become more prevalent or problematic in lanes that are farther away
from the sensor.
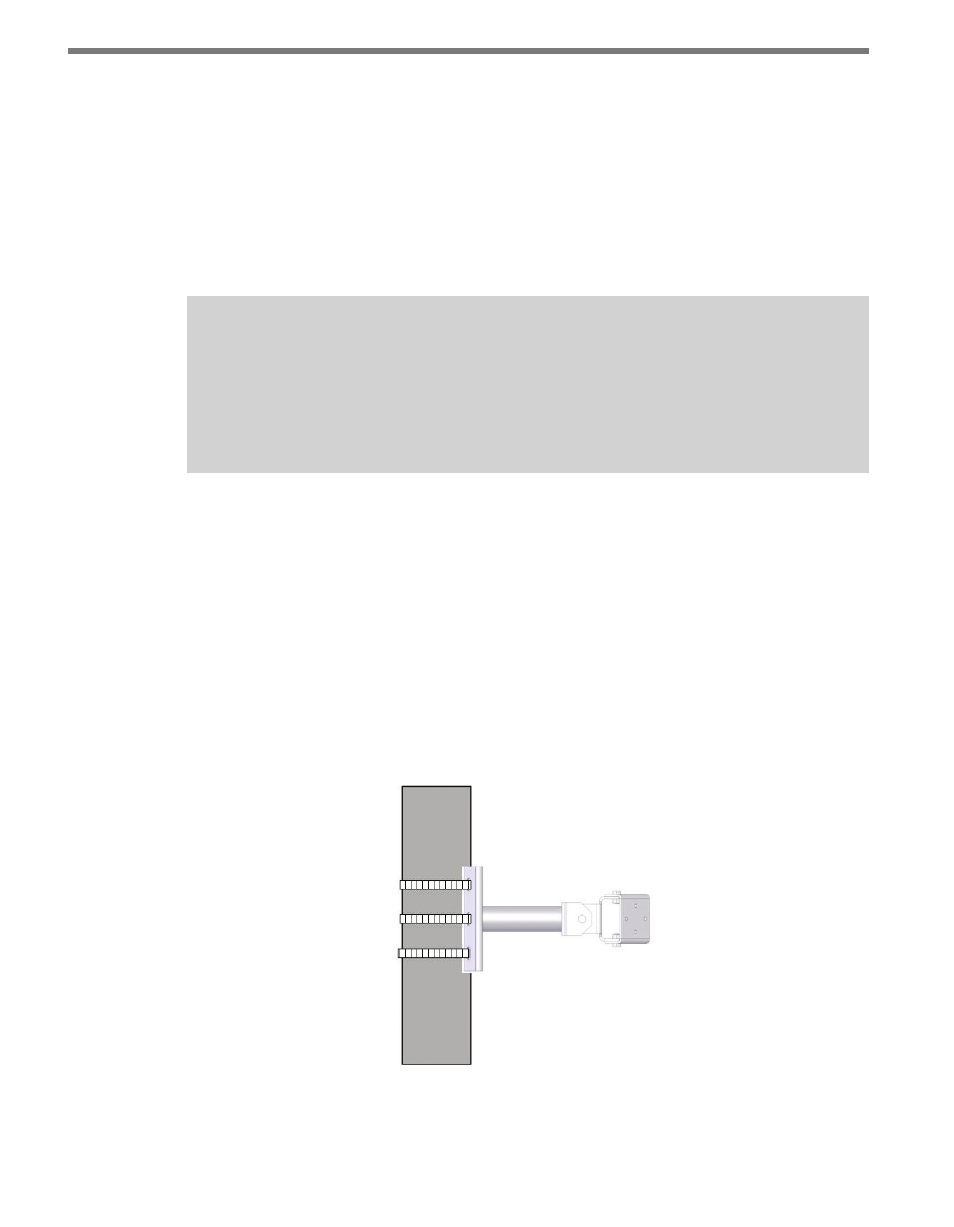
Attaching the Mount Bracket to the Pole
Before attaching the mount bracket to the pole, first make sure that your cables are long enough
to reach the sensor height and to stretch across the distance from the sensor to the cabinet.
Follow the steps below to correctly attach the mount to the pole:
1 Insert the stainless steel straps through the slots in the mount bracket.
2 Position the mount on the pole so that the head of the mount is pointing toward the
lanes of interest at about a 45° angle.
3 Tighten the strap screws.
Figure 1.1 – Attach the Mount Bracket to the Pole
The sensor double-swivel mount may need to be adjusted later to fine-tune the alignment.